My Visitors
Subscribe Here


Sunday, August 29, 2010
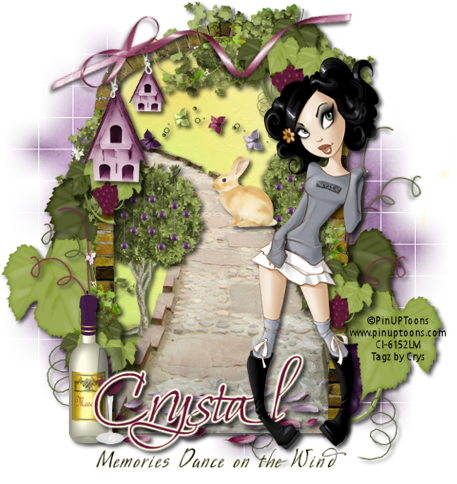
PTU Tutorial ~ Memories on the Wind
 For this tutorial you will need the following:
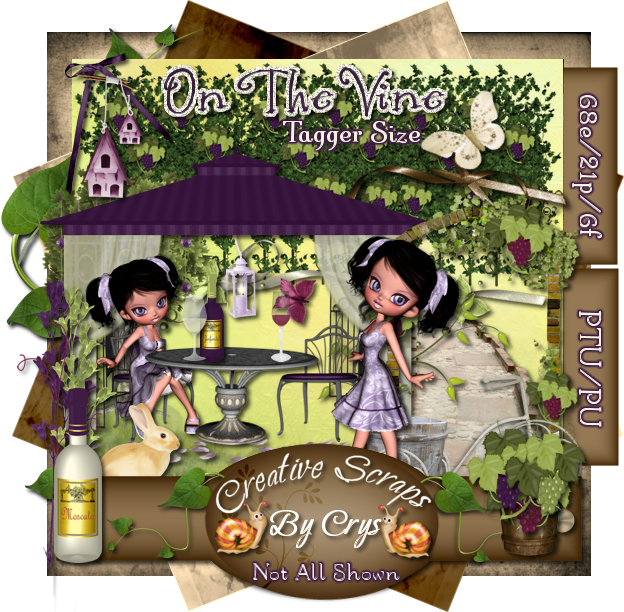
Scrap kit: PTU kit On the Vine by Creative Scraps by Crys HERE
Tube: The Fabulous Art work by PinUp Toons HERE
You must have a license to use his work
Mask: WeeScottLass Mask# 84 HERE
Plug-ins:
Eye candy 4000: Gradient glow
Font Used: Moon Dance Two (for the name) and Mr Wade (for the quote)
♥ Let's Get started! ♥
In Psp Open new layer 600x600 transparent checked.
For the drop shadow on evertying I am using the following settings:
Verticle: 3, Horizontal: 3, Opacity: 70, Blur: 6, color black. (you use what ever you want)
(*Resize everything before you start copy and pasting)
Paper 2 (resize 68%)
Paper 21 (resize 48%)
Arch 2
Bird House (resize 36%)
Bunny (resize 20%)
Butterfly trail (resize 36%)
Curly Ribbon (resize 54%)
Curly Ribbon 3 (resize 54%)
Grapes (resize 68%)
Path (resize 82%)
Petals & Petals 2
Ribbon 5 (resize 54% free rotate 12%)
Tree (resize 40%)
Wine Bottle (resize 32%)
Wind Glass (resize 26%)
Tube (resize 82% if using the same tube I am)
You can always refer to the sample for placement of anything!
Copy and paste Arch 2. Add dropshadow. Copy and Paste path, add dropshadow and erase
anypart outside of the arch.
Copy and paste paper 21. Adjust and erase anything that hangs outside the arch.
Copy and paste the tree, adjust above the path layer, add dropshadow and duplicate.
Arrange like the sample. Erase the roots that hang over the path for both trees. also erase
any part outside of the arch. Copy and paste the butterfly trail. See sample for placement
copy and paste the bunny and put up by the bush on the right. Add dropshadow to everything.
Copy and paste grapes add dropshadow, drag below paper layer. Duplicate mirror, erase stem out side of arch.
Copy and paste both curly ribbons, adjust above grapes layer add dropshadow, duplicate
both cury ribbons adjust on the other side, see sample for placement. Copy and paste the
bird house, add dropshadow and place in the upper left corner of the arch. Erase the stick
and strings, copy and paste ribbon 5. Move above the bird house. Add dropshadow.
Copy and paste both petals. Erase any part outside of the arch. Add dropshadow. Arrange at
bottom of path below the arch layer. See sample.
Copy and paste the wine bottle and wine glass, arrange above arch on the left side. Add dropshadow.
Copy and paste tube of choice. If using the tube that I am, mirror and adjust on the right side of arch.
I used the dropper tool and pulled the burgundy color from the grapes on the arch for the name
And for the gradient glow I used the cream color in the wine bottle.
Type the name you are using. Now add your gradient glow on these settings:
Glow width 3.00
Soft Corners 25
Overall Opacity 100
Draw only outside selection checked.
Under color tab, use the cream color. Drag one slider half way across the bar.
Click ok. Add your dropshadow. Drag it below the tube layer.
Now for this part I just typed the words Memories dance on the wind using black.
To finish it off copy and paste paper 2 drag to the bottom of all layers, apply your mask.
Add your copyright.
Save and you are done! Simple and easy. I would love to see what you made!
Thank you for following my tutorial! If you have any questions please email me at
kissnjoe@yahoo.com!
Here is a preview of the PTU scrap kit I used.

Wednesday, August 18, 2010
New PTU Tut - Framed Memories

For this tutorial you will need the following:
Scrap kit: PTU kit A Bit of Romance by Creative Scraps by Crys HERE
Tube: The Fabulous Art work by Ismael Rac HERE
You must have a license to use his work
My Supplies HERE
Plug-ins:
Eye candy 4000: Gradient glow, & Glass
Xero: Radiance
Font Used: Lavishly Yours
♥ Let's Get started! ♥
In Psp Open new layer 390x550 transparent checked.
For the drop shadow on evertying I am using the following settings:
Verticle: 3, Horizontal: 3, Opacity: 70, Blur: 6, color black. (you use what ever you want)
(*Resize everything before you start copy and pasting)
Paper 12 (resize 53%)
Frame 4 (resize 15%)
Clock (resize 54%)
Fence 2 (resize 92%)
Topiary (resize 92%)
Violin (92%)
Tube (resize 90% if using the same tube I am)
Close up Tube (resize 66% if using the same tube I am)
You can always refer to the sample for placement of anything!
Copy and paste the word layer from my supplies. Copy and paste the fence layer. Add dropshadow
Copy and paste the frame. With the magic wand tool click in side the frame, selection, modify,
expand by 6, invert. Copy and paste the paper. Hit delete on the keyboard. Do not deselect yet.
Copy and paste the close up tube and hit delete. Selection, Select none. Effects, Xero,
Radiance on these settings:
Strangeness 128
Charm 50
Truth 128
Beauty 255
Click ok. Change the blend mode to Luminance (L). Change Opacity to 84. Add dropshadow to
the frame. Copy and paste the clock and move above the fence layer. See the sample for placement.
Add dropshadow. Copy and paste the violin. Image, mirror and move to the right side of the
frame. Copy and paste the topiary. Duplicate and place them on each side of the fence. Add
dropshadow. Copy and paste the tube, adjust to the right of the frame. Add dropshadow.
For the name, I took the dropper tool and picked up a red from the violin. After typing the
name, effects, plugins, eyecandy 4000 Glass on these settings:
Bevel Width 20.00
Smoothness 100
Inside marquee checked
Edge Darkening 40
Gradient Shading 50
Refratcion 50
Opacity 60
Tinting 40
Glass color: same color used for the name.
Click ok.
Now add your gradient glow on these settings:
Glow width 3.00
Soft Corners 25
Overall Opacity 100
Draw only outside selection checked.
Under color tab, use white for the color. Drag one slider half way across the bar.
Click ok. Add your dropshadow.
Add your copyright.
Save and you are done! Simple and easy. I would love to see what you made!
Thank you for following my tutorial! If you have any questions please email me at
kissnjoe@yahoo.com!
Here is a Preview of the Scrap kit I used for this tutorial!

Monday, August 16, 2010
PTU Tutorial ~ Mice in the Kitchen

For this tutorial you will need the following:
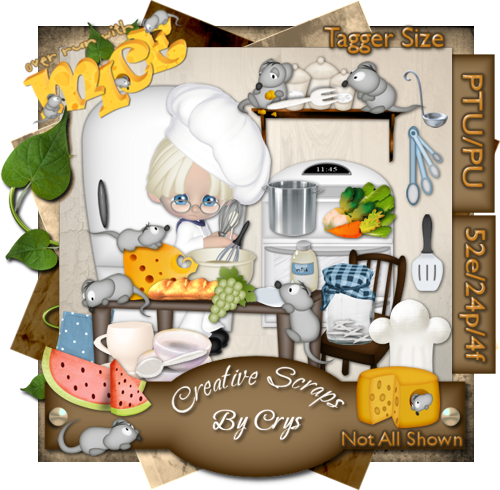
Scrap kit: PTU kit Over Run with Mice by Creative Scraps by Crys HERE
Tube: The Fabulous Art work by PinUp Toons HERE
You must have a license number to use his work.
Mask: WSL mask# 180 HERE
Plug-ins:
Eye candy 4000: Gradient glow, & Glass
Font Used: GradoGradooNF
♥ Let's Get started! ♥
In Psp Open new layer 500x500 transparent checked.
For the drop shadow on evertying I am using the following settings:
Verticle: 3, Horizontal: 3, Opacity: 70, Blur: 6, color black. (you use what ever you want)
(*Resize everything before you start copy and pasting)
Paper 1 (resize 82%)
Coffee, Flour, and Sugar canisters (resize 16%)
Counter (resize 62%)
fridge 2 (resize 62%)
Mixing bowl 3 (resize 24%)
Mouse 1,3,& 8 (resize 16%)
Shelf (resize 36%)
Stove (resize 48%)
Toaster (resize 22%)
Tube (if using the same as I am, resize 72%)
You can always refer to the sample for placement of anything!
Copy and paste Paper 1. Layers, Load/save mask, mask from disc. Apply mask. Merge group.
Resize by 72%.
Copy and paste the counter. Add dropshadow. Copy and paste the fridge and stove. Adjust
like the sample. Add dropshadow.
Copy and paste the toaster on the counter. Add dropshadow.
Copy and paste the shelf. Add dropshadow. Copy and paste the flour, sugar, and coffee
canisters. Adjust on the shelf. Add dropshadow. Copy and paste the bowl. Adjust on the stove
top and add dropshadow. Copy and paste the mice. Move them to where you think looks best. Follow
the sample for placement if you want it to look like mine. Add dropshadow.
copy and paste the tube, mirror. Add dropshadow. Position in front of the fridge and counter.
From here you can copy and paste any other elements you wish to use. I used the turnips,
carrots, bread, and cheese 2. Just make sure to resize them to fit your siggy!
Now Add your name (I used the blue from the background) and click effects, plugins,
eyecandy 4000 Glass on these settings:
Bevel Width 20.00
Smoothness 100
Inside marquee checked
Edge Darkening 40
Gradient Shading 50
Refratcion 50
Opacity 60
Tinting 40
Glass color: same color used for the name.
Click ok.
Adjust, add noise on these settings:
Uniform checked, Monochrome checked, and noise at 34%. Click ok.
Now add your gradient glow on these settings:
Glow width 3.00
Soft Corners 25
Overall Opacity 100
Draw only outside selection checked.
Under color tab, use black for the color. And drag one slider half way across the bar.
Click ok. Add your dropshadow.
Crop and resize. I resized mine to 500 pixels. Add your copyright info and any license number if using a PTU tube.
Save and you are done! Simple and easy. I would love to see what you made!
Thank you for following my tutorial! If you have any questions please email me at
kissnjoe@yahoo.com!
Here is a preview of the kit that I used.
Friday, August 6, 2010
FTU ~No Scraps Team Edward
 For this tutorial you will need the following:
No Scrap kit used for this tutorial
Tube: The Fabulous Art work by Ismael Rac HERE
Do not use with out a license number
Mask: WSL mask# 81 HERE
Plug-ins:
Eye candy 4000: Gradient glow, Glass, Shadowlab
Eye candy 5: Brick wall
Font Used: For the graffiti- Street Soul and Sick Capital Vice
Font used for the Name- Whoa and Sick Capital Vice
♥ Let's Get started! ♥
In Psp Open new layer 700x700 transparent checked.
For the drop shadow on evertying I am using the following settings:
Verticle: 3, Horizontal: 3, Opacity: 70, Blur: 6, color black. (you use what ever you want)
(*Resize everything before you start copy and pasting)
The Edward tube in the background comes with the Team Twilight tube from Ismael Rac
Resize Edward by 68%
Resize Tube by 86%
You can always refer to the sample for placement of anything!
Flood fill with color#470000 (dark brick red)
Effects, plugins, Eye candy 5, brick wall on these settings:
Under basics tab
Brick Height 15.36
Aspect Ratio 2.78
Brick Pattern Running
Brick color Use the same color as used for flood fill
Mortar Thickness2
Mortar Depth 40
MOrtar color Use a dark grey
Flat mortar unchecked
Color Variation 52
Surface Detail 65
Edge Roughness 63
Highlight Brightness 0
seamless tile unchecked
Click ok
click on Layers, Load save mask, load mask from disk, pick your mask and apply. Right click
in layer palatte and merge group.
Copy and paste Edward tube, change blend mode to Luminance (L) and drop opacity to 52%
with the different fonts write Graffiti on the wall. You can use the same as I did...
With White and the sick capital vice font, write I Love Edward. Place up by his head. Effects,
Plugins, Eye candy 4000, shadowlab on these settings:
Direction: 185
Center offset distance 24.85
Overall Opacity 88%
Overall Blur 0.52
Perspective Blur 5.92
Color black
Draw only outside selection checked.
Click ok.
With White and the Street Soul font, type Edward Rocks. Place to the bottom of the Edward
tube. Add the plugin Shadowlab on the same settings as above.
Copy and paste the other tube and adjust to your liking. See sample for placement. Add dropshadow
Now with the font Whoa, type the name you want, effects, eye candy 4000, glass on these settings:
Under settings, pick glass tubing
under basic tab
Bevel Width 170.19
Smoothness 100
Inside Marquee checked
Edge Darkening 25
Gradient shading 0
Refraction 50
Opacity 80
tinting 5
Click ok.
Effects, eye candy 4000, shadowlab on the same settings as above.
Effects, eye candy 4000, gradient glow on these settings:
under the basic tab
Glow width 3.00
Soft corners 25
overall opacity 100
Draw only outside selection checked, under color tab
use black and move a second slider half way down the bar. Click ok
If you want, you can add your name again using the sick capital vice font like in the sample.
I used white with the same gradient glow settings as above. Add dropshadow.
Crop, and resize. I resize mine to 500. Add your copyright info.
Save and you are done! Simple and easy. I would love to see what you made!
Thank you for following my tutorial! If you have any questions please email me at
kissnjoe@yahoo.com!
Subscribe to:
Posts (Atom)
About Me
- Crys
- I am a SAHM of 2 very active kids and a Wife to a wonderful man. I also take care of my grandma who lives with us...so yep I am a busy girl...lol, I started out as a tagger almost 4 yrs ago and then I started making templates and writing tutorials, one day I decided I wanted to try my hand at making scrap kits...and almost 2 years later, I am still making them. I have met a lot of amazing people along the way that have helped and given me support through-out all of this. Big hugs and thanks! Well that is about it, if you want to know more...just shoot me an email!
My Scrap Blog

Snag My Blinkie
