My Visitors
Subscribe Here


Friday, May 28, 2010
PTU Tutorial - A fairytale
Good Morning! I have finally gotten another tutorial done, I used the awesome scrap kit by Chassity at PolkaDot Scraps called A Fairytale. The little dragon in this kit is just adorable! For this tutorial, I decided to create a forum set. An Avi and a banner style siggy! I hope you all enjoy this tutorial! Here is the preview.
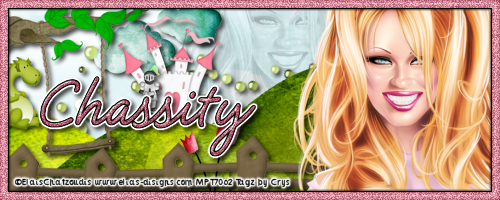 This had to be resized to fit the blog, please click on the tag to view the copyright info.
For this tutorial you will need the following:
I've used a PTU tube by Elias Chatzoudis. You can purchase his art HERE
(*Note you must have a license to use his art)
Scrap Kit: PTU kit A Fairytale by Chassity @ PolkaDot Scraps HERE
Plug-ins: (Optional)
Eyecandy 4000: Gradient glow, Glass
Xero: Radiance
Font Used: Natural Script
Pink color used: de4c6a
♥ Let's Get started! ♥
This Tutorial is for both the Avi and the Siggy, We are starting with the siggy first.
In Psp Open new layer 500x200, make sure it is on 72 DPI and trasparent is checked.
For the drop shadow on evertying I am using the following settings:
Verticle: 3, Horizontal: 3, Opacity: 70, Blur: 6, color black. (you use what ever you want)
(*Resize everything before you start copy and pasting)
Open your scrap kit and select:
E2 Castle (resize 18%)
E5 Dragon (resize 12%)
E6 Tree branch w/ swing (resize 28%)
E11 Hills (resize 70%)
E12 Clouds (resize 32%)
E13 Flowers (resize 38%)
E14 Fence (resize 78%)
E34 Beads (resize 48% & free rotate 45% to the left)
E45 Knight (resize 12%)
P 1 Sky paper
On blank layer, selections, select all, modify, contract by 8, flood fill with pink.
Effects, plugins, Eyecandy, glass with these settings:
Click on Settings Tab, click glass tube
settings should be:
Bevel width 14.40
Smoothness 100
Edge Darkness 25
Gradient shade 0
refraction 50
Opacity 80
Tinting 5
Click ok. Adjust, add noise with these settings:
Uniform checked
32%
Monochrome checked.
Effects, plugins, gradient glow at these settings:
Glow Width 3
Soft Corners 25
Overall opacity 100
click on color, use black.
copy and paste paper, move below border, copy and paste green beeds, using the sample, position
in the top middle. Copy and paste the hills, move down to bottom where just the tops
of the hills are showing. Copy and paste the clouds and position where you are happy. Copy
and paste the castle. Move it to the middle of the hill, copy and paste the knight, move
in front of the castle. Copy and paste the dragon, mirror, move to the left side on top
of the hill. Copy the tree branch/swing and paste, move the branch to just under the border
Copy and paste the flower, move to the bottom of the tag, copy and paste the fence and
move it to the bottom. Check with the sample to verify placement.
Copy the Tube and paste, Move to the right side. Effects, plugins, xero, radiance with these
settings:
Strangeness 128
Charm 50
Truth 128
Beauty 140
In layer palatte, drag one of the tubes down to the bottom and position behind the hill to
the right of the other tube. With blend mode, change to luminance (L) at 28% opacity.
Add your drop shadow to everything.
Add your Name to the siggy, if you want to do the same as I did, type the name, then use
the same glass effect as above on the border, add noise with same settings as above. For
the gradient glow, use the same settings as above, only add another slider in white. Add
your drop shadow.
Add your copy right to the tag and you are done with the siggy...Now on to the AVI...
♥ Let's Get started! ♥
In Psp Open new layer 150x150, make sure it is on 72 DPI and trasparent is checked.
For the drop shadow on evertying I am using the following settings:
Verticle: 3, Horizontal: 3, Opacity: 70, Blur: 6, color black. (you use what ever you want)
(*Resize everything before you start copy and pasting)
P1 sky paper
E11 Hills (resize 70%)
E34 Beads (resize 48% & free rotate 45% to the left)
On blank layer, selections, select all, modify, contract by 8, flood fill with pink.
Effects, plugins, Eyecandy, glass with these settings:
Click on Settings Tab, click glass tube
settings should be:
Bevel width 14.40
Smoothness 100
Edge Darkness 25
Gradient shade 0
refraction 50
Opacity 80
Tinting 5
Click ok. Adjust, add noise with these settings:
Uniform checked
32%
Monochrome checked.
Effects, plugins, gradient glow at these settings:
Glow Width 3
Soft Corners 25
Overall opacity 100
click on color, use black.
copy and paste paper, move below border, copy and paste green beeds, using the sample, position
in the top middle. Copy and paste the hills, move down to bottom where just the tops
of the hills are showing.
Copy and paste your tube, position to the right side.
Effects, plugins, xero, radiance with these
settings:
Strangeness 128
Charm 50
Truth 128
Beauty 140
Add your drop shadow to everything.
Add your initial as above,
then use
the same glass effect as above on the border, add noise with same settings as above. For
the gradient glow, use the same settings as above, only add another slider in white. Add
your drop shadow.
Add your copyright info and save!
I hope you had fun following my tutorials, if you get the time, please share. I will add
it to our slide show! Thank you for stopping by!
This had to be resized to fit the blog, please click on the tag to view the copyright info.For this tutorial you will need the following:
I've used a PTU tube by Elias Chatzoudis. You can purchase his art HERE
(*Note you must have a license to use his art)
Scrap Kit: PTU kit A Fairytale by Chassity @ PolkaDot Scraps HERE
Plug-ins: (Optional)
Eyecandy 4000: Gradient glow, Glass
Xero: Radiance
Font Used: Natural Script
Pink color used: de4c6a
♥ Let's Get started! ♥
This Tutorial is for both the Avi and the Siggy, We are starting with the siggy first.
In Psp Open new layer 500x200, make sure it is on 72 DPI and trasparent is checked.
For the drop shadow on evertying I am using the following settings:
Verticle: 3, Horizontal: 3, Opacity: 70, Blur: 6, color black. (you use what ever you want)
(*Resize everything before you start copy and pasting)
Open your scrap kit and select:
E2 Castle (resize 18%)
E5 Dragon (resize 12%)
E6 Tree branch w/ swing (resize 28%)
E11 Hills (resize 70%)
E12 Clouds (resize 32%)
E13 Flowers (resize 38%)
E14 Fence (resize 78%)
E34 Beads (resize 48% & free rotate 45% to the left)
E45 Knight (resize 12%)
P 1 Sky paper
On blank layer, selections, select all, modify, contract by 8, flood fill with pink.
Effects, plugins, Eyecandy, glass with these settings:
Click on Settings Tab, click glass tube
settings should be:
Bevel width 14.40
Smoothness 100
Edge Darkness 25
Gradient shade 0
refraction 50
Opacity 80
Tinting 5
Click ok. Adjust, add noise with these settings:
Uniform checked
32%
Monochrome checked.
Effects, plugins, gradient glow at these settings:
Glow Width 3
Soft Corners 25
Overall opacity 100
click on color, use black.
copy and paste paper, move below border, copy and paste green beeds, using the sample, position
in the top middle. Copy and paste the hills, move down to bottom where just the tops
of the hills are showing. Copy and paste the clouds and position where you are happy. Copy
and paste the castle. Move it to the middle of the hill, copy and paste the knight, move
in front of the castle. Copy and paste the dragon, mirror, move to the left side on top
of the hill. Copy the tree branch/swing and paste, move the branch to just under the border
Copy and paste the flower, move to the bottom of the tag, copy and paste the fence and
move it to the bottom. Check with the sample to verify placement.
Copy the Tube and paste, Move to the right side. Effects, plugins, xero, radiance with these
settings:
Strangeness 128
Charm 50
Truth 128
Beauty 140
In layer palatte, drag one of the tubes down to the bottom and position behind the hill to
the right of the other tube. With blend mode, change to luminance (L) at 28% opacity.
Add your drop shadow to everything.
Add your Name to the siggy, if you want to do the same as I did, type the name, then use
the same glass effect as above on the border, add noise with same settings as above. For
the gradient glow, use the same settings as above, only add another slider in white. Add
your drop shadow.
Add your copy right to the tag and you are done with the siggy...Now on to the AVI...
♥ Let's Get started! ♥
In Psp Open new layer 150x150, make sure it is on 72 DPI and trasparent is checked.
For the drop shadow on evertying I am using the following settings:
Verticle: 3, Horizontal: 3, Opacity: 70, Blur: 6, color black. (you use what ever you want)
(*Resize everything before you start copy and pasting)
P1 sky paper
E11 Hills (resize 70%)
E34 Beads (resize 48% & free rotate 45% to the left)
On blank layer, selections, select all, modify, contract by 8, flood fill with pink.
Effects, plugins, Eyecandy, glass with these settings:
Click on Settings Tab, click glass tube
settings should be:
Bevel width 14.40
Smoothness 100
Edge Darkness 25
Gradient shade 0
refraction 50
Opacity 80
Tinting 5
Click ok. Adjust, add noise with these settings:
Uniform checked
32%
Monochrome checked.
Effects, plugins, gradient glow at these settings:
Glow Width 3
Soft Corners 25
Overall opacity 100
click on color, use black.
copy and paste paper, move below border, copy and paste green beeds, using the sample, position
in the top middle. Copy and paste the hills, move down to bottom where just the tops
of the hills are showing.
Copy and paste your tube, position to the right side.
Effects, plugins, xero, radiance with these
settings:
Strangeness 128
Charm 50
Truth 128
Beauty 140
Add your drop shadow to everything.
Add your initial as above,
then use
the same glass effect as above on the border, add noise with same settings as above. For
the gradient glow, use the same settings as above, only add another slider in white. Add
your drop shadow.
Add your copyright info and save!
I hope you had fun following my tutorials, if you get the time, please share. I will add
it to our slide show! Thank you for stopping by!

Subscribe to:
Post Comments (Atom)
About Me
- Crys
- I am a SAHM of 2 very active kids and a Wife to a wonderful man. I also take care of my grandma who lives with us...so yep I am a busy girl...lol, I started out as a tagger almost 4 yrs ago and then I started making templates and writing tutorials, one day I decided I wanted to try my hand at making scrap kits...and almost 2 years later, I am still making them. I have met a lot of amazing people along the way that have helped and given me support through-out all of this. Big hugs and thanks! Well that is about it, if you want to know more...just shoot me an email!
My Scrap Blog

Snag My Blinkie

0 comments: