My Visitors

Subscribe Here


 Posts
All Comments
Posts
All Comments
Thursday, August 25, 2011
Time and Space PTU Tutorial
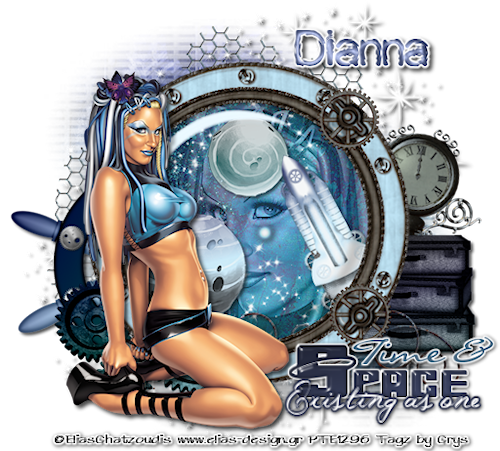
If you want to use the same Word art as I am, please right click and save the word art below...

Scrap kit: PTU kit From the Earth to the Moon by Digicats (and Dogs) HERE
Tube: I am using the awesome art work of Elias Chatzoudis HERE
(Must have a license number to use his art!)
Mask of choice
Font Used: Wasser
♥ Let's Get started! ♥
Open New raster 700x700 at 72 DPI
For the drop shadow on evertying I am using the following settings:
Verticle: 2, Horizontal: 2, Opacity: 70, Blur: 6, color black. (you use what ever you want)
Remember to save as you go.
(*Resize everything before you start copy and pasting)
Paper 13 (resize 72%)
Paper 4 (resize 88%)
Captains Wheel (do Not resize)
Chicken Wire (resize 74% mirror, and flip)
Clock (resize 70%)
Divider (resize 72%)
Gears2 (resize 48%)
Luggage (resize 48%)
Planet 1&2 (resize 36%)
Porthole (resize 78%)
Rocket 1 (resize 36%)
Shooting star (Do Not resize)
Sparkles (do Not resize)
Sparkling stars (reszie 51%)
Tube (if using the same resize 70%)
Tube close up (same as above tube)
You can always refer to the sample for placement of anything!
copy and paste paper 4, add your mask, copy and paste sparkles, copy and paste porthole.
Copy and paste the chicken wire, adjusting to the left top side as in sample.
copy and paste paper 13 drag below the porthole and erase everything on the outside edge.
your paper should only be seen from the center of the Porthole. Copy and paste close up
tube, erasing everything on the outside of the porthole. I chaged the blend mode to
Luminance (Legacy) and dropped opacity to 59. Copy and paste sparkling stars and adjust to
the top of the porthole just above the close up tube layer. Erase anything that hangs out of
the porthole. Duplicate, image, flip, and drag to bottom like in the sample. Copy and paste
the rocket, using your pick tool, rotate to the left, don't forget to add your dropshadow as
you go. copy and paste planet 1 and 2 adjusting inside the porthole. copy and paste shooting
star, erase anything sticking out of the porthole.
Copy and paste the clock, using the pick tool, rotate to the right slightly. Move to the
right side under paper 13 layer. copy and paste the luggage, place above the clock, using
the eraser tool, erase any of the clock that sticks out the bottom of the luggage.
copy and paste the divider moving to the bottom of the luggage layer. Still adding the
dropshadow as you go. Add your tube and add dropshadow. Position to lower left side.
copy and paste the captains wheel, adjusting to the lower left side, under the paper 13
layer. copy and paste the gears 2 above the wheel and adjust to lower bottom left corner.
Crop and resize. I resized mine to 500 pixels. Make sure the DPI
is at 72. If you choose, you can add the word art as seen in the sample, or make your own.
You do not have to add the word art if you do not choose to.
Add your name. I used inner bevel to give the name a cool effect on these settings:
Bevel 2 (semi circle), width 31 smoothness 35, depth 16, ambience -27, shininess 46
Angle 135, intensity 30, elevation 88.light color white.
I added a gradient glow to the name on the following settings:
Basic Tab: Glow width 3, Soft corners 25%, Overall opacity 100%
color Tab: using white, drag a second tab to 1/2 accross so there are 2 black tabs.
Add your copyrights for the tube. Don't forget to add your license number
if using a PTU tube.
Merge visible and save! you're done! Simple and easy.
I would love to see what you made!
Thank you for following my tutorial! If you have any questions please email me at
kissnjoe@yahoo.com!

Monday, August 22, 2011
New PTU tut: Shiver Me Timbers
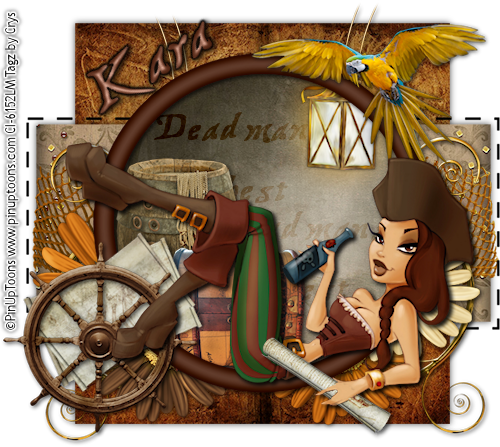
Scrap kit: PTU kit Shiver Me Timbers By Sweet Cravings Scraps HERE
Template: Shiver Me Timbers by Me HERE
Tube: I am using the awesome art work of PinUp Toons HERE
(I bought mine from CILM so I am using that license number)
Font Used: Treasure Map Deadhand
♥ Let's Get started! ♥
Open template, image, resize size 600x600. Image, Canvas size 700x700
For the drop shadow on evertying I am using the following settings:
Verticle: 2, Horizontal: 2, Opacity: 70, Blur: 6, color black. (you use what ever you want)
Remember to save as you go.
(*Resize everything before you start copy and pasting)
Paper 5 (resize 60%)
Paper 6 (resize 90%)
Paper 10 (resize 80%)
Barrel (resize 34%)
Fishing Net 2 (resize 78%)
Flare (Do Not resize)
Flower 7,8,&9 (resize 40%)
Lantern (resize 32%)
Parrot (resize 58% mirror)
Scroll 1 (resize 32%)
Scroll 2 (resize 40%)
Ship Wheel (resize 48%)
Treasure Chest (resize 34%)
Tube (if using the same Do not resize, mirror)
You can always refer to the sample for placement of anything!
Delete the copyright and the word art layer.
Select the the Circle layer, selections, float, defloat, invert.
Copy and paste paper 5, hit delete on the keyboard. Selections, select none.
Delete the circle layer.
Make sure you add your dropshadow to everthing as you go.
Select the rectangle layer, selections, float, defloat, invert, copy and paste paper 6
Hit delete. Selections, select none and delete the grey rectangle layer.
Select the large square, selections, float, defloat, invert copy and paste paper 10
hit delete. Selections, select none and delete the grey square layer.
Copy and paste the flare, see sample for placement, with the eraser tool, erase the tip of
the flare so it barely sticks up over the square. Duplicate mirror.
Copy and paste the fishing net, adjust above the rectangle layer just below the flares.
Copy and paste flower 7,8, and 9. Drag just below the frame and circle layers, see sample
for placement. Duplicate flower 8 and move to oposite side like example.
Remember to add dropshadows as you go.
below the frame layer copy and paste the barrel and treasure chest. position to bottom
left side. copy and paste the lantern, duplicate and change color to a warm yellow/orange
color, adjust, blur, gaussian blur at 20. Copy and paste the parrot and adjust to top right
side of circle frame. copy and paste scroll 2, using the pick tool, rotate the scroll as in
example. Copy and paste the ships wheel. Copy and paste the tube, add dropshadow. Copy and
paste scroll 1 move over the tube hand as the example and lower the opacity of the scroll
until you can see the hand below it, erase only the scroll that is above the hand, so it looks
like the tube is holding the scroll.
Crop and resize. I resized mine to 500 pixels. Make sure the DPI
is at 72. Add your name. I added a gradient glow to the name on the following settings:
Basic Tab: Glow width 3, Soft corners 25%, Overall opacity 100%
color Tab: using black, drag a second tab to 3/4 accross so there are 2 black tabs.
Add your copyrights for the tube. Don't forget to add your license number
if using a PTU tube.
Merge visible and save! you're done! Simple and easy.
I would love to see what you made!
Thank you for following my tutorial! If you have any questions please email me at
kissnjoe@yahoo.com!
PTU Tut Emo Shun
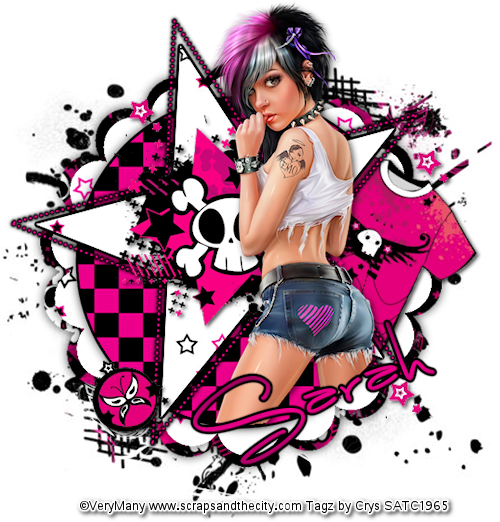
For this tutorial you will need the following:
Scrap kit: PTU kit Emo Shun by Scraps by CWD HERE
Template: Missy template #26 HERE
Tube: I am using the awesome art work of VeryMany HERE
(If you use the same tube from SATC you must have a license number)
Font Used: Luna Bar
Mask of choice
♥ Let's Get started! ♥
Open template, image, canvas size 600x600
For the drop shadow on evertying I am using the following settings:
Verticle: 2, Horizontal: 2, Opacity: 70, Blur: 6, color black. (you use what ever you want)
Remember to save as you go.
(*Resize everything before you start copy and pasting)
Paper 4 (resize 82%)
Paper 7 (resize 75%)
Paper 16 (resize 75%)
Emo Accent2 (Do Not resize)
Emo Accent3 (Do Not Resize)
Scalloped Template2 (resize 86%)
Scalloped Template3 (resize 82%)
Skull Star Grunge Decal (resize 54%)
T-shirt Pink Skull (Do Not Resize - Mirror)
Tube (if using the same resize 54%)
Open template, image, canvas size 600x600
For the drop shadow on evertying I am using the following settings:
Verticle: 2, Horizontal: 2, Opacity: 70, Blur: 6, color black. (you use what ever you want)
Remember to save as you go.
(*Resize everything before you start copy and pasting)
Paper 4 (resize 82%)
Paper 7 (resize 75%)
Paper 16 (resize 75%)
Emo Accent2 (Do Not resize)
Emo Accent3 (Do Not Resize)
Scalloped Template2 (resize 86%)
Scalloped Template3 (resize 82%)
Skull Star Grunge Decal (resize 54%)
T-shirt Pink Skull (Do Not Resize - Mirror)
Tube (if using the same resize 54%)
You can always refer to the sample for placement of anything!
Delete the copyright and the background layer.
Select the the Circle layer, selections, float, defloat, invert.
Copy and paste paper 16, hit delete on the keyboard. Selections, select none.
Delete the circle layer.
Make sure you add your dropshadow to everthing as you go.
Select the star layer, selections, float, defloat, invert, copy and paste paper 7
Hit delete. Selections, select none and delete the star layer.
I added a gradient glow to both the circle and the star on the following settings:
Basic Tab: Glow width 3, Soft corners 25%, Overall opacity 100%
color Tab: using black, drag a second tab to 3/4 accross so there are 2 black tabs.
Copy and paste scalloped template 2. adjust under the circle layer. Copy and paste
scalloped template3 above scalloped temp2 center.
Copy and paste paper 4. Add your mask to it, in the layers palette, right click in mask
Merge group.
Copy and paste the tube, on the circle layer, selections, select all, float, defloat, invert
now select the tube and erase the legs that hang over the circle edge. Add dropshadow to
the tube.
Copy and paste the remaining elements and adjust to your liking, you can follow the sample
for placements.
On the dotted star, I picked a pink from the kit and changed the color to the pink, then added
a gradient glow with the above settings.
Add your dropshadow. Crop and resize. I resized mine to 500 pixels. Make sure the DPI
is at 72. Add your name. I added the same gradient glow to mine.
Add your copyrights for the tube. Don't forget to add your license number
if using a PTU tube.
Merge visible and save! you're done! Simple and easy.
I would love to see what you made!
Thank you for following my tutorial! If you have any questions please email me at
kissnjoe@yahoo.com!
Select the the Circle layer, selections, float, defloat, invert.
Copy and paste paper 16, hit delete on the keyboard. Selections, select none.
Delete the circle layer.
Make sure you add your dropshadow to everthing as you go.
Select the star layer, selections, float, defloat, invert, copy and paste paper 7
Hit delete. Selections, select none and delete the star layer.
I added a gradient glow to both the circle and the star on the following settings:
Basic Tab: Glow width 3, Soft corners 25%, Overall opacity 100%
color Tab: using black, drag a second tab to 3/4 accross so there are 2 black tabs.
Copy and paste scalloped template 2. adjust under the circle layer. Copy and paste
scalloped template3 above scalloped temp2 center.
Copy and paste paper 4. Add your mask to it, in the layers palette, right click in mask
Merge group.
Copy and paste the tube, on the circle layer, selections, select all, float, defloat, invert
now select the tube and erase the legs that hang over the circle edge. Add dropshadow to
the tube.
Copy and paste the remaining elements and adjust to your liking, you can follow the sample
for placements.
On the dotted star, I picked a pink from the kit and changed the color to the pink, then added
a gradient glow with the above settings.
Add your dropshadow. Crop and resize. I resized mine to 500 pixels. Make sure the DPI
is at 72. Add your name. I added the same gradient glow to mine.
Add your copyrights for the tube. Don't forget to add your license number
if using a PTU tube.
Merge visible and save! you're done! Simple and easy.
I would love to see what you made!
Thank you for following my tutorial! If you have any questions please email me at
kissnjoe@yahoo.com!
Friday, August 12, 2011
Kitties in my Garden PTU tut
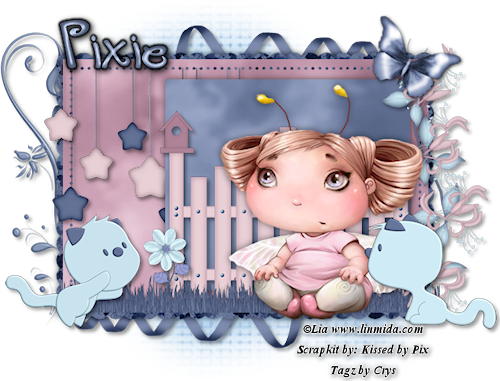
To make this adorable siggy, please follow the directions below!
For this tutorial you will need the following:
Scrap kit: PTU kit Kitties in my Garden by kissed by Pix HERE
Template: Missy template #29 HERE
Tube: tube of choice, I am using the adorable art work of Lia
Font Used: Tingle Institute
Mask of choice
♥ Let's Get started! ♥
Open template, image, canvas size 600x600
For the drop shadow on evertying I am using the following settings:
Verticle: 2, Horizontal: 2, Opacity: 54, Blur: 6, color black. (you use what ever you want)
Remember to save as you go.
(*Resize everything before you start copy and pasting)
Paper 1 (resize 54%)
Sky Paper 1 (resize 66%)
Sky Paper 2 (resize 66%)
Floral Paper 3 (resize 66%)
Blue Grass (resize 68%)
Doodle 2 (resize 67%)
Fence (resize 56%)
Flutter 4 (resize 18%)
Kitty 3 (resize 28%)
Kitty 8 (resize 28%)
Ribbon 6 (resize 68%)
Star Mobile (do not resize)
Summer flower 3 (resize 16%)
Vine (resize 60%)
Tube (if using the same tube resize 68%)
Open template, image, canvas size 600x600
For the drop shadow on evertying I am using the following settings:
Verticle: 2, Horizontal: 2, Opacity: 54, Blur: 6, color black. (you use what ever you want)
Remember to save as you go.
(*Resize everything before you start copy and pasting)
Paper 1 (resize 54%)
Sky Paper 1 (resize 66%)
Sky Paper 2 (resize 66%)
Floral Paper 3 (resize 66%)
Blue Grass (resize 68%)
Doodle 2 (resize 67%)
Fence (resize 56%)
Flutter 4 (resize 18%)
Kitty 3 (resize 28%)
Kitty 8 (resize 28%)
Ribbon 6 (resize 68%)
Star Mobile (do not resize)
Summer flower 3 (resize 16%)
Vine (resize 60%)
Tube (if using the same tube resize 68%)
You can always refer to the sample for placement of anything!
Delete the copyright, brush by Ivy, and the background.
Select the the scalloped edge layer, selections, float, defloat, invert.
Copy and paste floral paper 3, hit delete on the keyboard. Selections, select none.
Delete the black scalloped edge layer.
Make sure you add your dropshadow to everthing as you went.
Select large rectangle layer, selections, float, defloat, invert, copy and paste sky paper 2
Hit delete. Selections, select none and delete the grey rectangle.
Select the smaller rectangle, selections, float, defloat, invert, copy and paste sky paper 1,
hit delete. Selections, select none and delete the smaller grey rectangle.
Copy and paste paper 1, layers, load/save mask, add your mask, right click on the mask layer
and merge group. Now you can resize or move around if needed.
copy and paste ribbon 6 drag to bottom layer just above the mask in the bottom left corner.
Duplicate, mirror and adjust to the top right side. See example.
copy and paste the doodle 2. Mirror and using your pick tool, straiten it out some.
copy and paste the star mobile. using your selection tool set on rectangle, select the top
part of the mobile (Large star) and delete it, leaveing the strings and the stars. See sample
for placement. Remember to add dropshadow as you go. Copy and paste the vine, using the pick
tool straighten it out and move to the right side of the template on top layer.
Copy and paste the fence, adjusting inside the smaller rectangle. Copy and paste flutter 4
using the pick tool again, turn it to the right a bit. Position to top right above the vine.
copy and paste blue grass, aranging on top of the fence to strech the entire length of larger
rectangle. Copy and paste summer flower setting just on top of left fence post.
Copy and paste kitty 8, mirror and place at the bottom left corner. Copy and paste kitty 3,
mirror and move to the bottom right corner.
Copy and paste the tube and drag just below kitty 3 layer. Add your dropshadows.
Crop and resize to your liking, I resized to 500. Make sure DPI is 72.
Add your name. I added an effect to the name. If you want to use the same effect, then follow the
next steps...
Effects, 3D Effects, inner bevel on these settings:
Width 24, Smoothness 40, Depth 16, Ambience -27, Shininess 46, Angle 135, Intensity 30
Elevation 88, using white. Click ok, then I added a gradient glow with the color black.
Add your dropshadow. Add your copyrights for the tube.
Merge visible and save! you're done! Simple and easy.
I would love to see what you made!
Thank you for following my tutorial! If you have any questions please email me at
kissnjoe@yahoo.com!
Select the the scalloped edge layer, selections, float, defloat, invert.
Copy and paste floral paper 3, hit delete on the keyboard. Selections, select none.
Delete the black scalloped edge layer.
Make sure you add your dropshadow to everthing as you went.
Select large rectangle layer, selections, float, defloat, invert, copy and paste sky paper 2
Hit delete. Selections, select none and delete the grey rectangle.
Select the smaller rectangle, selections, float, defloat, invert, copy and paste sky paper 1,
hit delete. Selections, select none and delete the smaller grey rectangle.
Copy and paste paper 1, layers, load/save mask, add your mask, right click on the mask layer
and merge group. Now you can resize or move around if needed.
copy and paste ribbon 6 drag to bottom layer just above the mask in the bottom left corner.
Duplicate, mirror and adjust to the top right side. See example.
copy and paste the doodle 2. Mirror and using your pick tool, straiten it out some.
copy and paste the star mobile. using your selection tool set on rectangle, select the top
part of the mobile (Large star) and delete it, leaveing the strings and the stars. See sample
for placement. Remember to add dropshadow as you go. Copy and paste the vine, using the pick
tool straighten it out and move to the right side of the template on top layer.
Copy and paste the fence, adjusting inside the smaller rectangle. Copy and paste flutter 4
using the pick tool again, turn it to the right a bit. Position to top right above the vine.
copy and paste blue grass, aranging on top of the fence to strech the entire length of larger
rectangle. Copy and paste summer flower setting just on top of left fence post.
Copy and paste kitty 8, mirror and place at the bottom left corner. Copy and paste kitty 3,
mirror and move to the bottom right corner.
Copy and paste the tube and drag just below kitty 3 layer. Add your dropshadows.
Crop and resize to your liking, I resized to 500. Make sure DPI is 72.
Add your name. I added an effect to the name. If you want to use the same effect, then follow the
next steps...
Effects, 3D Effects, inner bevel on these settings:
Width 24, Smoothness 40, Depth 16, Ambience -27, Shininess 46, Angle 135, Intensity 30
Elevation 88, using white. Click ok, then I added a gradient glow with the color black.
Add your dropshadow. Add your copyrights for the tube.
Merge visible and save! you're done! Simple and easy.
I would love to see what you made!
Thank you for following my tutorial! If you have any questions please email me at
kissnjoe@yahoo.com!
Sunday, August 7, 2011
PTU Tut Silver Bullet
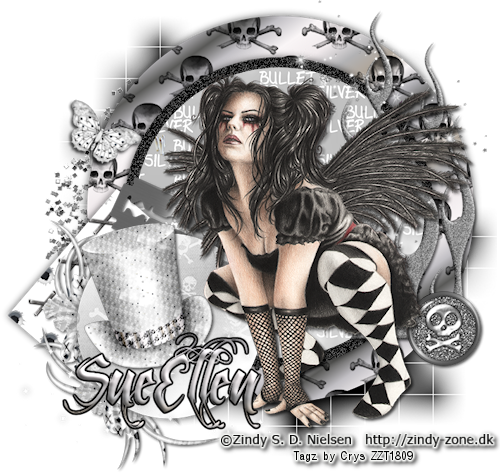
For this tutorial you will need the following:
Scrap kit: PTU kit Silver Bullet by Wicked Creation Scrapz HERE
Template: by me HERE
Tube: PTU by Zindy S.D. Nielsen HERE
Must have a license number to use her work
Must have a license number to use her work
Font Used: Feathergraphy Decoration
Mask of choice
♥ Let's Get started! ♥
Open template, image, canvas size 750x750
For the drop shadow on evertying I am using the following settings:
Verticle: 2, Horizontal: 2, Opacity: 70, Blur: 6, color black. (you use what ever you want)
Remember to save as you go.
(*Resize everything before you start copy and pasting)
Paper 1 (resize 76%)
Paper 4 (resize 56%)
Paper 9 do not resize
Paper 10 (resize 56%)
Butterfly (resize 44%)
Flame Do Not resize
Glitter Brad (resize 48%)
Glitter Scatter Do not resize
Hat (resize 66%)
Orchid Do Not resize
Razor blade (resize 60% Mirror)
Stars Do Not resize
Tube (if using the same tube do not resize)
Open template, image, canvas size 750x750
For the drop shadow on evertying I am using the following settings:
Verticle: 2, Horizontal: 2, Opacity: 70, Blur: 6, color black. (you use what ever you want)
Remember to save as you go.
(*Resize everything before you start copy and pasting)
Paper 1 (resize 76%)
Paper 4 (resize 56%)
Paper 9 do not resize
Paper 10 (resize 56%)
Butterfly (resize 44%)
Flame Do Not resize
Glitter Brad (resize 48%)
Glitter Scatter Do not resize
Hat (resize 66%)
Orchid Do Not resize
Razor blade (resize 60% Mirror)
Stars Do Not resize
Tube (if using the same tube do not resize)
You can always refer to the sample for placement of anything!
Delete the copyright, word art (unless you want to use), and the rectangle.
Add new raster layer, drag to the very bottom in the layer palette, flood fill with black
Layers, load/save mask pick your mask of choice, merge group.
Select the large cirle at the bottom layer, selections, float, defloat, invert.
Copy and paste paper 9, hit delete on the keyboard. Selections, select none. Delete the grey circle.
On the black circle layer, Adjust, add noise with these settings, Uniform and monochrome checked
and noise set at 100%. Don't forget to add your dropshadow as you go.
on the circle above the black circle, selections, float, defloat,invert, copy and paste paper 1
selections, select none, and delete the grey circle.
on small square selections, float, defloat, invert copy and paste paper 4, selections, select
none, and delete dark grey square. Do the same with the small cirlce above it, copy and paste
paper 10. Copy and paste the glitter scatter and drag below the largest circle adjusting to the
left by the square. Copy and paste the stars, drag to the top layer, adjusting to the top right
side. Copy and paste the flame, moving it to the right side. copy and paste the glitter brad,
moving to the bottom of the flame, covering it up. copy and paste the butterfly, adjust to the
left side (see sample for placement). Copy and paste the orchid, drag below the smallest circle
Now copy and paste the tube, adjust to your liking, then click and paste the razor blade, moving
it below the small circle. Copy and paste the hat, placing it in the small circle. Make sure
you added your dropshadow to everthing as you went.
Crop and resize to your liking, I resized to 500. Make sure DPI is 72.
Add your name. I did add a gradient glow to mine but if you do not have Eyecandy 4000, just
selections, float, defloat, modify by 2, add new raster layer and flood fill with black.
Drag below the name and add dropshadow. Add your copyrights for the tube.
Merge visible and save! you're done! Simple and easy.
I would love to see what you made!
Thank you for following my tutorial! If you have any questions please email me at
kissnjoe@yahoo.com!
Add new raster layer, drag to the very bottom in the layer palette, flood fill with black
Layers, load/save mask pick your mask of choice, merge group.
Select the large cirle at the bottom layer, selections, float, defloat, invert.
Copy and paste paper 9, hit delete on the keyboard. Selections, select none. Delete the grey circle.
On the black circle layer, Adjust, add noise with these settings, Uniform and monochrome checked
and noise set at 100%. Don't forget to add your dropshadow as you go.
on the circle above the black circle, selections, float, defloat,invert, copy and paste paper 1
selections, select none, and delete the grey circle.
on small square selections, float, defloat, invert copy and paste paper 4, selections, select
none, and delete dark grey square. Do the same with the small cirlce above it, copy and paste
paper 10. Copy and paste the glitter scatter and drag below the largest circle adjusting to the
left by the square. Copy and paste the stars, drag to the top layer, adjusting to the top right
side. Copy and paste the flame, moving it to the right side. copy and paste the glitter brad,
moving to the bottom of the flame, covering it up. copy and paste the butterfly, adjust to the
left side (see sample for placement). Copy and paste the orchid, drag below the smallest circle
Now copy and paste the tube, adjust to your liking, then click and paste the razor blade, moving
it below the small circle. Copy and paste the hat, placing it in the small circle. Make sure
you added your dropshadow to everthing as you went.
Crop and resize to your liking, I resized to 500. Make sure DPI is 72.
Add your name. I did add a gradient glow to mine but if you do not have Eyecandy 4000, just
selections, float, defloat, modify by 2, add new raster layer and flood fill with black.
Drag below the name and add dropshadow. Add your copyrights for the tube.
Merge visible and save! you're done! Simple and easy.
I would love to see what you made!
Thank you for following my tutorial! If you have any questions please email me at
kissnjoe@yahoo.com!
Friday, July 29, 2011
PTU Tut Make a Choice
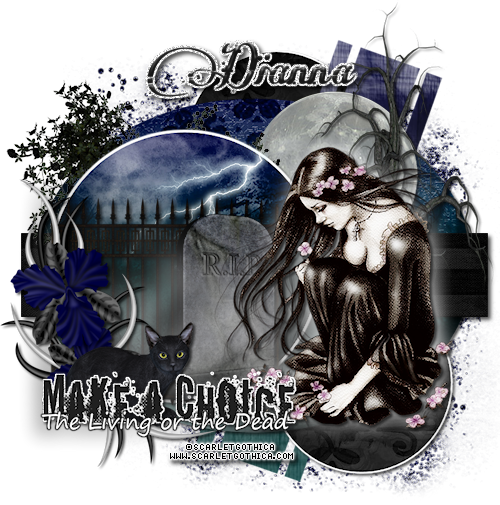
For this tutorial you will need the following:
Scrap kit: PTU kit Stygian by Digicats(and dogs) HERE
Template: by me HERE
Tube: FTU Scarlet Gothica
She does sell some of her stuff, so if you use one of her PTU
Make sure you have a license number to do so.
She does sell some of her stuff, so if you use one of her PTU
Make sure you have a license number to do so.
Font Used: Many Weatz
♥ Let's Get started! ♥
Open template, image, canvas size 800x800
For the drop shadow on evertying I am using the following settings:
Verticle: 2, Horizontal: 2, Opacity: 70, Blur: 6, color black. (you use what ever you want)
Remember to save as you go.
(*Resize everything before you start copy and pasting)
Paper 4 (resize 58%)
Paper 9 (resize 85%)
Paper 11 do not resize
Paper 16 (resize 64%)
Paper 18 do not resize
Fence (resize 60%)
Fog (resize 78%)
Full Moon (resize 48)
Flower 2 Do not resize
Glitter Do not resize
Grave Stone 3
Lightening (resize 28%)
Rose bush 1 (resize 78%)
Stygia (resize 58%)
Tree Do not resize
Tube (resize 74%)
Open template, image, canvas size 800x800
For the drop shadow on evertying I am using the following settings:
Verticle: 2, Horizontal: 2, Opacity: 70, Blur: 6, color black. (you use what ever you want)
Remember to save as you go.
(*Resize everything before you start copy and pasting)
Paper 4 (resize 58%)
Paper 9 (resize 85%)
Paper 11 do not resize
Paper 16 (resize 64%)
Paper 18 do not resize
Fence (resize 60%)
Fog (resize 78%)
Full Moon (resize 48)
Flower 2 Do not resize
Glitter Do not resize
Grave Stone 3
Lightening (resize 28%)
Rose bush 1 (resize 78%)
Stygia (resize 58%)
Tree Do not resize
Tube (resize 74%)
You can always refer to the sample for placement of anything!
Select one of the small cirles at the bottom layers, selections, float, defloat, invert.
Copy and paste paper 16, hit delete on the keyboard. Selections, select none. Delete the grey circle,
selections, float, defloat, modify by 2, add new raster layer and flood fill with white.
Drag below the circle and add dropshadow. Do the same steps with the other small cirle.
select the long rectangles in the back, selections, float, defloat, invert, copy and paste
paper 18, hit delete. Selection, select none. Delete template.
copy and paste the glitter, drag it to the bottom layer, move to the top left corner (see sample)
duplicate, and move to the bottom right corner.
On the large oval, selections, float, defloat, invert, copy and paste paper 9, hit delete.
Selections, select none, delete grey oval. Don't forget to add your dropshadow as you go.
copy and paste the Rose bush, and move to the left, just under the top cirlce layer.
On the rectangle layer above the oval,selections, float, defloat, invert, copy and paste
paper 11, hit delete. Selections, select none, delete black template.
copy and paste the full moon (adjust size to your liking) Move so it sits just under the top
cirlce layer.
Select the top circle layer, selections, float, defloat, invert, copy and paste
paper 4, hit delete. copy and paste the fence, adjust in the circle so it is more to the left
of the circle hit delete, copy and paste the lightening, adjust to the top left of the circle
and hit delete. Selections, select none, on the lightening layer, image, mirror so it sits
in the right top section of the circle.
On the circle layer again, selections, float, defloat, modify by 2, add new raster layer and
flood fill with white, Seletcions, select none. Adjust, add noise on these settings:
MOnochrome checked, Uniform checked, noise on 74%. Drag below the circle and add dropshadow.
Copy and paste the tube, adjust to the right side, copy and paste the tree, erase the roots
that stick out from under the tube. copy and paste the grave stone resize it to be a bit
smaller than the tube (see example).
copy and paste the fog, Adjust, blur, gaussian blur at 12%, Adjust to bottom.
Copy and paste flower 2, move to bottom left of top circle. Remember to add your dropshadow.
Copy and paste Stygia, move to the bottom, behind the word art.
If you want your tube to look like it has a glow behind it, then follow the next steps.
Duplicate the tube, on the bottom tube, adjust, blur, gaussian blur, 12% then change to white.
and drop the opacity to 60%.
Crop and resize to your liking, I resized to 500. Make sure DPI is 72.
Add your name. I did add a gradient glow to mine but if you do not have Eyecandy 4000, just
selections, float, defloat, modify by 2, add new raster layer and flood fill with white.
Drag below the name and add dropshadow. Add your copyrights for the tube.
Merge visible and save! you're done! Simple and easy.
I would love to see what you made!
Thank you for following my tutorial! If you have any questions please email me at
kissnjoe@yahoo.com!
Copy and paste paper 16, hit delete on the keyboard. Selections, select none. Delete the grey circle,
selections, float, defloat, modify by 2, add new raster layer and flood fill with white.
Drag below the circle and add dropshadow. Do the same steps with the other small cirle.
select the long rectangles in the back, selections, float, defloat, invert, copy and paste
paper 18, hit delete. Selection, select none. Delete template.
copy and paste the glitter, drag it to the bottom layer, move to the top left corner (see sample)
duplicate, and move to the bottom right corner.
On the large oval, selections, float, defloat, invert, copy and paste paper 9, hit delete.
Selections, select none, delete grey oval. Don't forget to add your dropshadow as you go.
copy and paste the Rose bush, and move to the left, just under the top cirlce layer.
On the rectangle layer above the oval,selections, float, defloat, invert, copy and paste
paper 11, hit delete. Selections, select none, delete black template.
copy and paste the full moon (adjust size to your liking) Move so it sits just under the top
cirlce layer.
Select the top circle layer, selections, float, defloat, invert, copy and paste
paper 4, hit delete. copy and paste the fence, adjust in the circle so it is more to the left
of the circle hit delete, copy and paste the lightening, adjust to the top left of the circle
and hit delete. Selections, select none, on the lightening layer, image, mirror so it sits
in the right top section of the circle.
On the circle layer again, selections, float, defloat, modify by 2, add new raster layer and
flood fill with white, Seletcions, select none. Adjust, add noise on these settings:
MOnochrome checked, Uniform checked, noise on 74%. Drag below the circle and add dropshadow.
Copy and paste the tube, adjust to the right side, copy and paste the tree, erase the roots
that stick out from under the tube. copy and paste the grave stone resize it to be a bit
smaller than the tube (see example).
copy and paste the fog, Adjust, blur, gaussian blur at 12%, Adjust to bottom.
Copy and paste flower 2, move to bottom left of top circle. Remember to add your dropshadow.
Copy and paste Stygia, move to the bottom, behind the word art.
If you want your tube to look like it has a glow behind it, then follow the next steps.
Duplicate the tube, on the bottom tube, adjust, blur, gaussian blur, 12% then change to white.
and drop the opacity to 60%.
Crop and resize to your liking, I resized to 500. Make sure DPI is 72.
Add your name. I did add a gradient glow to mine but if you do not have Eyecandy 4000, just
selections, float, defloat, modify by 2, add new raster layer and flood fill with white.
Drag below the name and add dropshadow. Add your copyrights for the tube.
Merge visible and save! you're done! Simple and easy.
I would love to see what you made!
Thank you for following my tutorial! If you have any questions please email me at
kissnjoe@yahoo.com!
Thursday, July 28, 2011
PTU Tut Pay the Toll
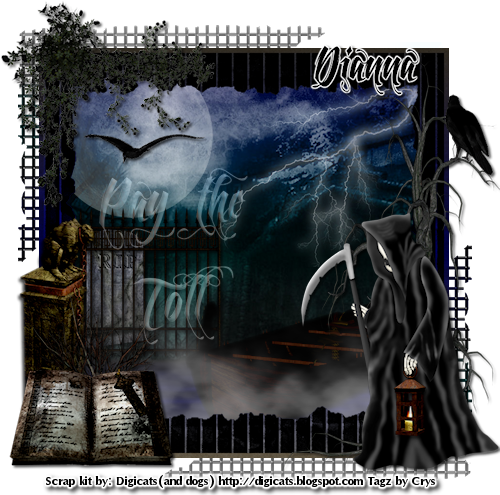
For this tutorial you will need the following:
Scrap kit: The Amazing PTU kit Stygian by Digicats(and dogs) HERE
Font Used: Feathergraphy Decoration
♥ Let's Get started! ♥
New raster 800x800
For the drop shadow on evertying I am using the following settings:
Verticle: 2, Horizontal: 2, Opacity: 70, Blur: 6, color black. (you use what ever you want)
Remember to save as you go.
(*Resize everything before you start copy and pasting)
Paper 4 (resize 75%)
Paper 12 (resize 75%)
Frame 2 (resize 80%)
Corner Grid (resize 60%)
Crow (resize 32%)
Crow 2 (resize 48%)
Dead Bush (resize 52%)
Fence (resize 44%)
Ferrymans Boat 2 (resize 68%)
Fog (Resize 70%)
Full Moon (resize 64%)
Gargoyle (resize 68%)
Grave Stone 3(resize 38%)
Grim Reaper (resize 54%)
Lantern (resize 32%)
Lightening (resize 44%)
Open Book (resize 64%)
Rose bush (resize 62%)
Tree (do not resize)
New raster 800x800
For the drop shadow on evertying I am using the following settings:
Verticle: 2, Horizontal: 2, Opacity: 70, Blur: 6, color black. (you use what ever you want)
Remember to save as you go.
(*Resize everything before you start copy and pasting)
Paper 4 (resize 75%)
Paper 12 (resize 75%)
Frame 2 (resize 80%)
Corner Grid (resize 60%)
Crow (resize 32%)
Crow 2 (resize 48%)
Dead Bush (resize 52%)
Fence (resize 44%)
Ferrymans Boat 2 (resize 68%)
Fog (Resize 70%)
Full Moon (resize 64%)
Gargoyle (resize 68%)
Grave Stone 3(resize 38%)
Grim Reaper (resize 54%)
Lantern (resize 32%)
Lightening (resize 44%)
Open Book (resize 64%)
Rose bush (resize 62%)
Tree (do not resize)
You can always refer to the sample for placement of anything!
Copy and paste paper 4. Copy and paste Paper 12. With the pick tool, place the cursor at the
top of the paper and drag down, keeping the width of the paper. Make it the size of the
bottom 4th of the bottom paper (making it appear water is at the bottom) Adjust, blur,
gaussian blur, radius on 2. copy and paste frame, adjusting over the papers. Add dropshadow.
copy and paste the fence, adjusting to the left side. Drag below the water paper. Copy and
paste grave stone Adjust behind the fence. Copy and paste the full moon, adjusting to the
left top corner now in the layer palette, change the blend mode to screen and drop opacity
to 37%. copy and paste the crow 2. Copy and paste the lightening, in the layer palette
Change opacity to 52, drag to layer just under the frame. Copy and paste the ferrymans boat,
adjusting to the bottom right corner. Copy and paste the fog, Move to the bottom fo cover
some of the boat, see sample for placement. Erase any of the fog on the outside of the frame.
Copy and paste the gargoyle, move to the bottom left above the frame layer.
Copy and paste the dead bush. Copy and paste the open book.
Remember to add dropshadow to everything as you go. Copy and paste the rose bush, adjust to
top left side of frame. copy and paste tree, mirror, adjust to the bottom right of the frame.
Copy and paste the grim reaper, on tree layer, erase any of the root that sicks out from the
reapers robe. Copy and paste the lantern, move to the reapers hand, and add dropshadow. Erase
the top part of the handle so it looks like the reaper is holding the lantern.
Copy and paste the Crow move to a branch of the tree. Now copy and paste the corner grid.
Adjust to the bottom right. Duplicate, image, mirror, image, flip. Adjust to the top left.
Crop and resize to your liking, I resized to 500. Make sure DPI is 72.
Now you can be done and just add your name and follow the dirctions below...but if you want
to add the word art like I did then keep following...
Pick a font, I used Feathergraphy Decoration and typed the words Pay The Toll in white.
Change blend mode to Luminance (L) and drop opacity to 43. Add dropshadow and adjust to the left.
Add your name. I did add a gradient glow to mine but if you do not have Eyecandy 4000, just
selections, float, defloat, modify by 2, add new raster layer and flood fill with white.
Drag below the name and add dropshadow. Add any copyrights ( I put who made the kit and link)
Merge visible and save! you're done! Simple and easy.
I would love to see what you made!
Thank you for following my tutorial! If you have any questions please email me at
kissnjoe@yahoo.com!
top of the paper and drag down, keeping the width of the paper. Make it the size of the
bottom 4th of the bottom paper (making it appear water is at the bottom) Adjust, blur,
gaussian blur, radius on 2. copy and paste frame, adjusting over the papers. Add dropshadow.
copy and paste the fence, adjusting to the left side. Drag below the water paper. Copy and
paste grave stone Adjust behind the fence. Copy and paste the full moon, adjusting to the
left top corner now in the layer palette, change the blend mode to screen and drop opacity
to 37%. copy and paste the crow 2. Copy and paste the lightening, in the layer palette
Change opacity to 52, drag to layer just under the frame. Copy and paste the ferrymans boat,
adjusting to the bottom right corner. Copy and paste the fog, Move to the bottom fo cover
some of the boat, see sample for placement. Erase any of the fog on the outside of the frame.
Copy and paste the gargoyle, move to the bottom left above the frame layer.
Copy and paste the dead bush. Copy and paste the open book.
Remember to add dropshadow to everything as you go. Copy and paste the rose bush, adjust to
top left side of frame. copy and paste tree, mirror, adjust to the bottom right of the frame.
Copy and paste the grim reaper, on tree layer, erase any of the root that sicks out from the
reapers robe. Copy and paste the lantern, move to the reapers hand, and add dropshadow. Erase
the top part of the handle so it looks like the reaper is holding the lantern.
Copy and paste the Crow move to a branch of the tree. Now copy and paste the corner grid.
Adjust to the bottom right. Duplicate, image, mirror, image, flip. Adjust to the top left.
Crop and resize to your liking, I resized to 500. Make sure DPI is 72.
Now you can be done and just add your name and follow the dirctions below...but if you want
to add the word art like I did then keep following...
Pick a font, I used Feathergraphy Decoration and typed the words Pay The Toll in white.
Change blend mode to Luminance (L) and drop opacity to 43. Add dropshadow and adjust to the left.
Add your name. I did add a gradient glow to mine but if you do not have Eyecandy 4000, just
selections, float, defloat, modify by 2, add new raster layer and flood fill with white.
Drag below the name and add dropshadow. Add any copyrights ( I put who made the kit and link)
Merge visible and save! you're done! Simple and easy.
I would love to see what you made!
Thank you for following my tutorial! If you have any questions please email me at
kissnjoe@yahoo.com!
Thursday, June 30, 2011
PTU tut Center Stage
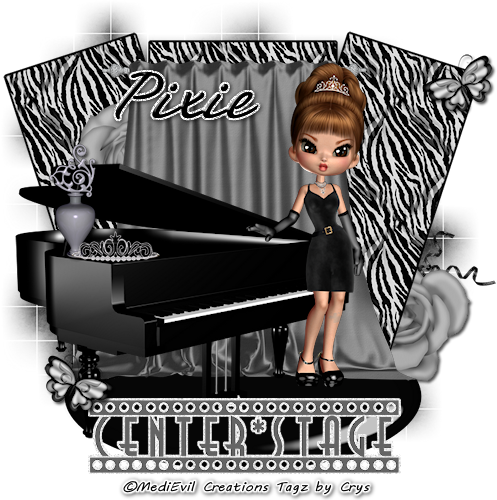
For this tutorial you will need the following:
Scrap kit: PTU kit Pewter Dreams by Kissed by Pix HERE
Tube: The Fabulous Art work by MediEvil Creations
The cookie comes in the kit
Template: By Creative Scraps by Crys HERE
Mask: Mask of Choice
Font of choice
♥ Let's Get started! ♥
Open Template, image, resize CANVAS 800x800
For the drop shadow on evertying I am using the following settings:
Verticle: 2, Horizontal: 2, Opacity: 70, Blur: 6, color black. (you use what ever you want)
Remember to save as you go.
(*Resize everything before you start copy and pasting)
Butterfly1 (resize 18%)
Curly 2 (resize 36%)
Pewter rose2 (resize 36%)
Stage Drapes Pewter
Tiara (resize 26%)
Perfume 1 (resize 26%)
Medi_grand piano
Medi_hollygolightly4
Paper 1
Paper 2
You can always refer to the sample for placement of anything!
On the template Delete copyright info and delete both star layers.
copy and paste paper 2 and drag to bottom layer and add your mask, merge group.
select the center rectangle, selections, float, defloat, invert, copy and paste paper 1. Hit
delete on your keyboard. Do the same thing to the other 2 rectangles. Delete all the grey
rectangles. I added a gradient glow to all the rectangles, but if you do not have Eyecandy
4000, just selections, float, defloat, modify by 2, add new raster layer and flood fill with black.
Drag below the name and add dropshadow.
Copy and paste the drapes and adjust over center rectangle. Copy and paste the piano, don't
forget to add the dropshadow as you go.
Copy and paste the Medi_hollygolightly4. From here, just look at the sample and use it as an
example on where to place the elements.
Crop and resize to your liking, I resized to 500. Make sure DPI is 72.
Now add your name and copyright info. Merge visible and save! you're done! Simple and easy.
I would love to see what you made!
Thank you for following my tutorial! If you have any questions please email me at
kissnjoe@yahoo.com!
Here is a sample of the tag using a tube by Keith Garvey (he is a PTU artist so you must have a license number to use his art work. He can be found at PSP Tubes Emporium)

Monday, June 13, 2011
PTU tut Watermelon Fantasy

For this tutorial you will need the following:
Scrap kit: PTU kit Watermelon Fantasy by Creative Scraps by Crys HERE
Tube: The Fabulous Art work by Caron Vinson
Mine was purchased at CILM but you can now find her at CDO HERE
Mask: Mask of Choice
Font Used: Love
♥ Let's Get started! ♥
For the drop shadow on evertying I am using the following settings:
Verticle: 2, Horizontal: 2, Opacity: 70, Blur: 6, color black. (you use what ever you want)
Remember to save as you go.
(*Resize everything before you start copy and pasting)
Paper 5 (resize 78%)
Paper 10 (resize 78%)
Frame5 (resize 80%)
Butterfly scatter (resize 72%)
Flower4 (resize 28%)
Flowers2 (resize 64%)
Flowers4 (resize 32%)
Leaves (resize 52%)
Leaves2 (resize 46%)
Ribbon3 (resize 28% rotate 90% right)
Ribbon5 (resize 28% rotate 90% right & flip)
Scatter (resize 78% rotate 90%)
Snail (resize 20%)
Watermelon2 (resize 26%)
Watermelon piece (resize 12%)
You can always refer to the sample for placement of anything!
open new raster layer 650x650
copy and paste paper10 add your mask to it. copy and paste frame5, add drop shadow. copy
and paste paper5. Drag below frame layer with your selection tool, make a rectangle around
the white part of the frame. Selections, invert, and hit delete on your keyboard. Your
paper should only be visible on the inside of the frame. Add dropshadow to the frame. copy
and paste butterfly scatter add dropshadow, copy and paste tube, duplicate it, on the bottom
tube add dropshadow and drag below the frame, erase anything hanging over the frame, on the
top tube layer, erase any parts sticking out on top of the frame.
Now just copy and paste the other elements and place them where you want, see sample for placements
Crop and resize to your liking, I resized to 500. Make sure DPI is 72.
Add your name. I did add a gradient glow to mine but if you do not have Eyecandy 4000, just
selections, float, defloat, modify by 2, add new raster layer and flood fill with black.
Drag below the name and add dropshadow.
Merge visible and save! you're done! Simple and easy.
I would love to see what you made!
Thank you for following my tutorial! If you have any questions please email me at
kissnjoe@yahoo.com!
Sunday, May 22, 2011
PTU TUT Shot Through the Heart
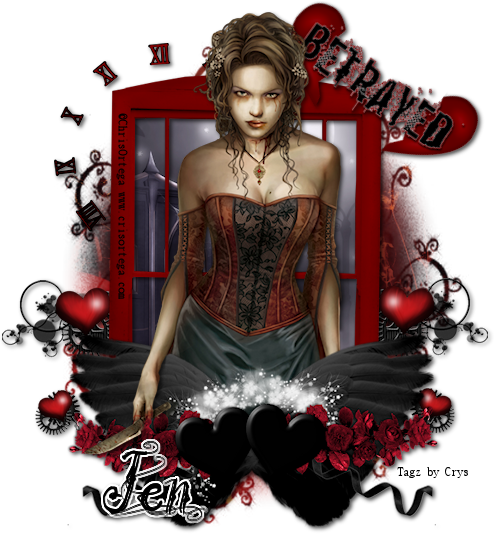
Scrap kit: PTU kit Shot through the Heart by Sleek-N-Sassy Designz HERE
Word Art HERE
Tube: The Fabulous Art work by Cris Ortega
Mask: WSL Mask 340 HERE
Font Used: VTKS Beautiful Dreams
♥ Let's Get started! ♥
Open new 600x600
For the drop shadow on evertying I am using the following settings:
Verticle: 2, Horizontal: 2, Opacity: 70, Blur: 6, color black. (you use what ever you want)
Remember to save as you go.
(*Resize everything before you start copy and pasting)
Paper 1 (resize 54%)
Paper 2 (resize 74%)
Steampunk2 (resize 54%)
window (resize 74%)
Time (resize 54%)
Winged Hearts (resize 54%)
Word Art (resize 26%)
You can always refer to the sample for placement of anything!
copy and paste paper 2 and drag to bottom layer and add your mask, merge group.
copy and paste paper 1, copy and paste window, arrange paper were the moon is in upper right
side. Erase any paper out side of the window.
Copy and paste time, drab below the frame and paper, add your dropshadow to everything.
copy and paste steampunk2 duplicate, mirror and adjust using the sample as a guide.
copy and paste winged heart and place at the bottom above the window.
Copy and paste the Word Art Betrayed, using your pick tool, rotate to the right.
Don't forget to add your dropshadows.
copy and paste the tube, resize 82. Drag below the winged hearts. If you would like it to
look like the sample then duplicate and drag copy above the winged hearts and just eraase the
parts of the tube you don't want to show.
You are almost done, now you need to Crop and check DPI is at 72.
add the copyright Add your name, to get the white border around the name as in the sample,
selections, select all, float, defloat, modify, expand by 2. add a new raster layer flood
fill with white. Selections, select none, add dropshadow and drag below the name.
Merge visible and save! you are done! Simple and easy.
I would love to see what you made!
Thank you for following my tutorial! If you have any questions please email me at
kissnjoe@yahoo.com!
Thursday, May 19, 2011
New PTU Tut: Betrayed
For this tutorial I am using the amazing kit Betrayed, it is part of the Unfaithful Series collection. The other kit in teh series is called Shot through the Heart. You can purchase just the kits by themselves or you can pick up both of them in a bundle for one low price!
Swing by her blog HERE to pick up the great Matching Word Art!
Here is the sample to follow:

For this tutorial you will need the following:
Scrap kit: PTU kit Betrayed by Sleek-N-Sassy Designz HERE
Tube: The Fabulous Art work by Anna Marine HERE
You must have a license to use her work
I purchased her art work from CILM, but you can now find her at CDO
Template Sick of Crying by Creative Scraps by Crys HERE
Mask: Mask of your choice
Plug-ins:
Eye candy 4000 (optional) : Gradient glow
Font Used: Justice by Dirt2
♥ Let's Get started! ♥
Open template, delete the copyright
For the drop shadow on evertying I am using the following settings:
Verticle: 2, Horizontal: 2, Opacity: 70, Blur: 6, color black. (you use what ever you want)
Remember to save as you go.
(*Resize everything before you start copy and pasting)
Paper 6 (resize 60%)
Paper 13 (resize 60%)
Paper 14 (resize 75%)
Bow (resize 40%)
Broken Dish (resize 40%)
Caught (resize 40%)
Embellishment (resize 50%)
Frame 2 (resize 60%)
Key (resize 40%)
Marriage Certificate (resize 60%)
Rose (resize 24%)
Splatter (resize 60%)
You can always refer to the sample for placement of anything!
Open the template and delete the copyright info
copy and paste paper 14 and drag to bottom layer and add your mask, merge group.
Select the larger circle on the bottom, Selections, float, defloat, invert, copy and paste
paper 6 hit delete on the keyboard. Delete the grey circle. Select the smaller circle, selection, float, defloat,
invert, paste paper 6 again and hit delete on keyboard. Keep circle selected and copy and
paste the tube, Erase anything outside the circle on the bottom. Selections, Select none.
Delete the grey circle. Add Gradient glow with these settings to both circles
Glow Width: 3
Soft Corners: 25
Opacity: 100
Adjust the sliders on the bar to your liking, and use black for the color.
Now hide the tube and click on the larger black rectangle. Selections, float, defloat, invert
and copy and paste paper 13, hit delete on the keyboard, keep it selected and add your tube
again, hit delete on the keyboard, selection, select none. Delete the bottom rectangle.
select the other rectangle, selections, float, defloat, invert, and copy and paste paper 6
hit delete on your keyboard, Selections None, and delete the bottom rectangle. Add the same
gradient glow as above to this rectangle. Don't forget to add your drop shadow to evertyhing
as you go.
copy and paste the splatter and drag above the mask later, adjust at the bottom, duplicate
and move up to the top right side.
Copy and paste frame2 and adjust over the larger rectangle with the tube, and using your
pick tool adjust the frame to fit the rectangle. Add drop shadow and unhide the other tube.
now just copy and paste the remaining elements and rearange to your liking. See the sample
placement. If anything is to large, you can always use the pick tool and make it smaller to
fit. Now select the word art and using the pick tool, shrink to your liking, I placed mine
on top. Selections, float, defloat, modify by 2. Add a new raster layer and using the paint
brush, paint in white. drag below the word art layer and add drop shadow.
You are almost done, now you need to Crop and check DPI is at 72. Resize to what you want, I resized to 500 pixels.
add the copyright and any license numbers if need be. Add your name, I used the same settings as above for the
gradient glow (which is optional) Merge visible and save! you are done! Simple and easy.
I would love to see what you made!
Thank you for following my tutorial! If you have any questions please email me at
kissnjoe@yahoo.com!
Swing by her blog HERE to pick up the great Matching Word Art!
Here is the sample to follow:
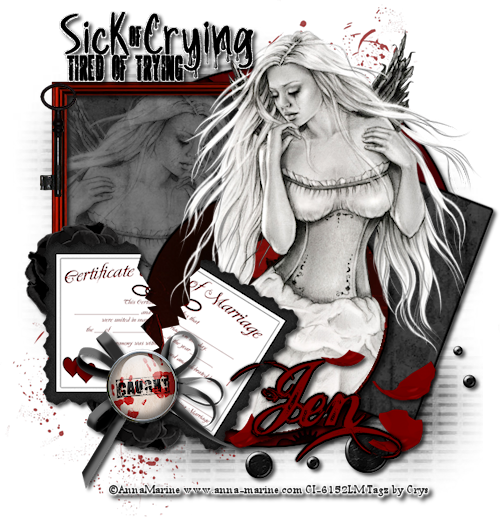
For this tutorial you will need the following:
Scrap kit: PTU kit Betrayed by Sleek-N-Sassy Designz HERE
Tube: The Fabulous Art work by Anna Marine HERE
You must have a license to use her work
I purchased her art work from CILM, but you can now find her at CDO
Template Sick of Crying by Creative Scraps by Crys HERE
Mask: Mask of your choice
Plug-ins:
Eye candy 4000 (optional) : Gradient glow
Font Used: Justice by Dirt2
♥ Let's Get started! ♥
Open template, delete the copyright
For the drop shadow on evertying I am using the following settings:
Verticle: 2, Horizontal: 2, Opacity: 70, Blur: 6, color black. (you use what ever you want)
Remember to save as you go.
(*Resize everything before you start copy and pasting)
Paper 6 (resize 60%)
Paper 13 (resize 60%)
Paper 14 (resize 75%)
Bow (resize 40%)
Broken Dish (resize 40%)
Caught (resize 40%)
Embellishment (resize 50%)
Frame 2 (resize 60%)
Key (resize 40%)
Marriage Certificate (resize 60%)
Rose (resize 24%)
Splatter (resize 60%)
You can always refer to the sample for placement of anything!
Open the template and delete the copyright info
copy and paste paper 14 and drag to bottom layer and add your mask, merge group.
Select the larger circle on the bottom, Selections, float, defloat, invert, copy and paste
paper 6 hit delete on the keyboard. Delete the grey circle. Select the smaller circle, selection, float, defloat,
invert, paste paper 6 again and hit delete on keyboard. Keep circle selected and copy and
paste the tube, Erase anything outside the circle on the bottom. Selections, Select none.
Delete the grey circle. Add Gradient glow with these settings to both circles
Glow Width: 3
Soft Corners: 25
Opacity: 100
Adjust the sliders on the bar to your liking, and use black for the color.
Now hide the tube and click on the larger black rectangle. Selections, float, defloat, invert
and copy and paste paper 13, hit delete on the keyboard, keep it selected and add your tube
again, hit delete on the keyboard, selection, select none. Delete the bottom rectangle.
select the other rectangle, selections, float, defloat, invert, and copy and paste paper 6
hit delete on your keyboard, Selections None, and delete the bottom rectangle. Add the same
gradient glow as above to this rectangle. Don't forget to add your drop shadow to evertyhing
as you go.
copy and paste the splatter and drag above the mask later, adjust at the bottom, duplicate
and move up to the top right side.
Copy and paste frame2 and adjust over the larger rectangle with the tube, and using your
pick tool adjust the frame to fit the rectangle. Add drop shadow and unhide the other tube.
now just copy and paste the remaining elements and rearange to your liking. See the sample
placement. If anything is to large, you can always use the pick tool and make it smaller to
fit. Now select the word art and using the pick tool, shrink to your liking, I placed mine
on top. Selections, float, defloat, modify by 2. Add a new raster layer and using the paint
brush, paint in white. drag below the word art layer and add drop shadow.
You are almost done, now you need to Crop and check DPI is at 72. Resize to what you want, I resized to 500 pixels.
add the copyright and any license numbers if need be. Add your name, I used the same settings as above for the
gradient glow (which is optional) Merge visible and save! you are done! Simple and easy.
I would love to see what you made!
Thank you for following my tutorial! If you have any questions please email me at
kissnjoe@yahoo.com!
Saturday, March 5, 2011
Another tut with the Awesome PTU kit Shake your Shamrocks

For this tutorial you will need the following:
Scrap kit: PTU kit Shake your Shamrocks by Sleek-N-Sassy Designz HERE
Tube: The Fabulous Art work by Elias Chatzoudis HERE
(You must have a license to use his work)
Mask: Vix mask 355 HERE
Plug-ins:
Eye candy 4000 (optional) : Gradient glow
Font Used: Escher Hand and Roelandt BT
♥ Let's Get started! ♥
Open new image canvas size 600x600 DPI 72
For the drop shadow on evertying I am using the following settings:
Verticle: 2, Horizontal: 2, Opacity: 70, Blur: 6, color black. (you use what ever you want)
Remember to save as you go.
(*Resize everything before you start copy and pasting)
Paper 5 (resize 75%)
Paper 6 (resize 75%)
Butterfly (resize 26%)
Clovers 3
Double circle Gold Frame (resize 84%)
Flower 2 (resize 54%)
Medi Paddygold 4 (resize 75%)
You can always refer to the sample for placement of anything!
copy and paste paper 6, layers, Load/save mask, load mask from disc choose the mask, merge group. Adjust, add noise with
these settings:
Uniform
Monochrome
94%
Copy and paste the frame. With the magic wand, click inside the frame, selections, modify by 3, invert, copy and paste
paper 5 hit delete on the keyboard. Selection, select none, move below the frame. Now then copy and
paste tube. Adjust placement and duplicate, drag below frame, and erase anything outside the frame, add dropshadow, Now on the
top layer erase part of the tube where it covers the frame and the clovers on the frame. Now it should look like
the tube is below the frame except the hand with the beer.
copy and paste the clovers and drag under the frame and paper layers. See example for placement. Add dropshadow.
copy and paste gold coins, drag down below the bottom tube layer.
copy and paste flower 2, add dropshadow drag below the frame and adjust to the bottom left side
duplicate, and adjust to the side. copy and paste butterfly and place it on the shamrock
I added word art, You can either do the same or leave it and finish it up. If you add the word art
then here is the settings for the gradient glow I used around the text.
gradient glow with these setting:
Glow Width: 3
Soft Corners: 25
Opacity: 100
Adjust the sliders on the bar to your liking, and use what color you choose.
You are almost done, now you need to Crop and check DPI is at 72. Resize to what you want, I resized to 500 pixels.
add the copyright and any license numbers if need be. Add your name, I used the same settings as above for the
gradient glow (which is optional) Merge visible and save! you are done! Simple and easy.
I would love to see what you made!
Thank you for following my tutorial! If you have any questions please email me at
kissnjoe@yahoo.com!
PTU tutorial Shake your Shamrock

For this tutorial you will need the following:
Scrap kit: PTU kit Shake your Shamrocks by Sleek-N-Sassy Designz HERE
Tube: The Fabulous Art work by Elias Chatzoudis HERE
(You must have a license to use his work)
Mask: WSL mask 107 HERE
Plug-ins:
Eye candy 4000 (optional) : Gradient glow
Font Used: Leichenhaus
♥ Let's Get started! ♥
Open new image canvas size 600x600 DPI 72
For the drop shadow on evertying I am using the following settings:
Verticle: 2, Horizontal: 2, Opacity: 70, Blur: 6, color black. (you use what ever you want)
Remember to save as you go.
(*Resize everything before you start copy and pasting)
Paper 5 (resize 75%)
Paper 6 (resize 75%)
Butterfly2 (resize 26%)
Clovers 2 (mirror)
Corset (resize 58%)
Decorative Element (mirror)
Double circle shamrock Frame2 (resize 80%)
Flower 2 (resize 54%)
Glove (resize 44% free roatate 45%)
Hat (resize 34% mirror)
Martini (resize 44% free rotate 10%)
Mask (resize 52%)
Shamrocks 2 (resize 54% mirror)
Tube (resize 86%)
close up tube
You can always refer to the sample for placement of anything! Don't forget to add the dropshadow as you go. And save often
copy and paste paper 5, layers, Load/save mask, load mask from disc choose the mask, merge group
Copy and paste the frame. With the magic wand, click inside the frame, selections, modify by 3, invert, copy and paste
paper 6 hit delete on the keyboard, move below the frame. Now then copy and paste the close up tube. hit delete on the keyboard
In the layers palette, change blend to Luminance Legacy. Drop the opacity to where you like it.
copy and paste shamrocks 2 and drag above the mask layer. Adjust to the left side of the frame.
copy and paste clover 2, Drag below frame position to the right of the frame.
copy and paste Decorative Element. See sample for placement.
Now you are going to copy and paste the corset, hat, martini, mask and glove. See example for placement.
copy and paste tube. Postion to the left side. Crop and resize to your liking.
Add you name and if you want to use the same gradient then use these settings:
gradient glow with these setting:
Glow Width: 3
Soft Corners: 25
Opacity: 100
Adjust the sliders on the bar to your liking, and use what color you choose. I used a gold color from
one of the elements.
Now to get the glitter effect, with your magic wand, click on the gold outline, adjust, add noise on these settings:
Uniform
74%
Monochrome checked
Now add your copyright info and license number.
Merge visible and save! you are done! Simple and easy.
I would love to see what you made!
Thank you for following my tutorial! If you have any questions please email me at
kissnjoe@yahoo.com!
Monday, February 21, 2011
PTU tut Rocker Chic

Scrap kit: PTU kit Rocker Chic by Sleek-N-Sassy Designz HERE
This kit is on Sale for 50% off right now.
Tube: The Fabulous Art work by Elias Chatzoudis HERE
You must have a license to use his work(mine was purchased at MPT he now sells at the link provided)
Mask: WSL mask 84 HERE
Plug-ins:
Eye candy 5 Impact (optional) : Gradient glow
Font Used: FTU font Pea Anna Banana
♥ Let's Get started! ♥
Open new image canvas size 600x600 DPI 72
For the drop shadow on evertying I am using the following settings:
Verticle: 2, Horizontal: 2, Opacity: 70, Blur: 6, color black. (you use what ever you want)
Remember to save as you go.
(*Resize everything before you start copy and pasting)
Paper 5 (resize 75%)
Paper 8 (resize 60%)
Bubbles (resize 60%)
Disco Ball (resize 74%)
Flower (resize 34%)
Frame 3 (resize 70% Free Rotate 45%)
Glitter (resize 40%)
Key Cheain 2 (resize 40%)
Lip Stick (resize 26%)
Music Notes (resize 54%)
Record (resize 44%)
Tube (resize 80%)
You can always refer to the sample for placement of anything!
copy and paste paper 5, layers, Load/save mask, load mask from disc choose the mask, merge group
Copy and paste the frame. With the magic wand, click inside the frame, selections, modify by 3, invert, copy and paste
paper 8 hit delete on the keyboard. Selection, select non, move below the frame. Add dropshadow. Now then copy and
paste the glitter, add dropshadow, position to the lower left side of frame behind the paper, duplicate and drag to the
top right side. copy and paste the record and flower, add drop shadows, position at the top left side under the paper layer
copy and paste the music notes arange to the side above the record, see sample for placement. Add dropshadow. copy and paste
the keychain, adust above the frame at the top left side, dropshadow, copy and paste the bubbles, if still a little to big,
with your pick tool, readust size. position above the frame to the bottom part of the frame, see sample. Copy and paste
the disco ball drag under the frame and erase the chain, position as seen in the sample. copy and paste the tube. Position
above the frame Duplicate the flower and drag abovethe tube. Duplicate again, Effects, Photo Effects, black and White film,
click ok. Duplicate again. Drag the pink flower to the top and move the 2 gray flowers around until the tube is covered
like in the sample. Readjust the pink one ontop of the gray ones. copy and paste the lipstick drag below the pink flower,
with the pick tool, rotate til it is slightly to the left. Add dropshadow. Now you want to resize. I resized mine to 500.
Add your name and if you are going to add a gradient glow to the name, then follow the next step of directions.
If you choose you can now add the
gradient glow with these setting:
Glow Type: mark outside glow
mask Selection marked
Glow radius: 5
Soften Corners: 25
Opacity: 100
Distortion Amount 0 Distortion Lumpsize:55
Gradient Smoothness: 100
color is white. I added another tab and added a pink color around the white.
You are almost done, now you need to add the copyright and any license numbers if need be. Crop and
make sure the DPI is at 72 and save! you are done! Simple and easy.
I would love to see what you made!
Thank you for following my tutorial! If you have any questions please email me at
kissnjoe@yahoo.com!
Sunday, February 13, 2011
Wow I finally wrote a new Tut!
I know my blog is in sad need of an update! It has been awhile since I got a chance to write a new tut! I decided to use the beautiful PTU kit Honestly by Kara at Sweet Cravings Scraps! Here is the preview and the tutorial to follow!

Tube: The Fabulous Art work by Keith Garvey HERE
You must have a license to use his work(mine was purchased at MPT he now sells at the link provided)
Template by Crys at Creative Scraps by Crys HERE
Mask: Vix mask 355 HERE
Plug-ins:
Eye candy 5 Impact (optional) : Gradient glow & Glass (can also substiture Eye candy 4000)
Xero: Radiance (optional)
Font Used: FTU font Satisfaction & Segoe
♥ Let's Get started! ♥
Open the template in psp, delete all the hearts. Image, canvas size 600x600
For the drop shadow on evertying I am using the following settings:
Verticle: 2, Horizontal: 2, Opacity: 70, Blur: 6, color black. (you use what ever you want)
Remember to save as you go.
(*Resize everything before you start copy and pasting)
Paper 1 (resize 75%)
Paper 6 (resize 50%)
Paper 12 (resize 75%)
Paper 20 (resize 50%)
Tube: (if using the same as I am) resize 82% Close up resize 82%
Bow 4 (resize 36%)
Butterfly mask 2 (resize 36%)
candles 3 (resize 22%)
Flare 2 (resize 74%)
flower 1 (resize 40%)
Pears (resize 12%)
Ribbon puff 6 (resize 36%)
Close up tube: Blend to Soft Light (Effects, plugins, xero,
radiance on these settins: Strangeness 128, Charm 50, Truth 128, Beauty 255)
You can always refer to the sample for placement of anything!
copy and paste paper 1 below the last layer on the template. Layers, load mask from disk, choose your mask click ok.
Merge group.
Copy and paste flower, move to lower left corner. Duplicate and move to upper right corner. Duplicate again. On bottom layer adjust, blur, gaussian blur raius on 13. click ok. Do the same on the lower left hand flower copy and paste your ribbon puff adjust to your liking. Duplicate and adjust on the right side. See example. on the black strip, effects, texture effects, weave with this settings: Gap size 5 weave color black. Width 12 Gap color white, Opacity 28, check fill gaps.
select the long white rectangle. Selections, float, defloat, invert paste paper 12, hit delete. Delete the botton rectangle Select the white square selections, float, defloat, invert, paste paper 12 hit delete. paste close up tube, hit delete. If you choose you can now add the gradient glow with these setting:
Glow Type: mark outside glow
mask Selection marked
Glow radius: 5
Soften Corners: 25
Opacity: 100
Distortion Amount 0 Distortion Lumpsize:55
Gradient Smoothness: 100
color is black.
Delete white square.
Select the left square, selections, select all, float defloat, invert. paste paper 6 hit delete. add your gradient glow if you select to do so. Use the same settings as above. Delete the gray square below.
Copy and paste flare 2. use sample for placement. paste bow 4 and adjust to lower corner of left square. select the right square, selections, select all, float, defloat, invert paste paper 20. hit delete. Add gradient glow if you choose with the above settings. Delete bottom layer. Paste
butterfly mask position over right square, use your pick tool and rotate to the right to match the square. Now copy and paste the candles and pears. copy and paste tube.
I hope you remembered to add your dropshadow to everything. If not, then now would be the perfect time to do so. For the word art (Optional) I used Segoe for the blocky wording. Bold and stroke width on 6. use color of your choice.
I used color # b98fb2 Type out the words you want, I used the name of the kit Heavenly all in caps. Now this step is optional Add glass effect with these setting:
Under Settings tab: Clear
Under Basic tab:
Bevel Width on 6.26 Bevel Smoothness on 0
Round selection corners 0
Inside selection checked
Opacity 0, Tinting 0, Refractions 50, Inner Shadow 22
Dropshadow 0, Shadow offest 10.80, Shadow glow 20
Then add a gradiant glow with the previous settings only using white instead of black. Add your dropshadow.
I used Satisfaction for the words Beautiful on bold.
Crop and resize to your liking. Now add your name and copyright
Make sure the DPI is at 72 and save! you are done! Simple and easy.
I would love to see what you made!
Thank you for following my tutorial! If you have any questions please email me at
kissnjoe@yahoo.com!
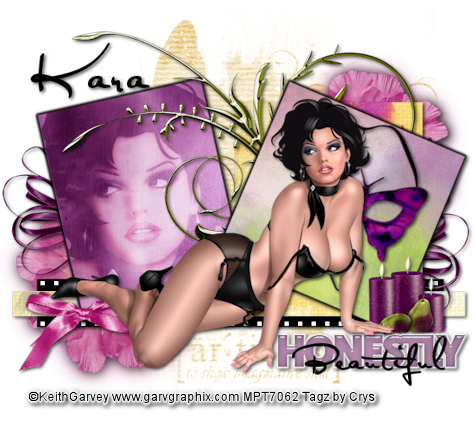
For this tutorial you will need the following:
Scrap kit: PTU kit Honestly by Kara at Sweet Cravings Scraps HERETube: The Fabulous Art work by Keith Garvey HERE
You must have a license to use his work(mine was purchased at MPT he now sells at the link provided)
Template by Crys at Creative Scraps by Crys HERE
Mask: Vix mask 355 HERE
Plug-ins:
Eye candy 5 Impact (optional) : Gradient glow & Glass (can also substiture Eye candy 4000)
Xero: Radiance (optional)
Font Used: FTU font Satisfaction & Segoe
♥ Let's Get started! ♥
Open the template in psp, delete all the hearts. Image, canvas size 600x600
For the drop shadow on evertying I am using the following settings:
Verticle: 2, Horizontal: 2, Opacity: 70, Blur: 6, color black. (you use what ever you want)
Remember to save as you go.
(*Resize everything before you start copy and pasting)
Paper 1 (resize 75%)
Paper 6 (resize 50%)
Paper 12 (resize 75%)
Paper 20 (resize 50%)
Tube: (if using the same as I am) resize 82% Close up resize 82%
Bow 4 (resize 36%)
Butterfly mask 2 (resize 36%)
candles 3 (resize 22%)
Flare 2 (resize 74%)
flower 1 (resize 40%)
Pears (resize 12%)
Ribbon puff 6 (resize 36%)
Close up tube: Blend to Soft Light (Effects, plugins, xero,
radiance on these settins: Strangeness 128, Charm 50, Truth 128, Beauty 255)
You can always refer to the sample for placement of anything!
copy and paste paper 1 below the last layer on the template. Layers, load mask from disk, choose your mask click ok.
Merge group.
Copy and paste flower, move to lower left corner. Duplicate and move to upper right corner. Duplicate again. On bottom layer adjust, blur, gaussian blur raius on 13. click ok. Do the same on the lower left hand flower copy and paste your ribbon puff adjust to your liking. Duplicate and adjust on the right side. See example. on the black strip, effects, texture effects, weave with this settings: Gap size 5 weave color black. Width 12 Gap color white, Opacity 28, check fill gaps.
select the long white rectangle. Selections, float, defloat, invert paste paper 12, hit delete. Delete the botton rectangle Select the white square selections, float, defloat, invert, paste paper 12 hit delete. paste close up tube, hit delete. If you choose you can now add the gradient glow with these setting:
Glow Type: mark outside glow
mask Selection marked
Glow radius: 5
Soften Corners: 25
Opacity: 100
Distortion Amount 0 Distortion Lumpsize:55
Gradient Smoothness: 100
color is black.
Delete white square.
Select the left square, selections, select all, float defloat, invert. paste paper 6 hit delete. add your gradient glow if you select to do so. Use the same settings as above. Delete the gray square below.
Copy and paste flare 2. use sample for placement. paste bow 4 and adjust to lower corner of left square. select the right square, selections, select all, float, defloat, invert paste paper 20. hit delete. Add gradient glow if you choose with the above settings. Delete bottom layer. Paste
butterfly mask position over right square, use your pick tool and rotate to the right to match the square. Now copy and paste the candles and pears. copy and paste tube.
I hope you remembered to add your dropshadow to everything. If not, then now would be the perfect time to do so. For the word art (Optional) I used Segoe for the blocky wording. Bold and stroke width on 6. use color of your choice.
I used color # b98fb2 Type out the words you want, I used the name of the kit Heavenly all in caps. Now this step is optional Add glass effect with these setting:
Under Settings tab: Clear
Under Basic tab:
Bevel Width on 6.26 Bevel Smoothness on 0
Round selection corners 0
Inside selection checked
Opacity 0, Tinting 0, Refractions 50, Inner Shadow 22
Dropshadow 0, Shadow offest 10.80, Shadow glow 20
Then add a gradiant glow with the previous settings only using white instead of black. Add your dropshadow.
I used Satisfaction for the words Beautiful on bold.
Crop and resize to your liking. Now add your name and copyright
Make sure the DPI is at 72 and save! you are done! Simple and easy.
I would love to see what you made!
Thank you for following my tutorial! If you have any questions please email me at
kissnjoe@yahoo.com!
Friday, November 12, 2010
PTU Tutorial ~ GoodNight Moon
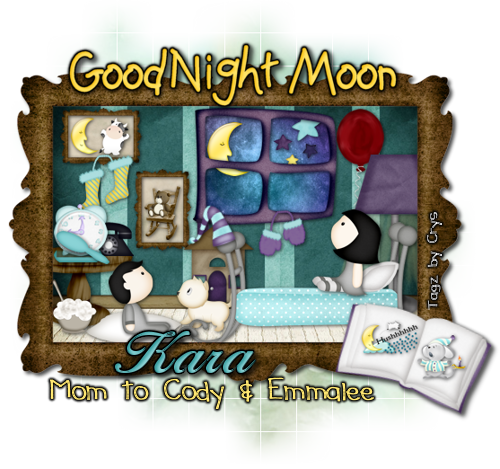
(Story of GoodNight Moon to follow after tutorial incase you haven't heard it)
Scrap kit: PTU Hush by Kara at Sweet Cravings Scraps HERE
Tube: The little boy and girl are provided in the kit
Plug-ins:
Eye candy 4000: Gradient glow
Font Used: FTU Childrenplay (goodnight moon), Larissa (the name), and Pea Times new Camileon
(any other sayings)
Mask used: WSL #84
♥ Let's Get started! ♥
Open a new raster layer 600 x 600
For the drop shadow on evertying I am using the following settings:
Verticle: 3, Horizontal: 3, Opacity: 70, Blur: 6, color black. (you use what ever you want)
(*Resize everything before you start copy and pasting)
Paper 9 (resize 20%)
Paper 10 (resize 600 x 600 pixels)
Paper 11 (resize 14%)
Paper 20 (resize 54%)
Bed (resize 36%)
Bowl of mush, brush, comb, cow, Rocking chair, sleeping cap, stars (resize 10%)
Moon (resize 10%) duplicate and resize again 64%
Frame (resize 63%,duplicate and resize 18%)
Bear (resize 5%)
Kitten (resize 13%)
Book, house, window (resize 20%)
Mittens, phone (resize 11%)
word art (resize 8%)
Mouse (resize 9%)
Little boy, socks (resize 14%)
Little girl (resize 16%)
Lamp (resize 30%)
Red balloon (resize 24%)
Pillow (resize 18%)
You can always refer to the sample for placement of anything!
For this tag, it is really just copy and pasting the elements where you want them. I always
start at the bottom and work my way up mostly. also if something just isn't the right size,
you can resize how you see fit, mine is only an example, so be creative!
paste paper 20, paste the frame above paper layer. Click inside the frame with your magic
wand tool, selections, modify, expand by 5, selections, invert. On the paper layer hit
delete on your keyboard.
Copy and paste paper 9, copy and paste window. Click inside each square in the window, selections
modify, expand by 4, selections, invert. On the paper layer click delete on the keyboard.
Copy and paste the larger moon and stars. Erase anything hanging over the edge of the frame.
Add drop shadows to everything as you go.
copy and paste the red balloon, move to the right side of window, copy and paste lamp, move
to the side of the balloon. (see sample for placement)
Copy and paste the mittens. copy and paste paper 11, copy and paste smaller frame, adjust
above paper 11. As before, click in the frame, selections, modify by 4, selections, invert,
on the paper layer, hit delete on your keyboard. Don't forget to be adding your dropshadow to
your elements as you go. Duplicate paper and frame, For both the paper and the frame, image,
free rotate, to the right 90%. copy and paste the moon and cow as shown in the example and
arrange in the horizontal frame. copy and paste the bear and rocking chair. Move them into
the frame that is verticle.
Now at this point I just started adding elements to make it look like the book Goodnight Moon.
Once you have it the way you want it, You can do the following steps or just add your name and be done.
With the dropper tool, pick up the dark yellow color from the moon and with the font
Childrenplay type out GoodNight Moon.
Effects, plug ins, Eye candy 4000, gradient glow.
Now add your gradient glow on these settings:
Glow width 3.00
Soft Corners 25
Overall Opacity 100
Draw only outside selection checked.
Under color tab, use black for gradient glow. Drag one slider half way across the bar.
Click ok. Add your dropshadow. Using your dropper tool again pick up the teal color.
With the font Larissa, add your name and use the same gradient glow settings as above.
using the yellow color again and the font Pea Times New Camileon, type out any sayings you
want to add. Again use the same gradient glow settings as above. Add dropshadow to everything
if you haven't already.
Re-sizing the siggy...
I resized mine to 500 pixels. Add your tag info.
Save and you are done! Easy Peasy!
I would love to see what you made!
Thank you for following my tutorial! If you have any questions please email me at
kissnjoe@yahoo.com!
Here is a preview of the kit...

GoodNight Moon is both of my kid's favorite book, we read it every night for bed. Now I want to share it with all of you and you can see how awesome this kit is. It really does follow the story! Thank you Kara for such amazing work! My kids love it! When I was making the siggy for the tutorial, my kids had a blast helping me! Anyway here is the story...
GoodNight Moon
By: Margaret Wise Brown
By: Margaret Wise Brown
In the great green room
There was a telephone
And a red balloon
And a picture of --
The cow jumping over the moon
And there were three little bears sitting on chairs
And two little kittens And a pair of Mittens
And a little toyhouse And a young mouse
And a little toyhouse And a young mouse
And a comb and a brush and a bowl full of mush
And a quiet old lady who was wispering "hush"
Goodnight room Goodnight moon
Goodnight cow jumping over the moon
Goodnight light and the red balloon
Goodnight bears Goodnight chairs
Goodnight kittens and goodnight mittens
Goodnight clocks and goodnight socks
Goodnight littel house and goodnight mouse
Goodnight comb and goodnight brush
Goodnight nobody Goodnight mush
And goodnight to the old lady whispering "hush"
Goodnight stars Goodnight air
Goodnight noises everywhere.
Sunday, October 3, 2010
PTU tutorial ~ At the Circus
Scrap kit: PTU kit At the Circus by Kara at Sweet Cravings Scraps HERE
Tube: The Fabulous Art work by Caron Vinson HERE
You must have a license to use her work
Plug-ins:
Eye candy 4000: Glass and Gradient glow
Font Used: FTU font Wacky Action BTN
Mask used: WSL #84 & 117 HERE
♥ Let's Get started! ♥
Open a new raster layer 750x750
For the drop shadow on evertying I am using the following settings:
Verticle: 3, Horizontal: 3, Opacity: 70, Blur: 6, color black. (you use what ever you want)
(*Resize everything before you start copy and pasting)
Paper 7 (resize 81%)
Frame 5 (resize 81%, Rotate 90% left)
Frame 2 (resize 34%)
Balloon 4 (resize 44%)
Confetti (resize 94%)
Cotton Candy 1 (resize 54%)
Flower 1 (resize 44%, mirror)
Rabbit Hat (resize 44%)
Ribbon 9 (resize 44%)
Ticket (resize 44%)
You can always refer to the sample for placement of anything!
flood fill the layer with a dark grey (I used a color from the tube), Layers, load saved mask,
load mask from disc, select your mask and apply (I used WSL mask #84), Merge group.
Copy and paste confetti, Layers, load saved mask, load mask from disk, select mask
(I used WSL mask #117)
Copy and paste frame 5, Copy and paste paper 7, drag below the frame layer. With the magic
wand tool, click inside the frame layer, selections, modify, by 5, invert. On the paper
layer hit delete on the keyboard. Copy and paste the tube. Drag below the frame layer. Add
dropshadow to the tube, erase anything outside the frame layer. Add dropshadow to the frame.
Copy and paste frame 2. Add dropshadow, position at the upper left corner, Drag below the
paper layer. Duplicate and drag to the right side about mid way down. See sample for placement.
Now you can add what ever elements you want. If using the same as I did, then use the sample
to place your elements. On the right side, I started with the flower and then layered the cotton candy, then the ticket and then on top the rabbit hat. Add your dropshadow to all elements.
On the left side layer the ribbon and the balloons. Add dropshadow to both.
Now you add your name. If you want it to be like the sample, then you need to follow the next
steps to add a glass effect and gradient glow. If not, then skip to the resizing part.
Effects, plug ins, Eye candy 4000, glass: on these settings,
Under Basic tab:
Bevel width 10.17
Smoothness 75
Inside Marquee checked
Edge Darkening 30
Gradient shading 0
Refraction 50
Opacity 0
Tinting 50
Glass color white. Click ok
Effects, plug ins, Eye candy 4000, gradient glow.
Now add your gradient glow on these settings:
Glow width 3.00
Soft Corners 25
Overall Opacity 100
Draw only outside selection checked.
Under color tab, use black for gradient glow. Drag one slider half way across the bar.
Click ok. Add your dropshadow.
Re-sizing the siggy...
I resized mine to 500 pixels. Add your copyright.
Save and you are done! Easy Peasy!
I would love to see what you made!
Thank you for following my tutorial! If you have any questions please email me at
kissnjoe@yahoo.com!
Saturday, October 2, 2010
PTU Tutorial ~ Welcome to the Jungle
Scrap kit: PTU kit Welcome to the Jungle by Kara at Sweet Cravings Scraps HERE
Tube: The Fabulous Art work by Jennifer Janesko HERE
You must have a license to use her work
Plug-ins:
Eye candy 4000: Gradient glow
Font Used: FTU font Landliebe
Mask used: WSL #84 HERE
♥ Let's Get started! ♥
Open a new raster layer 750x750
For the drop shadow on evertying I am using the following settings:
Verticle: 3, Horizontal: 3, Opacity: 70, Blur: 6, color black. (you use what ever you want)
(*Resize everything before you start copy and pasting)
Paper 15 (resize 86%)
Paper 16 (resize 58%)
Frame 9 (resize 62%)
Butterfly swarm (resize 66%)
Fern (resize 44%)
Flower 5 (resize 48%)
Leaf pile (resize 80%)
Mask (resize 36%, rotate 34%)
Tall grass
You can always refer to the sample for placement of anything!
Copy and paste paper 15, layers, load/save mask, load mask from disc, select mask and apply.
Copy and paste frame 9. Copy and paste paper 16. Drag it below the frame. Copy and paste
tall grass and position above the paper. With the magic wand tool, click inside the frame.
Selections, modify, modify by 5, invert. On the tall grass layer click delete on the keyboard.
Select the paper layer and hit delete again. On the grass layer, in the layer palatte,
change blend mode to burn and lower opacity to 26.
Copy and paste the leaf pile. Drag under the paper 16 layer, adjust to the top left corner
of the frame. Add dropshadow. Duplicate and drag to lower right corner. (see sample for placement)
Copy and paste the butterfly swarm and drag below paper 16, just above the leaf pile layer.
Adjust to your liking at the lower left corner. Add dropshadow, and duplicate. Drag to top
right corner.
Copy and paste the mask and fern adding your dropshadows. Position to your liking. Again you
can use the sample for placement.
Copy and paste the flower 5, place on the left side at the bottom above the frame layer. Add
dropshadow and duplicate. Mirror and position on the other side. Erase the stem from both
flowers.
Now it is time to add the tube. If using the same tube as I am, no need to resize, but if not
resize as necessary. Adjust the tube above the flower layer. Duplicate and drag one of the
tubes below the frame layer. With the magic wand tool, clickinside the frame, selections,
modify by 5, invert, select the tube that is below the frame layer and hit delete on the
keyboard. On the top tube layer, add dropshadow and erase any part of the tube at the bottom
that is outside the frame layer. This will make the tube appear to be inside the bottom of the
frame but above the frame at the top. See sample for example. Add your dropshadow to the
frame layer.
now you add your name. If you want it to be like the sample, then you need to follow the next
step to add a gradient glow. If not, then skip to the resizing part.
Effects, plug ins, Eye candy 4000, gradient glow.
Now add your gradient glow on these settings:
Glow width 3.00
Soft Corners 25
Overall Opacity 100
Draw only outside selection checked.
Under color tab, use a color from the flower for gradient glow. Drag one slider half way across the bar.
Click ok. Add your dropshadow.
Re-sizing the siggy...
I resized mine to 500 pixels. Add your copyright.
Save and you are done! Simple and easy.
I would love to see what you made!
Thank you for following my tutorial! If you have any questions please email me at
kissnjoe@yahoo.com!

Thursday, September 23, 2010
PTU Tutorial ~ Trick or Treat


For this tutorial you will need the following:
Scrap kit: PTU kit Spooky Stories by Creative Scraps by Crys HERE
Tube: The Fabulous Art work by Elias Chatzoudis HERE
You must have a license to use his work (I used 2 tubes if you use 2 tubes,
Scrap kit: PTU kit Spooky Stories by Creative Scraps by Crys HERE
Tube: The Fabulous Art work by Elias Chatzoudis HERE
You must have a license to use his work (I used 2 tubes if you use 2 tubes,
make sure you use them from the same artist)
Template by Stormy at Stormy's Tutorials and More HERE
Plug-ins:
Eye candy 4000: Gradient glow
Font Used: FTU font Addams Capital and regular
♥ Let's Get started! ♥
Open the template in psp, delete the copyright.
For the drop shadow on evertying I am using the following settings:
Verticle: 3, Horizontal: 3, Opacity: 70, Blur: 6, color black. (you use what ever you want)
(*Resize everything before you start copy and pasting)
Paper 1 (resize 75%)
Paper 3 (resize 75%)
Paper 9 (resize 75%)
Paper 12 (resize 75%)
Paper 13(resize 75%)
Bow 2 (resize 62%)
Button 1 & 2 (resize 26%)
Halloween doodle (resize 68%)
Skull (resize 68%)
Spider (resize 26%)
Spider web 4 (resize 68%)
Swirl 5
Witch tube: Blend to Luminance (Legacy) drop opacity to 48%(Effects, plugins, xero,
radiance on these settins: Strangeness 128, Charm 50, Truth 128, Beauty 200)
You can always refer to the sample for placement of anything!
Click on the triangle 1, selections, select all, float, defloat, invert, copy and paste
paper 3, arrange over the triangle and hit delete on the keyboard.
Effects, plug ins, Eye candy 4000, gradient glow.
Now add your gradient glow on these settings:
Glow width 3.00
Soft Corners 25
Overall Opacity 100
Draw only outside selection checked.
Under color tab, use black for the color. Drag one slider half way across the bar.
Click ok. Add your dropshadow. Delete the grey triangle.
Click on the Oval, selections, select all, float, defloat, invert, copy and paste paper 12
arrange over the oval and hit delete on the keyboard.
Effects, plug ins, Eye candy 4000, gradient glow.
Now add your gradient glow on these settings:
Glow width 3.00
Soft Corners 25
Overall Opacity 100
Draw only outside selection checked.
Under color tab, use black for the color. Drag one slider half way across the bar.
Click ok. Add your dropshadow. Delete the grey oval
Click on triangle 2, selections, select all, float, defloat, invert, copy and paste
paper 13, arrange over the triangle and hit delete on the keyboard.
Effects, plug ins, Eye candy 4000, gradient glow.
Now add your gradient glow on these settings:
Glow width 3.00
Soft Corners 25
Overall Opacity 100
Draw only outside selection checked.
Under color tab, use black for the color. Drag one slider half way across the bar.
Click ok. Add your dropshadow. Delete the grey triangle.
Click on square 1, selections, select all, float, defloat, invert, copy and paste paper 9.
Arrange over the square, copy and paste the witch tube, arrange where you like, then
hit delete. Select the paper layer and hit delete again. Selections, select none. Delete the grey square
Effects, plug ins, Eye candy 4000, gradient glow.
Now add your gradient glow on these settings:
Glow width 3.00
Soft Corners 25
Overall Opacity 100
Draw only outside selection checked.
Under color tab, use black for the color. Drag one slider half way across the bar.
Click ok. Add your dropshadow.
Click on square 2, selections, select all, float, defloat, invert, copy and paste paper 1.
Arrange over the square, and hit delete. Selections, select none. Delete the grey square
Duplicate the witch and mirror. Drag over to square 2 and position in the square.
Effects, plug ins, Eye candy 4000, gradient glow.
Now add your gradient glow on these settings:
Glow width 3.00
Soft Corners 25
Overall Opacity 100
Draw only outside selection checked.
Under color tab, use black for the color. Drag one slider half way across the bar.
Click ok. Add your dropshadow.
Copy and paste the tube, add drop shadow.
From here all you do is add the elements where you choose, follow my example for placement
if you want it to look exactly like mine.
Using the dropper, Take the color from the orange square for the name. Type out
the name, effects, plugins, eyecandy 4000, gradient glow on these settings:
Glow width 3.00
Soft Corners 25
Overall Opacity 100
Draw only outside selection checked.
Under color tab, use black. Drag one slider half way across the bar.
Click ok. Add dropshadow
I resized mine to 500 pixels. Add your copyright.
Save and you are done! Simple and easy.
I would love to see what you made!
Thank you for following my tutorial! If you have any questions please email me at
kissnjoe@yahoo.com!
Here is a preview of the scrap kit I used for this tutorial
Template by Stormy at Stormy's Tutorials and More HERE
Plug-ins:
Eye candy 4000: Gradient glow
Font Used: FTU font Addams Capital and regular
♥ Let's Get started! ♥
Open the template in psp, delete the copyright.
For the drop shadow on evertying I am using the following settings:
Verticle: 3, Horizontal: 3, Opacity: 70, Blur: 6, color black. (you use what ever you want)
(*Resize everything before you start copy and pasting)
Paper 1 (resize 75%)
Paper 3 (resize 75%)
Paper 9 (resize 75%)
Paper 12 (resize 75%)
Paper 13(resize 75%)
Bow 2 (resize 62%)
Button 1 & 2 (resize 26%)
Halloween doodle (resize 68%)
Skull (resize 68%)
Spider (resize 26%)
Spider web 4 (resize 68%)
Swirl 5
Witch tube: Blend to Luminance (Legacy) drop opacity to 48%(Effects, plugins, xero,
radiance on these settins: Strangeness 128, Charm 50, Truth 128, Beauty 200)
You can always refer to the sample for placement of anything!
Click on the triangle 1, selections, select all, float, defloat, invert, copy and paste
paper 3, arrange over the triangle and hit delete on the keyboard.
Effects, plug ins, Eye candy 4000, gradient glow.
Now add your gradient glow on these settings:
Glow width 3.00
Soft Corners 25
Overall Opacity 100
Draw only outside selection checked.
Under color tab, use black for the color. Drag one slider half way across the bar.
Click ok. Add your dropshadow. Delete the grey triangle.
Click on the Oval, selections, select all, float, defloat, invert, copy and paste paper 12
arrange over the oval and hit delete on the keyboard.
Effects, plug ins, Eye candy 4000, gradient glow.
Now add your gradient glow on these settings:
Glow width 3.00
Soft Corners 25
Overall Opacity 100
Draw only outside selection checked.
Under color tab, use black for the color. Drag one slider half way across the bar.
Click ok. Add your dropshadow. Delete the grey oval
Click on triangle 2, selections, select all, float, defloat, invert, copy and paste
paper 13, arrange over the triangle and hit delete on the keyboard.
Effects, plug ins, Eye candy 4000, gradient glow.
Now add your gradient glow on these settings:
Glow width 3.00
Soft Corners 25
Overall Opacity 100
Draw only outside selection checked.
Under color tab, use black for the color. Drag one slider half way across the bar.
Click ok. Add your dropshadow. Delete the grey triangle.
Click on square 1, selections, select all, float, defloat, invert, copy and paste paper 9.
Arrange over the square, copy and paste the witch tube, arrange where you like, then
hit delete. Select the paper layer and hit delete again. Selections, select none. Delete the grey square
Effects, plug ins, Eye candy 4000, gradient glow.
Now add your gradient glow on these settings:
Glow width 3.00
Soft Corners 25
Overall Opacity 100
Draw only outside selection checked.
Under color tab, use black for the color. Drag one slider half way across the bar.
Click ok. Add your dropshadow.
Click on square 2, selections, select all, float, defloat, invert, copy and paste paper 1.
Arrange over the square, and hit delete. Selections, select none. Delete the grey square
Duplicate the witch and mirror. Drag over to square 2 and position in the square.
Effects, plug ins, Eye candy 4000, gradient glow.
Now add your gradient glow on these settings:
Glow width 3.00
Soft Corners 25
Overall Opacity 100
Draw only outside selection checked.
Under color tab, use black for the color. Drag one slider half way across the bar.
Click ok. Add your dropshadow.
Copy and paste the tube, add drop shadow.
From here all you do is add the elements where you choose, follow my example for placement
if you want it to look exactly like mine.
Using the dropper, Take the color from the orange square for the name. Type out
the name, effects, plugins, eyecandy 4000, gradient glow on these settings:
Glow width 3.00
Soft Corners 25
Overall Opacity 100
Draw only outside selection checked.
Under color tab, use black. Drag one slider half way across the bar.
Click ok. Add dropshadow
I resized mine to 500 pixels. Add your copyright.
Save and you are done! Simple and easy.
I would love to see what you made!
Thank you for following my tutorial! If you have any questions please email me at
kissnjoe@yahoo.com!
Here is a preview of the scrap kit I used for this tutorial
Saturday, September 18, 2010
PTU Tutorial ~ Falling into Autumn

For this tutorial you will need the following:
Scrap kit: PTU kit Falling for Autumn by Creative Scraps by Crys HERE
Tube: The Fabulous Art work by Elias Chatzoudis HERE
You must have a license to use his work
Template by Kelly at Creative Misfit Creations HERE
My Supplies: HERE
Plug-ins:
Eye candy 4000: Gradient glow
Font Used: FTU font Nicholas
♥ Let's Get started! ♥
Open the template in psp, delete the copyright and all the stars.
For the drop shadow on evertying I am using the following settings:
Verticle: 3, Horizontal: 3, Opacity: 70, Blur: 6, color black. (you use what ever you want)
(*Resize everything before you start copy and pasting)
Paper 2 (resize 53%)
Paper 3 (resize 53%)
Paper 4 (resize 75%)
Paper 9 (resize 53%)
Paper 11(resize 75%)
Bow 2 (resize 74% and free rotate 90%)
Berries (resize 60% erase the vine on the bottom. Flip and free rotate to the lft 40%)
Leaf (resize 14%)
Leaf 2 (resize 12%)
Leaf 3 (resize 12%)
Leaf 4 (resize 16%)
Leaf 5 (resize 10%)
Twinkles (resize 68%)
Close up tube: Blend to Luminance (Legacy) drop opacity to 75%(Effects, plugins, xero,
radiance on these settins: Strangeness 128, Charm 50, Truth 128, Beauty 178)
You can always refer to the sample for placement of anything!
Open the supplies and copy and paste below the last layer on the template.
Add drop shadow. select the bottom ring, selections, float, defloat, invert, copy and paste
paper 4, hit delete on the keyboard. With your dropper tool pick up the dark red/brown color
from paper 3. Effects, plug ins, Eye candy 4000, gradient glow.
Now add your gradient glow on these settings:
Glow width 3.00
Soft Corners 25
Overall Opacity 100
Draw only outside selection checked.
Under color tab, use the red/brown color. Drag one slider half way across the bar.
Click ok.
Click on the top grey box, selections, float, defloat, invert, copy and paste paper 9.
Arrange over the square, copy and paste the tube, arrange under the frame where you like, then
hit delete. Select the paper layer and hit delete again. Selections, select none. Delete the grey square
Follow the same steps for the middle and last squares, using paper 3 for the middle and
paper 2 for the last.
Click on the first white frame, Using the red/brown color click on manual color correction
and change to the red brown color. Adjust, add noise, use these settings:
Uniform, monochrome, Noise 45%. Effects, gradient glow on these settings:
Glow width 3.00
Soft Corners 25
Overall Opacity 100
Draw only outside selection checked.
Under color tab, use the red/brown color. Drag one slider half way across the bar.
Click ok. Add your dropshadow. Apply the same steps to the other 2 frames.
Copy and paste the berries, drag under the frames, See the sample for placement. Add dropshadow,
duplicate, flip and drag below the grey rectangle.
click on the grey rectangle, selections, select all, float, defloat, invert, copy and paste
paper 3, arrange above the rectangle, hit delete on the keyboard. Delete the grey rectangle.
Add the drop shadow. Copy and paste the leaves, and arrange them where you like. See sample
for placement otherwise.
Copy and paste the twinkles, place where you like, add drop shadow.
Copy and paste the tube, add drop shadow.
Using the dropper, Take the orange color from the bottom square for the name. Type out
the name, effects, plugins, eyecandy 4000, gradient glow on these settings:
Glow width 3.00
Soft Corners 25
Overall Opacity 100
Draw only outside selection checked.
Under color tab, use the red/brown color. Drag one slider half way across the bar.
Click ok. Add dropshadow
I resized mine to 500 pixels. Add your copyright.
Save and change pixels to 72 DPI and you are done! Simple and easy.
I would love to see what you made!
Thank you for following my tutorial! If you have any questions please email me at
kissnjoe@yahoo.com!
Scrap kit: PTU kit Falling for Autumn by Creative Scraps by Crys HERE
Tube: The Fabulous Art work by Elias Chatzoudis HERE
You must have a license to use his work
Template by Kelly at Creative Misfit Creations HERE
My Supplies: HERE
Plug-ins:
Eye candy 4000: Gradient glow
Font Used: FTU font Nicholas
♥ Let's Get started! ♥
Open the template in psp, delete the copyright and all the stars.
For the drop shadow on evertying I am using the following settings:
Verticle: 3, Horizontal: 3, Opacity: 70, Blur: 6, color black. (you use what ever you want)
(*Resize everything before you start copy and pasting)
Paper 2 (resize 53%)
Paper 3 (resize 53%)
Paper 4 (resize 75%)
Paper 9 (resize 53%)
Paper 11(resize 75%)
Bow 2 (resize 74% and free rotate 90%)
Berries (resize 60% erase the vine on the bottom. Flip and free rotate to the lft 40%)
Leaf (resize 14%)
Leaf 2 (resize 12%)
Leaf 3 (resize 12%)
Leaf 4 (resize 16%)
Leaf 5 (resize 10%)
Twinkles (resize 68%)
Close up tube: Blend to Luminance (Legacy) drop opacity to 75%(Effects, plugins, xero,
radiance on these settins: Strangeness 128, Charm 50, Truth 128, Beauty 178)
You can always refer to the sample for placement of anything!
Open the supplies and copy and paste below the last layer on the template.
Add drop shadow. select the bottom ring, selections, float, defloat, invert, copy and paste
paper 4, hit delete on the keyboard. With your dropper tool pick up the dark red/brown color
from paper 3. Effects, plug ins, Eye candy 4000, gradient glow.
Now add your gradient glow on these settings:
Glow width 3.00
Soft Corners 25
Overall Opacity 100
Draw only outside selection checked.
Under color tab, use the red/brown color. Drag one slider half way across the bar.
Click ok.
Click on the top grey box, selections, float, defloat, invert, copy and paste paper 9.
Arrange over the square, copy and paste the tube, arrange under the frame where you like, then
hit delete. Select the paper layer and hit delete again. Selections, select none. Delete the grey square
Follow the same steps for the middle and last squares, using paper 3 for the middle and
paper 2 for the last.
Click on the first white frame, Using the red/brown color click on manual color correction
and change to the red brown color. Adjust, add noise, use these settings:
Uniform, monochrome, Noise 45%. Effects, gradient glow on these settings:
Glow width 3.00
Soft Corners 25
Overall Opacity 100
Draw only outside selection checked.
Under color tab, use the red/brown color. Drag one slider half way across the bar.
Click ok. Add your dropshadow. Apply the same steps to the other 2 frames.
Copy and paste the berries, drag under the frames, See the sample for placement. Add dropshadow,
duplicate, flip and drag below the grey rectangle.
click on the grey rectangle, selections, select all, float, defloat, invert, copy and paste
paper 3, arrange above the rectangle, hit delete on the keyboard. Delete the grey rectangle.
Add the drop shadow. Copy and paste the leaves, and arrange them where you like. See sample
for placement otherwise.
Copy and paste the twinkles, place where you like, add drop shadow.
Copy and paste the tube, add drop shadow.
Using the dropper, Take the orange color from the bottom square for the name. Type out
the name, effects, plugins, eyecandy 4000, gradient glow on these settings:
Glow width 3.00
Soft Corners 25
Overall Opacity 100
Draw only outside selection checked.
Under color tab, use the red/brown color. Drag one slider half way across the bar.
Click ok. Add dropshadow
I resized mine to 500 pixels. Add your copyright.
Save and change pixels to 72 DPI and you are done! Simple and easy.
I would love to see what you made!
Thank you for following my tutorial! If you have any questions please email me at
kissnjoe@yahoo.com!
Here is a preview of the kit I used

Subscribe to:
Posts (Atom)
About Me
- Crys
- I am a SAHM of 2 very active kids and a Wife to a wonderful man. I also take care of my grandma who lives with us...so yep I am a busy girl...lol, I started out as a tagger almost 4 yrs ago and then I started making templates and writing tutorials, one day I decided I wanted to try my hand at making scrap kits...and almost 2 years later, I am still making them. I have met a lot of amazing people along the way that have helped and given me support through-out all of this. Big hugs and thanks! Well that is about it, if you want to know more...just shoot me an email!
My Scrap Blog

Snag My Blinkie
