My Visitors

Subscribe Here


 Posts
All Comments
Posts
All Comments
New PTU Tut - Uptown Girls

For this tutorial you will need the following:
Scrap Kit: PTU Uptown Girls by Me HERE
Tube: The Fabulous Art work by Ismael Rac HERE
(*Note you need a license number to use his work)
Word Art Supplied HERE
Plug-ins: (Optional)
Eyecandy 4000: Gradient glow, and glass
Font Used: Inspiration
♥ Let's Get started! ♥
In Psp Open new layer 800x800 transparent checked.
For the drop shadow on evertying I am using the following settings:
Verticle: 3, Horizontal: 3, Opacity: 70, Blur: 6, color black. (you use what ever you want)
(*Resize everything before you start copy and pasting)
Open your scrap kit and select:
Paper 5 (resize by 86%)
Paper 12 (resize by 86%)
frame 1 (resize by 120%)
Branch (free rotate by 40%)
Building (resize by 64%)
Car 2 (resize 72%)
Diamond accent 2
Feather 4
Ice bucket 2 (resize 46%)
Moon (resize 82%)
Plant (resize 64%)
Stars 2 & 4 (resize by 82%)
Wine glass (resize by 46%)
You can always refer to the sample for placement of anything!
We are going to start with the frame. So copy and paste your frame to the new layer. It
should be in the middle. With your magic wand tool, click inside the frame, selections,
modify, expand by 6. Selections, invert. Now copy and paste paper 12 and drag it below your
frame. Hit delete on the keyboard.
Copy and paste the branch, add dropshadow, adjust it below the frame, copy and paste the feather in front of
the branch, add dropshadow See example for placement.
Copy the moon and place it below the frame layer and adjust to the left top corner. Erase any
part of the moon that is seen on the outside of the frame (if any), add dropshadow.
Copy and paste the building and arrange to the lower left side behind the frame. with your magic wand tool, click inside each window. (to allow each window to be selected hold down shift each
time you click in a window) Selections, modify, expand by 6, selections, and invert. Copy and
paste paper 5 drag below the building and hit delete on the keyboard. With your selected tube
before copy and pasting, image, mirror, then copy and paste below the building above the paper
layer. Hit delete on the keyboard, now your tube should only show through the windows. Here you can either leave the paper the color it is or you can add a yellow tint to it. I added a yellow
tint to mine. select the paper layer click on manual color correction and change it to a yellow
hue. Back on the tube, change the blend mode to Luminance (L). Still on the tube layer, effects
plug-ins, xero, radiance on these settings:
Strangeness 128
Charm 50
Truth 128
Beauty 155
Click ok. This step is optional, you do not have to use plugins. Add dropshadow to the building.
Copy and paste the black stars. Move to the top right corner above the frame layer.
I erased the smallest stars so it fit right. Add dropshadow. Copy and paste
the pink stars and move to the top right and do the same thing with erasing the stars. Add
dropshadow. (see sample for placements).
Copy and paste the tube. I used xero radiance on it as well. This is Optional also. Use the
following settings for radiance:
Strangeness 128
Charm 50
Truth 128
Beauty 155
Click ok. Add dropshadow. Now you just have to copy and paste the rest of the elements as I did
My tutorials are just a guideline to follow, make your tag how you like it. You can use what
ever elements you would like. If you are following my sample. Then you would copy and paste
the car above the tube. Add dropshadow. Copy and paste the plant to the left bottom side
above the frame. Add dropshadow. Copy and paste the ice bucket and the wine glass. Add
dropshadow to both and arrange in front of the plant, (see sample for placement). Copy and
place the diamond accent below the car and plant. Add dropshadow. Add your dropshadow to the frame also. In my supplies I have the word art. If using the word art, then copy and paste
the word art and arrange to your liking. Add your dropshadow.
Using what ever font you choose, add your name. I used the darker pink color from the feather.
If you would like the black line around the name like mine, then add a gradient glow. Effects,
plugins, eyecandy 4000, gradient glow on these settings:
under Basic tab
Glow Width 3.09
Soft Corners 25
Overall opacity 100
Under color tab
Black for the color
move an addition slider to 1/4 of the way down the bar. Click ok, add dropshadow.
Crop and resize. I resized mine to 500. Add your copyright and license number if using a PTU tube. Save and you are done! Simple and easy. I would love to see what you made!
Thank you for following my tutorial! If you have any questions please email me at
kissnjoe@yahoo.com!
Here is a version using a PinUp Toon...


New PTU Tut - Wicked Ways

Scrap Kit: PTU Wicked Ways by Kara @ Sweet Cravings Scraps HERE
Tube: The Fabulous Art work by Mark Wasyl HERE
(*note- you must have a license number to use his work)
Mask: Vix mask #400 HERE
Plug-ins: (Optional)
Eyecandy 4000: Gradient glow
Font Used: Free font The King and Queen Font
♥ Let's Get started! ♥
In Psp Open new layer 600x600 transparent checked.
For the drop shadow on evertying I am using the following settings:
Verticle: 3, Horizontal: 3, Opacity: 70, Blur: 6, color black. (you use what ever you want)
(*Resize everything before you start copy and pasting)
Open your scrap kit and select:
Paper 19 (resize by 86%)
Metal Butterfly 3 (resize by 22% & free rotate left 22%)
Metal Plate Word Art (resize by 72%)
Moon (resize by 56%)
Paint splatter 2
Rose 5 (resize 46%)
Satin ribbon curl 4 (resize 46% & flip)
You can always refer to the sample for placement of anything!
Copy and paste paper, Layers, Load Saved Mask, Mask from disk, choose the mask you wish
to use. Click ok and in the layer pallatte, right click on paper and merge group.
Copy the moon and paste. Move closer to the top. Still on the moon layer selections, float,
defloat, invert. Copy and paste the larger version of your tube and arrange to where you
like it, hit delete on the keyboard. Change blend mode to Luminance (L) and drop Opacity to
36%. Copy and paste Metal plate word art and adjust to the bottom of the moon, but make sure
it is above the moon layer. (on top of the moon) See the sample for placement. Add dropshadow.
Copy and paste the rose. Drag it below the moon layer, and position to the right side as shown
on the sample. Duplicate it and mirror it. Place it on the left side. Add your dropshadow.
Copy and paste the ribbon, drag below the metal plate word art. Add dropshadow. Copy and paste
the paint splatter. Postition to the top right side of the metal plate word art, allowing some
to overlap onto the moon. Add dropshadow. Copy and paste the butterfly, position on the
bottom right side on top of the metal plate. Add drop shadow. Copy and paste the tube and
move to the left side of the tag. Resize to fit. I did not have to resize mine. Add your
dropshadow. The font I used is a free font, but you can use what ever font for the name.
I selected a purple from the tube. I also added Noise to mine, this is optional, but if you
want to use noise, adjust, add noise, then use these settings:
Uniform checked
Monochrome checked
54%
I then added a gradient glow. Again this is optional. Effects, Plugins, Eyecandy 4000,
Gradient glow on these settings:
Under the Basic tab:
Glow Width 3.00
Soft Corners 25
Overall Opacity 100
Draw only outside section checked
Under the color tab:
color black and move a second slider about half way down the bar.
Click ok. Add your dropshadow.
Crop and resize. I resized mine to 500. Add your copyright. Don't forget license info if using a PTU tube. Save and you are done! Simple and easy. I would love to see what you made!
Thank you for following my tutorial! If you have any questions please email me at
kissnjoe@yahoo.com!
PTU tutorial - Beautiful Day
 For this tutorial you will need the following:
Scrap Kit: PTU Beautiful Day by Kara HERE
(The fairy is by MediEvil and is included in the kit please read separate TOU for her cookie)
Template by Crys HERE
Plug-ins: (Optional)
Eyecandy 4000: Gradient glow
Font Used: The Nautigal
♥ Let's Get started! ♥
In Psp Open the template. Image, canvas size, change to 800. Click ok. Delete copyright
and the wordart. Delete the small rectangle and dotted line under the small rectangle.
For the drop shadow on evertying I am using the following settings:
Verticle: 3, Horizontal: 3, Opacity: 70, Blur: 6, color black. (you use what ever you want)
(*Resize everything before you start copy and pasting)
Open your scrap kit and select:
Paper 2 (resize by 70%)
Paper 3 (resize by 70%)
Paper 6 (resize by 70%)
Paper 14 (resize by 70%)
Bag (resize by 24%)
Butterfly swarm (resize 48%)
Crazy mushroom patch (resize by 28%)
Fantasy sparkles (resize by 64%)
Flower 4 (resize 33%)
Flower 5 (resize 43%)
Heart Doodle (resize by 70%)
Start at the bottom in the layer palatte, select the bottom circle, selections, select all,
float, defloat, invert, copy and paste paper 3, hit delete on the keyboard. Effects, plugins,
eyecandy 4000, gradient glow on these settings:
Glow Width: 3
Soft Corner:25
Overall opacity 100
Color Dark Brown
move a second slider half way. Click ok.
Duplicate circle, mirror, and adjust to the right side. Delete both grey circles. Add your
drop shadow to both circles.
Click on the other circle, selections, select all, float, defloat, invert, copy and paste
paper 2, hit delete on the keyboard. Now if you want to add the text in the background like I
did then you need to pick a font you like ( I used The Nautigal) on size 28. (readjust the
size to your liking), type the words you want ( I used So Magical) in black. Convert to
a raster layer. Add drop shadow. Effects, plugins, Mura's Meister Copies on these settings:
on the bottom left there is a drop down box, select tiling. Now to the center middle drop
down boxes,
Top one: line
middle: tile
bottom: (blend mode)
Sliders to the right,
Number: 1
Shift X 50
shift y 50
Scale : 100
Tile gap 2
Dont change anything else. Click ok.
Now back on the circle, selections, select all, float, defloat, invert, click back on the
words, and hit delete. Now your words should be in the same shape as the circle. Change blend
mode to Luminance (L) Opacity on 40.
Back on the Circle, Effects, plugins,eyecandy 4000, gradient glow on these settings:
Glow Width: 3
Soft Corner:25
Overall opacity 100
Color Dark Brown
move a second slider half way. Click ok. Add drop shadow.
Select the long shape that runs down the circle. Selections, select all, float, defloat, invert,
copy and paste paper 14, click delete on the keyboard. Add drop shadow, and delete the grey layer
Select the rectangle, Selections, select all, float, defloat, invert, copy and paste paper 6,
click delete on the keyboard. Add drop shadow, and delete the grey layer
Now see the example for placement of the elements. Copy and paste the bag, and move it to
the left side just above the rectangle. Add drop shadow. Copy and paste the butterfly swarm
add drop shadow, copy and paste the heart doodle, place it near the bottom left of the circle,
duplicate, flip, mirror and then place it on the top right side of the circle. Add your drop
shadow to both of the heart doodles. Copy and paste flower 5 move to the right side,
add drop shadow, copy and paste flower 4 adjust, add drop shadow. Copy and paste fantasy
sparkles adjust to your liking. Copy and paste the crazy mushroom patch, move in front of
the flowers. Copy and paste the Cookie (or your tube of choice). If using the cookies from
the kit please use this copyright... ©MediEvil Creations. Add you drop shadow.
Add your name. I took 2 colors from the cookies dress and made a gradient with it, then I used
the font The Nautigal. The next steps are optional... Ajust, add noise, with these settings:
Uniform checked
Noise: 56
Monochrome checked
Effects, plugins,eyecandy 4000, gradient glow on these settings:
Glow Width: 3
Soft Corner:25
Overall opacity 100
Color Dark Brown
move a second slider half way. Click ok. Add drop shadow.
Crop and resize. I resized mine to 500. Now add your copyright info.
Save and you are done! Simple and easy. I would love to see what you made!
Thank you for following my tutorial! If you have any questions please email me!
FTU Tut...Jacob's Desire
 For this tutorial you will need the following:
I've used a PTU tube by Eugene Rzhevskii. You can purchase his art HERE
(*Note you must have a license to use his art)
Scrap Kit and Template: FTU Souls Desire (Eclipse of the Heart Blog train) by Crys HERE
Mask 119 by Weescotslass HERE
Plug-ins: (Optional)
Eyecandy 4000: Gradient glow, and glass
Eyecandy 5 rust
♥ Let's Get started! ♥
In Psp Open the template. Image, canvas size, change to 800. Click ok.
For the drop shadow on evertying I am using the following settings:
Verticle: 3, Horizontal: 3, Opacity: 70, Blur: 6, color black. (you use what ever you want)
(*Resize everything before you start copy and pasting)
Open your scrap kit and select:
Paper 1
Paper 8 (resize by 90%)
Grass
Moon 2 (resize 120%)
Pebbles
Pine Tree 2
Twigs (resize 78%)
Wolf 2 (resize 68% free rotate left 10%)
Copy and paste paper 1 and drag below the template to the bottom layer, Layers, load saved mask,
apply mask. Drop opacity to 53%.
Copy and paste the moon over the circle layer, Add drop shadow to the moon.
Delete the circle layer.
Select the cliff layer and selections, select all, float, defloat, invert, copy and paste
paper 8. Hit delete on the keyboard. Selections, select none. Delete the cliff template.
Add drop shadow to the cliff.
Copy and paste the wolf, arrange at the top of the cliff. Add drop shadow.
Copy and paste the tree, see example for placement. Add drop shadow.
Select the small rock layer, effects, plugins, Eye candy 5 nature, rust on these settings...
Under the settings tab, select Medium Orange High coverage
Under Basic tab:
Feature Size 60.01
Coverage 81
Soften spots 0
Texture variation 89
Rust color dark grey
Draw water streaks NOT checked.
Seamless tile NOT checked.
Random seed 1987
click ok.
Add your drop shadow.
Copy and paste the pebbles and drag below the small rock layer, see example for placement.
Add drop shadow.
Copy and paste the grass, arange in front of the small rock and tree. Add drop shadow.
Copy and paste the twigs, add drop shadow and see example for placement.
Copy and paste your tube of choice. Resize if need be and place where you think it looks best.
Add your drop shadow. with your move tool, drag the word art up to the top right corner.
For the word art, I took the green and the brown from the kit. click on the word art and then
click on manual color replacement. Change the color to your choice.
On the word Naked, Change it to green using the manual color replacement. Effects, plugins,
eye candy 4000, glass with these settings:
Under settings tab, select glass tube. drag the bevel width until you are satisfied with it.
click ok. effects, plugins, eye candy 4000, gradient glow with these settings:
Under basic tab:
Glow width 3
Soft corners 25
Overall opacity 100
Under the color tab:
change color to the brown move a second slider half way across. Click ok.
Hide all layers except all the word art, right click in the layers palatte on one of the
word art, merge, merge visible.
Selections, select all, float, defloat, modify, expand by 5. Add a new raster layer, flood
fill with white, adjust, add noise with these settings:
Uniform checked.
Noise 68%
Monochrome checked,
Drag below the word art and add drop shadow. Unhide everything. Add your name, I used the
cream color from the kit. Add noise on these settings:
Uniform checked.
Noise 48%
Monochrome checked.
Effects, plugins, eye candy 4000 gradient glow on these settings:
Under basic tab:
Glow width 3
Soft corners 25
Overall opacity 100
Under the color tab:
change color to the brown move a second slider half way across. Click ok. Add drop shadow.
See example on where to place the name.
Crop and resize your tag. I resized mine to 500. Now add your copyright and license number if using a PTU artist. And you are done!
Thank you for following my tutorial. I would love to see what you made!
FTU Tutorial - It's a Party!
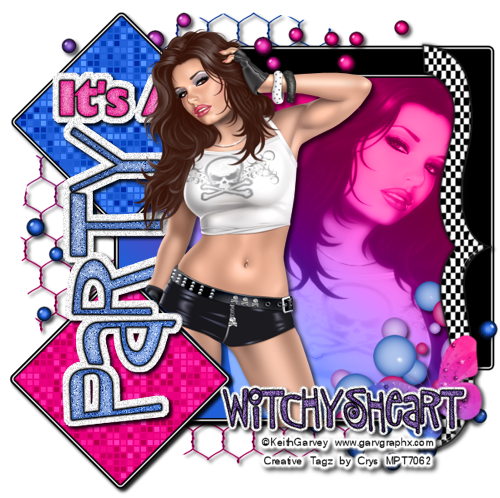 Hi Everyone! I wrote another tutorial, this time I am using my It's a Party Scrap kit! I just love the colors in it!
 I've used a PTU tube by Keith Garvey. You can purchase his art HERE
(*Note you must have a license to use his art)
Scrap Kit: FTU It's a Party scrap kit by Crys HERE
Template by Crys HERE
Plug-ins: (Optional)
Eyecandy 4000: Gradient glow, and glass
Xero: Radiance, and fritillary
Font Used: Sniplash
♥ Let's Get started! ♥
In Psp Open the template.
For the drop shadow on evertying I am using the following settings:
Verticle: 3, Horizontal: 3, Opacity: 70, Blur: 6, color black. (you use what ever you want)
(*Resize everything before you start copy and pasting)
Open your scrap kit and select:
Balloon rainbow 2 (resize 70%)
Bracket (free rotate right 90%)
Butterfly 4 (resize 40%, free rotate left 15%)
Circle Wire
sprinkles 1 (resize 78%)
Copy and paste the circle wire, drag to the bottom adjust so you can see it on the left side.
See example for placement. Add your drop shadow.
Leave the black square, black click effects, plugins, gradient glow Using these settings:
Glow width: 5
Soft Corners: 25
Overall opacity: 100
Draw only outside selection: checked
Click on color and make the first slider white, add a second slider and make it black.
Opacity set to 100. Click ok. Add your drop shadow.
Copy and paste the sprinkles, drag it just above the bottom black square. Adjust to your liking,
duplicate, mirror, and move to the bottom right corner. See example for placement. Add you
drop shadow.
I used the pink and the blue color from the kit, by taking the dropper tool and picking up the colors
from the sprinkles. Select the large grey square, selections, select all, float, defloat,
add a new raster layer, and flood fill with a gradient from the blue and pink colors you selected.
Select none, and delete the grey square. Copy and paste the close up of the tube, (if using
the same tube that I am, then click on image, mirror then resize by 82%) Adjust it to the right
side of the square. Click on the square, selections, select all, float, defloat, invert, select
the close up tube, and click delete. Effects, xero, radiance with these settings...
Strangeness: 128
Charm: 50
Truth: 128
Beauty: 255
Click ok. On the layers palatte change the blend mode to Luminance (L) and adjust opacity to 52.
Copy and paste the balloon rainbow and adjust above the tube on the bottom right. Check the
example for placement. Add your drop shadow, then click on the square again and selections
select all, float, defloat, invert and click back on the balloons and hit delete on your
keyboard.
Back on the gradient square, effects, plugins, eyecandy 4000, gradient glow. Use these settings...
Glow width: 5
Soft Corners: 25
Overall opacity: 100
Draw only outside selection: checked
Click on color and make the first slider black, add a second slider and make it white, and
make the third slider black. Opacity set to 100. Click ok. Add your drop shadow.
Select the top diamond shape, click on manual color correction, change the diamond to the blue
color. Effects, plugins, xero, fritillary on these settings...
Granularity: 8
Aggression: 30
Tesselation: 100
Variation: 61
Now click ok, Effects, plugins, eyecandy 4000, gradient glow on these settings:
Glow width: 5
Soft Corners: 25
Overall opacity: 100
Draw only outside selection: checked
Click on color and make the first slider black, add a second slider and make it white, and
make the third slider black. Opacity set to 100. Click ok. Add your drop shadow.
Select the bottom Diamond, click on the manual color correction, change the diamond to pink,
and repeat the steps above.
Click on the words "IT's A" and click on manual color corrections and change to pink, effects,
plugins, eyecandy 4000, glass on these settings...
Click on the settins in the "glass" box and click on glass tube, on the basics tab...
Bevel Width 31.70
Smoothness 100
Inside Marquee checked
Edge Darkening 25
Gradient shading 0
Refraction 50
Opacity 80
Tinting 5
Click ok, click on adjust, add noise on these settings...
Uniform checked
Noise 36
Monochrome checked.
Effects, plugins, eyecandy 4000, gradient glow on these settings...
Glow width: 5
Soft Corners: 25
Overall opacity: 100
Draw only outside selection: checked
Click on color and make the first slider black.
Click ok.
On the word Party Follow the same steps as above only changing it to blue.
Hide everything except the wordart and merge visible. Selections, float, defloat,
modify, expand by 6. Add a new raster layer and flood fill white.
click on adjust, add noise on these settings...
Uniform checked
Noise 48
Monochrome checked.
Drag below the wordart and add your drop shadow. Unhide everything.
Copy and paste the bracket, see example for placement, copy and paste the butterfly and
arrange on top of the bracket on the bottom. Copy and paste your tube,add your drop shadow
(if using the same tube as I am then resize it by 80% and follow the next steps.)
Erase the parts of the tube that overlap the bottom diamond. To erase the tube, I select
the diamond, selections, select all, float, defloat and then erase any part of the tube
I don't want to show. Follow the same directions on the word art so the tube doesn't cover
the a in the word party. See example.
Now all that is left is to add your name and copy right info. For the name... effects,
plugins, eyecandy 4000, glass on these settings...
Click on the settins in the "glass" box and click on glass tube, on the basics tab...
Bevel Width 31.70
Smoothness 100
Inside Marquee checked
Edge Darkening 25
Gradient shading 0
Refraction 50
Opacity 80
Tinting 5
Click ok, click on adjust, add noise on these settings...
Uniform checked
Noise 36
Monochrome checked.
Effects, plugins, eyecandy 4000, gradient glow on these settings...
Glow width: 5
Soft Corners: 25
Overall opacity: 100
Draw only outside selection: checked
Click on color and make the first slider black and make the second slider white. Add your
drop shadow.
Now crop and resize your siggy. I always resize mine to 500.
Add your copyright info and license number if using a PTU tube. I always add a gradient
glow to the copyright info that way it can be used on any color of background and the copyright
will still show up.
I hope you enjoyed my tutorial! Remember tutorials are just guidelines, make it your own and
have fun with it! I would love to see what you made! So either leave me a link where I can see
it or send me an email with it! I have a slide show and would love to show it off!
Thank you and have a great day!
FTU tutorial - Hotter than a Firecracker
 For this tutorial you will need the following:
I've used a PTU tube by PinUp Toons. You can purchase his art HERE
(*Note you must have a license to use his art)
Scrap Kit: FTU Hotter than a Firecracker kit by Stormy and Crys HERE
Template by Crys HERE
Plug-ins: (Optional)
Eyecandy 4000: Gradient glow, and glass
Font Used: Nadall
♥ Let's Get started! ♥
In Psp Open the template. Delete the word art.
For the drop shadow on evertying I am using the following settings:
Verticle: 3, Horizontal: 3, Opacity: 70, Blur: 6, color black. (you use what ever you want)
(*Resize everything before you start copy and pasting)
Open your scrap kit and select:
Paper 6 (resize by 62%)
Paper 10 (resize by 62%)
Firecracker 2 (resize by 36% free rotate right 28%)
Firecracker 3 (resize by 36% free rotate left 20%)
Metal Stars 2
ss fireworks (resize by 22%)
ss fireworks 2 (resize by 38%)
ss glitter swirl 3 (free rotate right 15%)
ss wire 2 (resize 78% & flip)
ss wordart 2 (resize to your liking)
Copy and paste the metal stars, drag to the bottom layer. Add drop shadow. Copy and paste ss fireworks 2
adjust under the firecracker template. Select the circle layer, selections, select all,
float, defloat, add a new raster layer, flood fill with white. Selections, select none.
delete the grey circle layer. Now we are going to add the gradient glow around the circle.
This is optional, if you do not have this plug in, don't worry, you don't have to use it.
If you are going to use it... Effects, plugins, eyecandy 4000, gradient glow on these settings..
Glow Width 6.77
Soft Corners 25
Overall Opacity 100
Draw only outside selection checked
Under the color tab
using blue for the first tab, white half way out on the second slider, and red all the
way to the end. (adjust to your liking)
Click ok. Add your drop shadow.
copy and paste ss wire 2 place over the white circle layer. Adjust to where you like it,
you can use the example for placement. Add your drop shadow.
select the square behind the firecracker template, selection, select all, float, defloat, invert
copy and paste paper 10, press the delete button on your keyboard. Delete the grey square
and add your gradient glow, only change it so the blue and the red are reversed. Add drop shadow
Select the bottom layer of the firecracker template, click on manual color correction and
change it from grey to a darker red color. Adjust, add noise, on these settings...
Uniform checked
48%
monochrome checked
Click ok and add your drop shadow.
On the star layer of the firecracker, go to adjust, add noise, and use the same settings as
above, only change the % to 86%. Add your drop shadow. Click on the oval top part of the
firecracker and change it to red as you did before with the manual color changer. Select
wick, effects, plugins, eyecandy 4000, glass. Leave all the settings the as is, only click
on settings, and select glass tube adjust the width until you like it, and click ok. Add your
drop shadow to it.
Click on the rectangle layer, selections, select all, float, defloat, invert, copy and paste
paper 6 and press delete on your keyboard. Delete the grey rectangle and add your gradient glow
as before on the white circle. Add your drop shadow.
Select one of the star templates, selections, select all, float, defloat, add a new raster layer
and flood fill with a red white and blue gradient. Delete the grey layer star and add your
gradient glow to the star, same as the white circle. Add your drop shadow, now right click on
the star in the layer palatte, and duplicate it. Move it over the other star and delete that
grey template too. Copy and paste ss fireworks and move to the top left corner of the red
rectangle.
Copy and paste ss glitter swirl 3 and adjust so it sets over both stars. Add your drop shadow
Copy and paste ss wordart 2. make sure it fits over the stars, with the stars still
showing. Use the example for exact placement. Add your drop shadow.
Copy and paste both firecrackers and adjust to your liking on top of the wordart.
Add drop shadow to both. Add your Tube, if using the same one I am, then resize it by 86%.
Add your drop shadow, if using a different tube, adjust and resize accordingly. Now add your
name to it and your copyright info! Don't forget your copyright info and license number if using
a PTU tube! Resize and you are done. I resize mine to 500 wide.
This tutorial is just a guide! Have fun and add what you want to yours, if you do follow the
tutorial, please leave me a link where I can see it or email me with it! I would love to see
your work! Thank you so much!

PTU Tutorial - Slumber Party

Scrap Kit: PTU kit Girls Just Wanna Have Fun by Kara @ Sweet Craving Scraps HERE
My Supplies HERE
Plug-ins: (Optional)
Eyecandy 4000: Gradient glow
Font Used: LDJ Jilly Nilly
♥ Let's Get started! ♥
In Psp Open the slumber party template from my supplies,
For the drop shadow on evertying I am using the following settings:
Verticle: 3, Horizontal: 3, Opacity: 70, Blur: 6, color black. (you use what ever you want)
(*Resize everything before you start copy and pasting)
Open your scrap kit and select:
Papers 1, 3, & 4 (resize 68%)
Bead splatter (resize 64%)
Candle 1 (resize 12%)
Floating Feathers (resize 68%)
Happy Star (resize 26%)
lollipop 1 (resize 18%)
Maze Effect 4 (resize 48%)
Pillow 1 (resize 40%)
Ribbon 3 (resize 48%)
Sleeping Moon (resize 54%)
Teddy Bear 1 (resize 40%)
Word art 4 (resize 18%)
Blynkyn (cookie) (resize 28%)
Wynkyn (cookie) (resize 34%)
Copy and paste the bead splatter, drag below the template. Copy and paste the maze element
and arange above the bead layer, but under the template. Move to the top left corner (see
the sample for placement) Duplicate and move to the lower right corner of the tempalte.
In the layers palatte, select the long rectangle on the bottom, Selections, select all, float,
defloat, invert, copy and paste paper#1 (orange), hit delete on keyboard. Selections,
invert, over the orange layer in the layer palatte, right click, new raster layer. Flood
fill with a darker orange color, with the move tool, move the dark orange rectangle up and
to the right, click delete. (It will leave just a thin boarder of dark orange) Move it back
into the rectangle and then click adjust blur, gaussian blur on 4. Again over the orange layer in the
layer palatte, Right click, new raster layer. Flood fill with the same darker orange color,
with the move tool, move the dark orange rectangle down and to the left, click delete.
(It will leave just a thin boarder of dark orange) Move it back into the rectangle and then
click adjust blur, gaussian blur on 4.
Repeat all of the steps above with the middle rectangle, using paper #4 (blue).
Repeat all of the same steps as above with the top rectangle, using paper #3 (pink).
Compare with the example.
Copy and paste the moon, Drag it down below the template, image, free rotate, to the left,
18%. Adjust to your liking. copy and paste
the star to the right of the moon. Copy the party word art, and place it above the template,
Copy and paste Cookie blynkyn and mirror, adust her on the middle rectangle. Copy and paste
pillow, arange the pillow to the left of the cookie beside her. Duplicate the pillow and drag
it to the bottom in front of all the rectangles. Copy and paste cookie wynkyn and place her on
the smallest rectangle in front (see example for placement). Copy and paste the feathers.
Erase some of the feathers so they are only in certain spots. (see example)
Copy and paste the teddy bear and arrange it on top of the pillow, making him look
like he is leaning against the bottom rectangle. Copy and paste the ribbon and move it
behind the teddy bear and rectangle. Copy the lollipop and place it behind the teddy bear,
image, free rotate, to the right, 18%. Copy and paste the candle position next to the cookie
wynkyn and duplicate, drag up to place beside blynkyn. (See example for placement).
Add your drop shadow to everything. Resize to your liking. I resized mine for Cafemom size
(450). Add your copyright, if using the cookies provided in the kit, please use @Medievil
Creations. Add the name you want. If you want it to look like the example, then you would
add a gradient glow to it with these settings:
Glow Width 3
Soft Corners 25%
Overall Opacity 100
Color: White & a pink from the paper. Click ok. And you are done!
Thank you for following my tutorial! I hope you had fun! I would love to see anything you
make, just send it to me in an email and I will added it to my slide show!
Here is the same siggy with different tubes. Just to show you can use different tubes!

PTU Tutorial - A fairytale

 This had to be resized to fit the blog, please click on the tag to view the copyright info.
For this tutorial you will need the following:
I've used a PTU tube by Elias Chatzoudis. You can purchase his art HERE
(*Note you must have a license to use his art)
Scrap Kit: PTU kit A Fairytale by Chassity @ PolkaDot Scraps HERE
Plug-ins: (Optional)
Eyecandy 4000: Gradient glow, Glass
Xero: Radiance
Font Used: Natural Script
Pink color used: de4c6a
♥ Let's Get started! ♥
This Tutorial is for both the Avi and the Siggy, We are starting with the siggy first.
In Psp Open new layer 500x200, make sure it is on 72 DPI and trasparent is checked.
For the drop shadow on evertying I am using the following settings:
Verticle: 3, Horizontal: 3, Opacity: 70, Blur: 6, color black. (you use what ever you want)
(*Resize everything before you start copy and pasting)
Open your scrap kit and select:
E2 Castle (resize 18%)
E5 Dragon (resize 12%)
E6 Tree branch w/ swing (resize 28%)
E11 Hills (resize 70%)
E12 Clouds (resize 32%)
E13 Flowers (resize 38%)
E14 Fence (resize 78%)
E34 Beads (resize 48% & free rotate 45% to the left)
E45 Knight (resize 12%)
P 1 Sky paper
On blank layer, selections, select all, modify, contract by 8, flood fill with pink.
Effects, plugins, Eyecandy, glass with these settings:
Click on Settings Tab, click glass tube
settings should be:
Bevel width 14.40
Smoothness 100
Edge Darkness 25
Gradient shade 0
refraction 50
Opacity 80
Tinting 5
Click ok. Adjust, add noise with these settings:
Uniform checked
32%
Monochrome checked.
Effects, plugins, gradient glow at these settings:
Glow Width 3
Soft Corners 25
Overall opacity 100
click on color, use black.
copy and paste paper, move below border, copy and paste green beeds, using the sample, position
in the top middle. Copy and paste the hills, move down to bottom where just the tops
of the hills are showing. Copy and paste the clouds and position where you are happy. Copy
and paste the castle. Move it to the middle of the hill, copy and paste the knight, move
in front of the castle. Copy and paste the dragon, mirror, move to the left side on top
of the hill. Copy the tree branch/swing and paste, move the branch to just under the border
Copy and paste the flower, move to the bottom of the tag, copy and paste the fence and
move it to the bottom. Check with the sample to verify placement.
Copy the Tube and paste, Move to the right side. Effects, plugins, xero, radiance with these
settings:
Strangeness 128
Charm 50
Truth 128
Beauty 140
In layer palatte, drag one of the tubes down to the bottom and position behind the hill to
the right of the other tube. With blend mode, change to luminance (L) at 28% opacity.
Add your drop shadow to everything.
Add your Name to the siggy, if you want to do the same as I did, type the name, then use
the same glass effect as above on the border, add noise with same settings as above. For
the gradient glow, use the same settings as above, only add another slider in white. Add
your drop shadow.
Add your copy right to the tag and you are done with the siggy...Now on to the AVI...
♥ Let's Get started! ♥
In Psp Open new layer 150x150, make sure it is on 72 DPI and trasparent is checked.
For the drop shadow on evertying I am using the following settings:
Verticle: 3, Horizontal: 3, Opacity: 70, Blur: 6, color black. (you use what ever you want)
(*Resize everything before you start copy and pasting)
P1 sky paper
E11 Hills (resize 70%)
E34 Beads (resize 48% & free rotate 45% to the left)
On blank layer, selections, select all, modify, contract by 8, flood fill with pink.
Effects, plugins, Eyecandy, glass with these settings:
Click on Settings Tab, click glass tube
settings should be:
Bevel width 14.40
Smoothness 100
Edge Darkness 25
Gradient shade 0
refraction 50
Opacity 80
Tinting 5
Click ok. Adjust, add noise with these settings:
Uniform checked
32%
Monochrome checked.
Effects, plugins, gradient glow at these settings:
Glow Width 3
Soft Corners 25
Overall opacity 100
click on color, use black.
copy and paste paper, move below border, copy and paste green beeds, using the sample, position
in the top middle. Copy and paste the hills, move down to bottom where just the tops
of the hills are showing.
Copy and paste your tube, position to the right side.
Effects, plugins, xero, radiance with these
settings:
Strangeness 128
Charm 50
Truth 128
Beauty 140
Add your drop shadow to everything.
Add your initial as above,
then use
the same glass effect as above on the border, add noise with same settings as above. For
the gradient glow, use the same settings as above, only add another slider in white. Add
your drop shadow.
Add your copyright info and save!
I hope you had fun following my tutorials, if you get the time, please share. I will add
it to our slide show! Thank you for stopping by!
PTU Tutorial - Who's the Frog
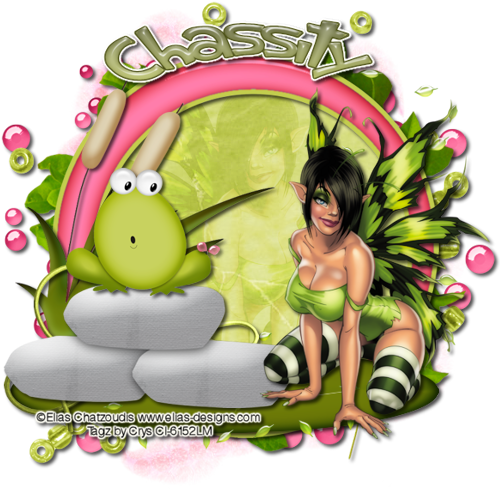
For this tutorial you will need the following:
I've used a PTU tube by Elias Chatzoudis. You can purchase his art HERE
(*Note you must have a license to use his art)
Scrap Kit: PTU kit Lilly Pad by Chassity @ PolkaDot Scraps HERE
Mask: I used mask #414 by Vix you can get it HERE
Plug-ins: (Optional)
Eyecandy 4000: Gradient glow, Glass
Xero: Porcelain, Radiance
Font Used: Shark Random Fun
♥ Let's Get started! ♥
In Psp Open new layer 600x600, make sure it is on 72 DPI and trasparent is checked.
For the drop shadow on evertying I am using the following settings:
Verticle: 3, Horizontal: 3, Opacity: 70, Blur: 6, color black. (you use what ever you want)
(*Resize everything before you start copy and pasting)
Open your scrap kit and select:
Frame 4 (resize by 78%)
Paper 11 (resize by 72%)
Paper 1
Element 2 (resize 45%)
Element 6 (flip)
Element 7 (resize 78%)
Element 10 (resize 68%)
Element 20 (resize 74%)
Element 28 (resize 52%)
Element 31 (resize 89%)
Element 39
Element 40
Copy and paste paper 11, apply vix mask 414. Copy and paste the frame, with the magic wand
click inside the frame, selections, modify, expand by 6. Selections, invert and copy and
paste paper 1, click delete on the keyboard.
Copy and paste element 39, move below frame. and arrange where you like it, same with
element 40. Copy and paste the cirlce of leaves, move below the frame.
Copy and paste the tube of choice below the frame. with the magic wand, click in the center
of the frame, selections, modify, expand by 6, selections, invert. Click on tube again and
hit delete button. (next step is optional) Effects, plugins, xero, radiance with these settings:
Strangeness 128
Charm 50
Truth 128
Beauty 255
still on the tube, in the layer palatte, blend mode, soft light, at 66%.
Copy and paste the lilly pad and arrange it at the bottom of the frame, copy and paste the
small scattered leaves, see the sample for placement on the elements. Copy and paste the
rocks, copy and paste the cattails behind the rock, now copy and paste the frog, place him
on top of the rock. Copy the ribbon and place it behind the rock, again see the sample for
details. Copy and paste the tube, mirror, arrange her to be on the right side, sitting on the
lilly pad. (next step is optional) on tube layer still, Effects, plug ins, xero, porcelain,
on these settings:
Strength 128
Softness 27, Brightness 128
Add drop shadow to all the elements and tubes. Add your copyright info. Now for adding
the text on a curve.
click on the reset shapes and select ellipse. Select the circle and draw out a circle a
little bigger than the frame. Do not convert to raster, leave as a vector. Right click
on the vector circle and add a new raster layer. With your text tool, click at the top of
the vector circle and type the name. Convert to a raster layer. Delete the vector circle
and extra raster layer. (next steps are optional)
With the font layer selected, effects, plugins, eyecandy, glass, click on settings, click on
snow, and then click ok. Next...effects, plugins, eyecandy, gradient glow, choose a dark
green and then with a second slider, move it 1/4 of the way across the bar, then move another
slider down 3/4 of the bar and make it white. Click Ok. Add your drop shadow. If you need
to, crop and resize.
There ya go, one new siggy! I hope you enjoyed the tutorial! If you do it, I would love to
see the results. Thank you!
FTU Tutorial ~ Buried Treasure
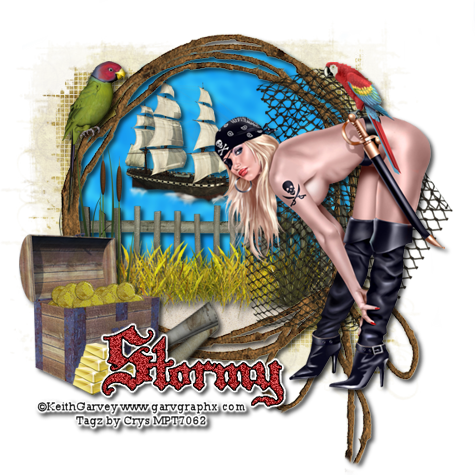
For this tutorial you will need the following:
I've used a PTU tube by Keith Garvey. You can purchase his art HERE
(*Note you must have a license to use his art)
Scrap Kit: Buried Treasure by Stormy @ Sinfully Creative Scraps HERE
Mask: I used mask #404 by Vix you can get it HERE
Plug-ins:
Eyecandy 4000: Gradient glow
Font Used: Rapscallioin
♥ Let's Get started! ♥
In Psp Open new layer 600x600, make sure it is on 72 DPI and trasparent is checked.
For the drop shadow on everything I am using the following settings:
Vertacle: 3, Horizontal: 3, Opacity: 70, Blur: 6, color black. (you use what ever you want)
Open your scrap kit and select:
Rope frame
Paper 1 resize by 78%
Paper 4 resize by 68%
Parrot resize by 40%
Net (do not resize)
Grass (do not resize)
Fence (do not resize)
Treasure Chest (resize 78%, mirror)
Reed (resize 36%, mirror)
Bar of Gold 1 (resize 36%, mirror)
Tall grass 3 (resize 36%)
Ship 2 resize (44%)
Scrolls (resize 36%, free rotate 20%)
Copy paper 4 and add mask. Copy and paste the rope frame to the 600x600 raster layer.
Erase the end of the ropes so they do not go below the bottom.
Copy paper 1 and paste behind the rope frame. Erase
any paper that appears outside the frame. See sample for detail. Next copy and paste the fence
arrange to your liking and erase any part of the fence that appears outside the frame. Paste the
grass and adjust,erasing anything outside the frame. Copy and Paste the boat just above the fence
(see sample for example) now with your eraser,
erase some bottom edges of the boat to make it look like it is actually in the water.
Copy and paste the Reed, Move it to the far left side of the fence. Arrange to above the
frame. Copy and paste the treasure chest, move to the left side, copy and paste the gold bar
and move to in front of the treasure chest. Copy and paste the parrot. Arrange on the
left side of the frame. Copy and paste tall grass, move to the right side of the frame.
Copy and paste the net and adjust on the right side of the frame. You can keep checking the
sample for placement. Copy and paste the scrolls and place over the frame on the bottom by
the treasure chest.
Copy the tube you are using and paste it to the right side adjust to look good.
Make sure you add your drop shadow to the elements and the tube.
All you have to do is add your name. If you want your text to stand out like the one I did,
after typing out the name, Convert to a raster then click on adjust add noise, with these settings:
Uniform checked, Noise at 64%, and monochrome checked.
Now if you want to use the Gradient Glow for around the text, go to effects, plug-ins,
eyecandy, gradient glow on these settings:
Glow width 3, soft corners 25, Overall opacity 100, click on color tab, with these settings:
make the first slider black and then make a second slider with black and move it 1/4 of the way out
make a third slider and make it white. Move it to the half way point and then click ok. Add
your drop shadow and your copyright info. Click on the crop tool and crop the siggy.
Now resize it to your liking then add your copyright information if needed.
I hope you enjoyed my tutorial! Thank you
PTU Tutorial - Queen of Hearts
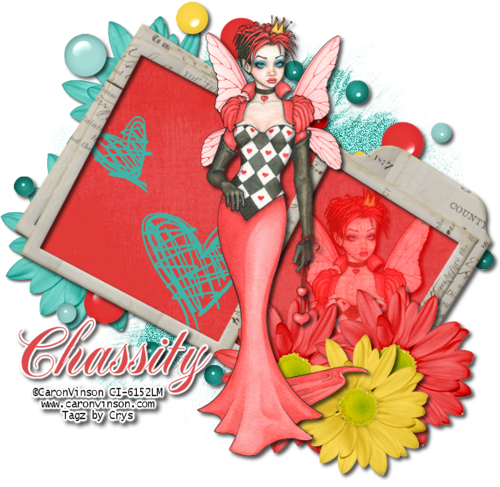
For this tutorial you will need the following:
I've used a PTU tube by Caron Vinson. You can purchase her art HERE
(*Note you must have a license to use her art)
Scrap Kit: Rain Drops Made by Chassity at PolkaDot Scraps you can find it HERE
Mask: I used mask #349 by Vix you can get it HERE
Plug-ins:
Eyecandy 4000: Gradient glow
Font Used: Notnorval HmkBold
♥ Let's Get started! ♥
In Psp Open new layer 600x600, make sure it is on 72 DPI and trasparent is checked.
For the drop shadow on evertying I am using the following settings:
Verticle: 3, Horizontal: 3, Opacity: 70, Blur: 6, color black. (you use what ever you want)
Open the scrap kit, and open the following elements, papers, and frame:
Paper #2
Paper #9
Frame #3
Element #19 (bubbles)
Element #20 (scribble hearts)
Element #46, 47, & 48 (flowers)
With the hand tool, copy and paste paper #9, Go to layers, load save mask, find your mask and apply,
merge as group. Resize 78%. Adjust, add noise with these settings:
Uniform checked, 63, MOnochrome checked.
Copy and paste the frame layer above the mask. Resize by 82%, image, free rotate
to the right by 36. Copy paper 2, paste it below the frame layer.
with the magic wand on the frame layer, click inside both the frame openings,
selections, modify, expand by 4. Selections, invert. click on paper 2 layer and hit delete.
Now you have nothing outside the frame.
Copy and paste element #19 resize by 78% arange to the left side of the frame
(see the example for placement) Duplicate, flip, and mirror. Arrange to your liking.
Copy and paste element #46 resize by 72% position under the bubble layer, duplicate readjust.
see the sample for placement.
Copy and paste element #47. Resize by 64% organize at the bottom right corner of the frame.
Duplicate and move just beside the first one.
Copy and paste element # 48, resize by 56%. position on top of the red flowers.
copy and paste scribble hearts, resize by 78%, drag below the frame layer. See the sample
for positioning.
Copy the tube and position on top, duplicate and drag below the frame layer. With the magic
wand on the frame layer, click in the box on the right, selections, modify, expand by 4.
Selections invert. Click on the tube layer (below the frame) hit delete. On the same tube
layer, effects, xero, radiance on these settings:
Strangeness 128
Charm 50
Truth 128
Beauty 112
click ok. still on the tube layer with blend mode, use Overlay.
Add your drop shadow to everything.
Now for the name. You can use what ever font you like, I used a color from the tube for the
name. On the name I used eyecandy Gradient glow on these settings:
Glow width 3
soft corners 25
overall opacity 100
Color white
add another bar and drag it half way across, click ok. Add your drop shadow.
Add your copyright and resize to your liking!
Thank you for following my tutorial! I would love to see anything you made.
Puppy Love Tutorial
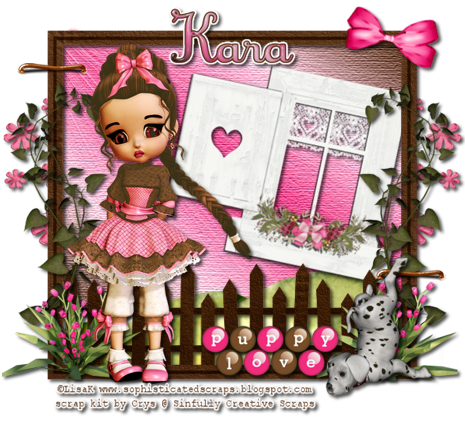
This tutorial is for someone with the basic knowledge of PSP
For this tutorial you will need the following:
Tube -- Included in the kit copyright is ©Lisa K www.sophisticatedscraps.blogspot.com
Plug-ins:
Eyecandy 4000: Glass and gradient glow
Texture: Texturizer
Scrap Kit: Made by Me, you can find it on my scrap blog Sinfully Creative Scraps HERE
(Scroll down a bit to find it)
Font Used: Crusif for the name. Size 48
♥ Let's Get started! ♥
In Psp Open new layer 600x600, make sure it is on 72 DPI and trasparent is checked.
For the drop shadow on evertying I am using the following settings:
Verticle: 3, Horizontal: 3, Opacity: 70, Blur: 6, color black. (you use what ever you want)
Open Fence Frame, copy, and paste as a new layer. Resize 82% make sure to uncheck all layers.
With the magic wand select inside the frame (make sure to get spaces between the fences too).
Select, modify, expand by 2. New raster layer, flood fill with gradient I used with these settings:
Dark Brown #563118, Dark Pink #fb4992, and Light pink #f4d6de. Click on gradient in your color
pallate click on edit and use these settings:
Dark pink should be in the middle at 50%, light pink outside of that sitting one to the right
at 24% amd 26%. the outside will be the dark brown will be at 2% and 98%. Save it and close. Make
angle at 38, repeats 0, invert checked. click ok.
Flood fill the new raster layer and drag under the fence frame. Add the texturizer effect (you don't
have to do this step. It just makes the background look like a canvas) With these settings:
Texture: Canvas, Scaling 100, and relief 4, light direction Top, invert unchecked. Click ok.
still on the gradient, effects, Illumination effects, sunbursts on these settings:
Color white, Brightness 0, horizontal 0, verticle 0, Density 90, brightness 70, circles 30,
repeats 0 invert checked. Click ok.
Now start adding your elements. Open the kit, select the window, the girl, any puppy, the brown staple,
bright pink bow, puppy love word art (I chose the M&M one), some greenery, and the medium color
pink flower spread. the grassy hill, and the pink flower plant. Resize them as needed. I resized
the window at 76%, the staple, puppy love word art, and the puppy at 40% and so on. Make the tag
your own. To create the look I have, copy the grassy hill and place behind the frame. Erase
antyhing that is outside of the frame. Copy and paste the window. Image, free rotate 12%. adjust
where you want it. Copy and paste the greenery and duplicate, and then mirror.
Position on each side of the frame. Copy and paste the staple duplicate and position them on
each side of the frame. refer back to the preview for placement. Copy and paste the plant
duplicate and position. Copy and paste flowers 3 and drag to the bottom, position to where
you can see it to the left side of the frame between the leafs. Duplicate and mirror.
Repostion if needed. Copy and paste the girl and the puppy. Mirror the puppy and postion to
the right and move the girl to the left. copy and paste the puppy love word art and move move down
in front of the fence. Add the bow. Resize and rotate 12%. Add your drop shadow to everything.
Add your copy right to the siggy. Now before you add your name, crop to remove excess canvas.
Now with the same gradient as above, add your name, effects, plug-ins, eye candy 4000, glass, on these settings:
click on settings in glass and pick Glass tubing. Leave everything the same, change the color to
the dark pink color. Click ok. Effects, plug-ins, eyecandy 4000 gradient glow, use white and
click ok. Add drop shadow. Resize all layers to your desired size.
*Make sure you can see the copy right clearly.
Save as a PnG and you are done!
Misfit Mafia Tutorial
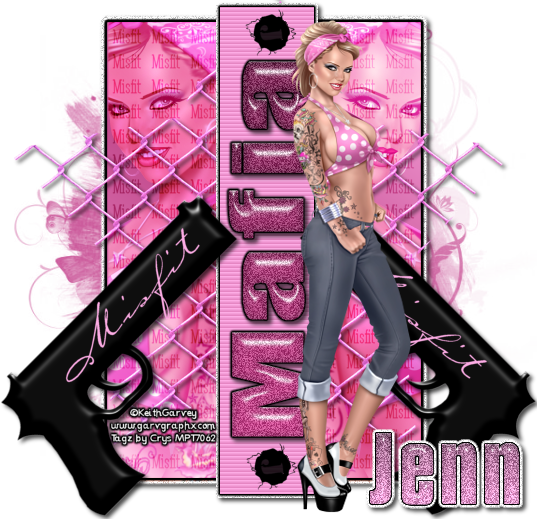
For this tutorial you will need the following:
Tube -- "Billie" by Keith Gavey which you can purchase at MPT HERE.
You MUST have a license to use this image. Please do not use it without one.
Plug-ins:
Eyecandy 4000: Glass and gradient glow
Mask by Vix (mask #362) HERE
Scrap Kit Use: Made by Jamie for Creative Misfits blog train
You can get it HERE (it is Scrap kit challenge 4)
Font Used: Carpenter ICG and Mobsters
♥ Let's Get started! ♥
Open the template in PSP.
Open the tube you are going to use.
pick 2 colors that compliment each other. Here are the colors I used...
Dark Pink: #cd5c9d
light pink: #fdace5
for the gadient use these settings:
Angle 38
Repeats 1
check invert
On the bottom rectangle, select all, float, defloat, add new raster layer,
flood fill the new raster layer with the gradient. Delete grey layer
Click on the misfit words layer change blend mode, I used overlay.
from your tube, use the close up and copy and past as a new layer over the
rectangle (uncer the word art) Use what ever blend mode you like, I used luminance (L)
then adjust the opacity to what ever you think looks good. Mine is set on 39.
Duplicate the tube, adjust, mirror. reposition if you have to so it is the same as
the other side.
Click on the Rectangle layer again, Effects, Plug-Ins, Eyecandy 4000, Gradient Glow
Use these settings:
Glow Width 3.00
Soft Corners 25
Overall opacity 100
Draw only outside selection checked
Color black move a second slider almost half way across, click ok
Still on the rectangle, selections, select all, float, defloat, new raster layer,
selections, modify, expand by 4, click ok
flood fill with white, adjust, add noise with these settings:
Uniform checked, 94, monochrome checked, click ok
Add your drop shadow. Move layer under your pink rectangle layer.
click on the narrow rectangle, flood fill with the lighter pink color. Effects,
texture effects, blinds with these settings:
Width 4
Opacity 40
Color Use the Dark pink color
Horizontal and light from left/top checked
Click ok
Add same gradient glow as above. Selections, float defloat, new raster layer,
flood fill with white as before use the same noise settings, drop shadow, move
layer down one.
On the guns, (use for both guns)Effects, Plug-ins, Eyecandy 4000, Glass,
with these effects:
click on settings (in the glass pop up box) click on Snow
Settings should automatically be set at these:
Bevel width 14.40
Smoothness 100
inside marquee checked
Edge darkening 40
Gradient Shading 50
Refraction 50
Opacity 60
tinting 40
Change glass color to black (left click on the box and choose black, ok.
Click ok.
click on the word art Mafia layer
Selections, float, defloat, add a new raster layer, flood fill with
the Dark pink color
delete the black word art
Back on the mafia layer, effects, plug-ins, Eye Candy 4000, glass,
Use the same settings as the used on the guns, only use the dark pink color
instead of the black. Adjust, add noise, same settings as above, only drop the number
to 40. Effects, Eye candy 4000 Gradient Glow, use the same as above. Add your
drop shadow.
If you want to add the word misfit to the guns like I did, I used the light pink
font: Carpenter, on size 48. Type out what you want, adjust the size, click image
free rotate, click on right, type in 45, click ok. convert to a raster layer.
Do the same for the other gun, only check left in the free rotate.
Add your tube to the top layer. Add your drop shadow and adjust to where you want it.
(you may have to resize the tube some.)
at the bottom, add a new raster layer, drag to the bottom, flood fill with dark pink
color add your mask. Merge group.
Add any elements you want to use from the scrap kit, I used the star wire and recolored it
Use the same glass effect as above and then add noise same as above. Add the gradient
glow with black, then add the same gradient glow with white. With the magic wand
click on the white area around the name so all the white is selected. Add the same noise.
selections, select none. add your drop shadow
All that is left to do is add your copyright info and resize if needed!
Thank you for following my tutorial, I would love to see anything you make!
Beach Babe

This tutorial is for someone with the basic knowledge of PSP
For this tutorial you will need the following:
Tube -- "Donatella" by Elias Chatzoudis which you can purchase at MPT HERE.
You MUST have a license to use this image. Please do not use it without one.
Beach Babe Template and Swirly Mask by Me HERE.
Scroll down until you find the template and masks.
Plug-ins:
Eyecandy 4000: Glass and gradient glow
Eyecandy 5 Nature: Ripple
Xero: Fritillary
Mura Miesters clouds
Font used: PeaAmiee it is a free font, you can download HERE
You will need to scroll down to find the font.
Lets get started...
Open the template in PSP, Delete the copyright. Pick your tube you are going to use the
same tube that I am using, make sure you have the proper licensing to use it.
We are going to start at the bottom, so on the right side in the layer pallate click on
raster layer 2, In the color pallate, Right click on foreground, and then click on light
grey. For the background (you can choose any color of blue), left click on the
background pallate and in the HTML box type in 86d3fc, click ok.
Click on the manual color correction (next to Enhance Photo).
Manual Target Color checked, right click on source and pick the light grey color. Right click on Target
and select the blue color. Hue on 143, Saturation on 90, and Lightness on 193
Click on ok.
Click on Effects, Eyecandy 4000, glass, click on selection, glass tube, then at the bottom
click on the blue square. click Ok.
Effects, 3D, dropshadow (you can use what ever dropshadow you want) Verticle 3, horizontal 3
Opacity 71, blur 6, color black. click ok.
In layer pallate click on the bottom circle, then up to selections, select all, float,
defloat, in the layer pallate, right click on the circle and select new raster layer. Then use
the dropper tool and take the green out of the glasses. In the background
box left click and type in the HTML box f2f7e7 this is a lighter green (you can pick your own
color) On the foreground color, click on the little black circle and change it from a solid
color to gradient and use these settings: Angle 38, Repeats 0
Click on edit. Move the bar on the dark green to the outside edges (both left and right) with
the light green in the center. Click save as and then name it, save, and click close. Click ok.
With the flood fill tool left click on the circle. Selections, select none. Click on Effects,
plugins, Eyecandy 4000 gradient glow, Glow Width move the bar all the way to the left, Soft corners
on 25, overall opacity all the way to the right. Click on color tab, left click on the color box
and change to black. Left click on first slider and drag a second one out about half way. Click ok.
Click on effects, 3D, add your dropshadow. Now delete the grey circle layer.
Click on the next circle layer above in the layer pallate. Selections, select all, float, defloat.
On the layer pallate right click on the circle layer and click new raster layer. With your
dropper tool pick up the pink color in the swim suit (or if using a different tube pick up
color out of the tube.) With the dropper tool, pick up an orange shade from the glass. On the foreground
color, click on the little black circle and change it from a solid
color to gradient and use these settings: Angle 38, Repeats 0. Click on edit. Move the foreground in towward
the center about a quarter inch do the same with the background color. In the center click just
under the bar and another tab will show up, change the custom to white. Click save as and name it.
Click close and then click ok. On the new raster layer cirlce flood fill with the new gradient. Selection,
select none, Click on Adjust,add noise, Click Uniform, Click Monochrome, move the slider to 67, click ok. Effects, Gradient glow
with the same settings as before, click on the color box and change to white. Click ok. Effects, 3D,
add dropshadow.
In the layer pallate, click on the rectangle, selections, float, defloat, back to layer pallate and
right click on the rectangle, click new raster layer. For these colors I picked a color from the hair,
and orange from the glass again. Click on gradient, flood fill. Select none. Effects, xero,
fritillary with these settings: Granularity 7, Aggression 30, Tesselation 100, variation 91, click ok
add dropshadow. Right click on grey rectangle and delete.
Left click on the top circle, selections, float, defloat, In the color pallate left click on foreground
type in the HTML box 86d3fc (or pick a blue shade of your choice). Flood fill new raster layer with
the blue, selections, select none, effects, Eyecandy Nature, ripples with these settings:
click on basic, Ripple generator, raindrops, number of rain 1, ripple wavelength 42.68, time 7.26,
random wave amplitude 0, random wave length 1.49, refraction 7, Uncheck Draw outside selection.
click ok. Effects, Eyecandy 4000, gradient glow, choose a dark blue and when you have it the way you
like it, click ok.
Click on the sun in the layer pallate, selections, select all, float, defloat, With dropper tool
pick up a lighter orange out from the slice of orange in the glass for the foreground and a darker
ornage color from the slice of orange for the background color. flood sun with foreground
color, effects, MuRas meister, clouds, click the reset colors button with the following settings:
Effect 100, amount 100, grain 3, Contrast 0, Bias 0, Light -12, Cubic 0, blur 0, contour 0, make
sure its on blend mode. click ok. Selections, select none. Effects, Eyecandy 4000, glass on these settings:
click on settings click glass tube, Bevel Width 5.39. Nothing else is changed. change the glass color box to the
foreground color. Click ok. Add drop shadow of choice. In the layer pallate delete the black
sun.
In the layer pallate click on the word art, Selections, select all, float, defloat. right click on
the word art in the layer pallate, new raster layer. In the color pallate, click on the foreground,
click on gradient, and scroll through until you find the gradient called mulit-aqua. on the settings:
Angle 38, repeats 0, invert checked, click ok. With the paint bruch tool, Paint the gradient across the word art.
Selections, select none. Effects, Eyecandy 4000, glass on these settings: Bevel width 11.37,
smoothness 75, inside marquee checked, Edge darkening 1, gradient shading 35, refraction 50,
Opacity 0, tinting 50, for the glass color, left click in the box and pick a light blue color or
a sea foam green color, click ok. Effects, Eyecandy 4000, gradient glow, use the same settings
as previously used, for the color select white. Click ok. If you want your text to look exactly
like mine then follow the next step, if you are happy with it the way it is, then add drop shadow
of your choice click ok...or with your magic wand click on just the white outline (make sure
all of the white outline is selected. Click Adjust, add noise, use these settings: Uniform checked,
monochrome checked, 89, click ok. Selcections, select none. Add your dropshadow. Right click on the black word art in the layer pallate, delete layer.
Add your tube of choice and resize to fit. I resized mine at 78%. Dropshadow of your choice.
Now you can add any other elements you would like to.
Now we are going to add your name with the font of your choice, using the gradient we used with
the word art. right click on name in layer pallate, convert to a raster layer. Effects, Eyecandy
4000, glass, use the same settings as before in the word art, click ok, Effects, Eyecandy 4000,
gradient glow, use the same as you used before with the word art. click ok. Now you can add the same
noise or leave the way it is and just add dropshadow to the name.
If you want to add a mask you need to right click in the layer pallate and add a new raster layer,
drag it to the bottom of layers flood fill with the same gardient used in the name. Click on layers,
load saved mask, load mask from disk, select your mask. click ok, right click in layer pallate on
one of the mask layers and merge group. Effects, add noise, use same settings as above in the
word art.
Resize to your liking and then add your copyright and license info
I hope you found my tutorial easy to follow and enjoyed it! I would love to see your final results!
Welcome!
Crys
About Me
- Crys
- I am a SAHM of 2 very active kids and a Wife to a wonderful man. I also take care of my grandma who lives with us...so yep I am a busy girl...lol, I started out as a tagger almost 4 yrs ago and then I started making templates and writing tutorials, one day I decided I wanted to try my hand at making scrap kits...and almost 2 years later, I am still making them. I have met a lot of amazing people along the way that have helped and given me support through-out all of this. Big hugs and thanks! Well that is about it, if you want to know more...just shoot me an email!
My Scrap Blog

Snag My Blinkie
