My Visitors

Subscribe Here


 Posts
All Comments
Posts
All Comments
Friday, January 20, 2012
PTU tut Markin' Time

For this tutorial you will need the following:
Scrap kit: PTU kit Cops and Robbers by Sweet Cravings Scraps HERE
Font of choice, I used SC Manipulative Lovers
Tube: tube of choice, I am using the gorgeous art work of Elias chatzoudis HERE
You must have a license to use his work. (Mine was purchased at MPT)
Mask of Choice
♥ Let's Get started! ♥
Open a new raster layer at 600x600 transparent
For the drop shadow on evertying I am using the following settings:
Verticle: 2, Horizontal: 2, Opacity: 46, Blur: 6, color black. (you use what ever you want)
Remember to save as you go.
(*Resize everything before you start copy and pasting)
Paper 3 (resize 48%)
Paper 5 (resize 75%)
Paper 15 (resize 74%)
Crime Tape (resize 36%)
Frame 7 (resize 66%)
Handcuff (resize 14%)
Jail Cell (resize 78%)
Keys 2 (resize 22%)
Money Bag (resize 24%)
Sparkles 1 (resize 60%)
Wire Fence (reisze 74%)
Tube (if using the same cop tube Do Not resize)
2nd tube resize to fit in cell.
You can always refer to the sample for placement of anything!
Start by copy and pasting paper 5, apply mask. Copy and paste frame 7. Click inside the frame with
the magic wand, selections, expand by 8, and invert. Paste paper 15 and hit delete. Paste paper 3
and move to the bottom, to make it look like a cement floor. Hit delete. Copy and paste jail cell
adjust to your liking in the frame and hit delete. Selections, select none.
Now take your pen tool on width 3 and click the free hand button. with black, draw 4 lines down and
one line diagonally as in the sample. Hide everything but the lines, and merge visible. Unhide
everything and on the lines layer, duplicate 6 times, and adjust as in the sample. To make it look
like someone is marking the amount of days they have been in jail.
Copy and paste the tube you are using for the inmate. Adjust behind the cell bars. Copy and paste
the wire fence, using the pick tool, rotate to the left and place in the middle behind the papers.
copy and paste the sparkles. Duplicate and mirror.
Paste the crime tape, and move to the side of the frame. Erase the roll to make it look like it is
going behind the frame. See sample. copy and paste money bag, move to the lower left corner of frame.
Copy and paste handcuff, mirror and place by money bag. Remember to add your dropshadow to everthing.
Copy and paste the cop tube. Now you can add any word art. I used Markin' Time as the word art.
Crop and resize, I resized mine to 500. add your name,
Add the copyright info, any licenses numbers and merge visible
Save and you're done! Simple and easy.
I would love to see what you made!
Thank you for following my tutorial! If you have any questions please email me at
kissnjoe@yahoo.com!

Wednesday, January 18, 2012
PTU tut Memories of Yesterday

For this tutorial you will need the following:
Scrap kit: PTU kit Memoiries of Yesterdays by S.G. Rowe Designs HERE
Font of choice, I used Will & Grace for name and Volutes for word art
Tube: tube of choice, I am using the adorable art work of Suzanne Woolcott HERE
You must have a license to use her work.
♥ Let's Get started! ♥
Open a new raster layer at 700x700 transparent
For the drop shadow on evertying I am using the following settings:
Verticle: 2, Horizontal: 2, Opacity: 46, Blur: 6, color black. (you use what ever you want)
Remember to save as you go.
(*Resize everything before you start copy and pasting)
ts paper 13 (resize 88%)
ts butterfly 2 (resize 22%)
ts button 1 (resize 28%)
ts flower 1 (resize 34%)
ts flower 2 (resize 38%)
ts journal 1 (Do not resize)
ts vine (resize 62%)
Tube (if using the same tube Do Not resize)
You can always refer to the sample for placement of anything!
This is a very easy siggy!
paste paper 13, and apply mask, merge group. Paste the Journal. With your pick tool on the mask
layer, fit it to just outside the journal, see sample, also rotate it some to the left.
Copy and paste the vine, duplicate and mirror, on the mirrored vine, flip also, adjust to the right
just on top of the journal. On the left side, duplicate the fine again and drag below the journal.
On the top vine, erase parts so it looks like it starts out on top and then goes behind the journal
as in the sample.
Copy and paste the button, place on top of the bow.
Now you can add any word art you want. I just put in the name of the kit, because I thought it
was a pretty saying. Copy and paste the butterfly. I put it by the word art.
Copy and paste flower 1 move to the bottom left corner of journal, duplicate and move to the side.
Paste flower 2 adjust on top of other flowers, and in the center of them.
Rember to add your dropshadow as you go.
Paste your tube and adjust to the right side.
Crop and resize, I resized mine to 500. add your name, if you want the same effect on the name that
I have follow the next steps. Others wise skip to adding the copyright info.
Effects, 3D effects, inner bevel on these settings:
Bevel 2, width 20, smoothness 28, depth 20, ambience and shininess on 0,
color white, angle 42, intensity 47, and elevation 46.
If you have eyecandy 4000 you can add a gradient glow, or on the name, selections, select
all, float, defloat, modify, expand by 1. Add a new raster layer and flood fill with white
drag it below the name and add dropshadow.
Add the copyright info, any licenses numbers and merge visible
Save and you're done! See very Simple and easy.
I would love to see what you made!
Thank you for following my tutorial! If you have any questions please email me at
kissnjoe@yahoo.com!
Tuesday, January 17, 2012
PTU tut Busy Bee

For this tutorial you will need the following:
Scrap kit: PTU kit Honey Bee by Sweet Cravings Scraps HERE
Font of choice, I used WeeHah
Tube: tube of choice, I am using the adorable art work of Caron Vinson HERE
You must have a license to use her work.
♥ Let's Get started! ♥
Open a new raster layer at 700x700 transparent
For the drop shadow on evertying I am using the following settings:
Verticle: 2, Horizontal: 2, Opacity: 46, Blur: 6, color black. (you use what ever you want)
Remember to save as you go.
(*Resize everything before you start copy and pasting)
Bee Hive (resize 25%)
Bee House (resize 41%)
Cloud 1 & 2 (Do Not Resize)
Cup 2 (resize 12%)
Cute Bee 2 (resize 12%)
Fence (resize 44%)
Flower 2 (resize 22%)
Flower Cluster (resize 78%)
Frame 4 (resize 25%)
Honey Spill (resize 78%)
Tube (if using the same tube resize 78%)
You can always refer to the sample for placement of anything!
So for this siggy, we are going to be layering. We are going to start with the bottom up.
copy and paste cloud 1, move to the left side. copy and paste cloud 2 and move to the right side
copy and paste honey spill, move it to the right side over cloud 2. Remember to add dropshadow
as you go. copy and paste flower cluster. center it over the clouds. Copy and paste the fence.
Duplicate and drag it below the flower cluster, and then back on the top fence, erase anything that
covers the large flower, so it appears the flower is above the fence. Copy and paste the bee house
and using your pick tool, rotate it to the right a bit, and move to the right side of the cluster.
Copy and paste the bee hive, and move it to the right side above the bee house, see sample for placement
copy and paste frame 4 mirror, and flip, and place behind the hive. paste flower 2 and move just above
frame 4 below the hive. Duplicate and move to the left side of the hive and drag below the hive.
copy and paste the cup. place on the fence.. Copy and paste the cute bees, put one on top above
the fence and then duplicate and move by the bee house.
Now we can add the tube. If using the same tube, mirror and adjust so her hand is near the hive.
Crop and resize, I resized mine to 500. add your name,
Add the copyright info, any licenses numbers and merge visible
Save and you're done! Simple and easy.
I would love to see what you made!
Thank you for following my tutorial! If you have any questions please email me at
kissnjoe@yahoo.com!
PTU tut Winter Wedding

For this tutorial you will need the following:
Scrap kit: PTU kit Winter Wedding Collab by Kissed by Pix and Kissed by Cari HERE
Font of choice, I used Respective
Mask of Choice
Tube: tube of choice, I am using the gorgeous art work of Jennifer Janesko HERE
You must have a license to use her work. Mine was purchased at CILM but she is
at CDO.
♥ Let's Get started! ♥
Open a new raster layer at 700x700 transparent
For the drop shadow on evertying I am using the following settings:
Verticle: 2, Horizontal: 2, Opacity: 46, Blur: 6, color black. (you use what ever you want)
Remember to save as you go.
(*Resize everything before you start copy and pasting)
Paper 6 (resize 63%)
Paper 8 (resize 78%)
Paper 14 (resize 70%)
Babys breath 1 (Do Not resize)
Ballon 1 (resize 24%)
Brad ring 1 (Duplicate resize one at 80% and one at 50%)
Deco Buds 4 (resize 28%)
Deco spray 4 (resize 64%)
Gold rings (resize 16%)
Invitation (resize 50%)
Pearls 3 (resize 50%)
Silk Flowers 3 (resize 36%)
Tube (if using the same tube do not resize)
You can always refer to the sample for placement of anything!
Copy and paste paper 8 and add your mask. Copy and paste Brad ring 1 (larger one) move to the upper
left side, and using your magic wand, click inside the frame, selections, modify, expand by 8, invert
and paste paper 14. Hit delete, selections, select none. Copy and paste smaller brad ring, move it
to the lower right corner on top of the other brad. See sample for placement. Using the magic wand
click inside, selections, modify, expand by 8, invert and paste paper 6, hit delete. Paste your tube
into the smaller frame (mirror), ajusting like sample, hit delete, selections, select none.
I changed the blend mode to overlay on the tube. still on the tube...Effects, texture effects,
blinds on these settings: Width 4, Opacity 28, color brown, horizontal and light from left/top
checked. Paste tube again on top of larger frame, drag so it is above smaller frame too (hair sits on top
of smaller frame). Duplicate drag copy to below the larger frame (hide top layer tube),
erase anything hanging out of frame. Add drop shadow. Unhide top tube layer, erase everything on the
outside of the large frame so only the hair is above the small frame. (see sample)
Now you can add drop shadow to both frames.
Time to start copy and pasting the other elements to make this signature. Paste the invitation and
drag to just above the mask layer to top right of frames, copy and paste silk flower and using pick
tool, rotate slightly to the right. place above the invitation. Copy and paste the babys breath.
Erase the stem. Duplicate and use the pick tool to rotate to the right and place like sample.
Now copy and paste the Deco Spray, drag to the top layer, adjust over both frames, copy and paste the
balloon, position under the spray, copy and paste the deco buds, duplicate twice, and adjust as in the
sample. Paste the rings and adjust above the balloons and below the spray. Paste the pearls, mirror
and move to below the spray above the smaller frame. Duplicate and pull it out to the left of the
spray. Almost done now, just copy and paste the babys breath again and position with the pick tool
duplicate again and move to the bottom as in the sample.
Crop and resize, I resized mine to 500. add your name, I used a brown from the tubes hair for the color.
Add the copyright info, any licenses numbers and merge visible
Save and you're done! Simple and easy.
I would love to see what you made!
Thank you for following my tutorial! If you have any questions please email me at
kissnjoe@yahoo.com!
I also made one for Pixie too! I hope you enjoyed this tutorial!

Friday, January 13, 2012
PTU tut I Heart You

For this tutorial you will need the following:
Scrap kit: PTU kit Rions Heart by kissed by Pix HERE
Tube: tube of choice, I am using the beautiful art work of PinUp Toons HERE
You must have a license to use his work.
♥ Let's Get started! ♥
Open new raster layer 700x700 transparent and at 72 DPI
For the drop shadow on evertying I am using the following settings:
Verticle: 2, Horizontal: 2, Opacity: 54, Blur: 6, color black. (you use what ever you want)
Remember to save as you go.
(*Resize everything before you start copy and pasting)
Paper 6 (do not resize)
Paper 9b (resize 78%)
Deco Heart 1 (Do not resize)
Heart Bead Frame (Do not resize, flip)
Heart Dangles 4 (resize 46%)
Heart Line 4 (Do not resize)
Morning Glory 1 (resize 46%)
Tube (if using the same tube Do not resize)
You can always refer to the sample for placement of anything!
Copy and paste Heart Bead Frame, selections, float, defloat, expand by 2. New Raster layer, flood fill
with white, drag below frame, ajust, add noise, on these settings:
Uniform marked
Noise 74%
Monochrome checked.
Selections, select none. Selections, float, defloat, modify, expand by 3, invert,copy and paste
paper 6, hit delete.
Copy and paste Deco Heart 1, drag to bottom layer, and position to bottom left, duplicate move
to top right. Copy and paste Heart dangles 4 drag to below the white frame layer, adjust to the top, and
erase anything that hangs over the frame. Copy and paste the Morning Glory, duplicate, and mirror
adjust to the left side. copy and paste Heart line 4, adjust below the the frame, erase any parts
on the side showing.
Copy and paste the tube of choice.
Remember to add your dropshadows. Now you can add any word art you choose.
I added the phrase, I Heart You. Crop and resize, add your name and the copyright info, any licenses
you need to and merge visible.
Save and you're done! Simple and easy.
I would love to see what you made!
Thank you for following my tutorial! If you have any questions please email me at
kissnjoe@yahoo.com!
PTU tut Love Me Forever

For this tutorial you will need the following:
Scrap kit: PTU kit Ambrosia Dream by kissed by Pix HERE
Tube: tube of choice, I am using the gorgeous art work of Elias
You must have a license to use his work. My tube was purchased at
MPT but you can find his work at PTE HERE
♥ Let's Get started! ♥
Open new raster layer 650x650 transparent and at 72 DPI
For the drop shadow on evertying I am using the following settings:
Verticle: 2, Horizontal: 2, Opacity: 54, Blur: 6, color black. (you use what ever you want)
Remember to save as you go.
(*Resize everything before you start copy and pasting)
Glowing Heart paper 4 (do not resize)
Butterfly 1 (Duplicate resize one to 12% and one to 18%)
Button 2(resize 10%)
curly 2 (resize 68%)
Curly 3 (resize 20%)
Frame 1 (resize 84%)
Heart Frame 1 (resize 94%)
Rose 4 & 5 (resize 18%)
Tube (if using the same tube Do not resize)
You can always refer to the sample for placement of anything!
Copy and paste Heart Frame 1, copy and paste frame 1. Copy and paste glowing heart paper 4, with the
magic wand, click inside frame 1, selections, modify, expand by 6, invert and hit delete on the paper
layer. copy and paste the tube, duplicate and drag tube above the frame. on the bottom tube layer,
hit delete to remove any tube outside the frame. Selections, select none. On the top tube layer, erase
anyting outside the bottom of the frame, see sample.
Copy and paste curly 2 and mirror, using the pick tool, rotate so it lies on the frame as in the sample.
Erase parts of the ribbon to make it look like it wraps around the frame.
Copy and paste the larger butterfly and adjust to the side above the curly ribbon.
copy and paste rose 4 duplicate and place on the left side of the frame. Copy and paste Rose 5 and
position in between the two yellow roses. Copy and paste button 2, duplicate and adjust, see sample.
Copy and paste curly 3 and move below the blue rose, copy and paste the smaller butterfly and position
above the blue rose. Remember to add your dropshadows. Now you can add any word art you choose.
I added the phrase, Love Me Forever. Crop and resize, add your name and the copyright info, any licenses
you need to and merge visible.
Save and you're done! Simple and easy.
I would love to see what you made!
Thank you for following my tutorial! If you have any questions please email me at
kissnjoe@yahoo.com!
Friday, October 28, 2011
New PTU Tut Spooky Night

Scrap kit: PTU kit Spooky Pumpkins by Creative Scraps by Crys HERE
Tube: tube of choice, I am using the Adorable art work of PinUp Toons HERE
You must have a license number to use this tube.
Font Used: Plaid
Eye Candy 4000 Gradient Glow (Optional)
♥ Let's Get started! ♥
Open new raster layer at 800x800
For the drop shadow on evertying I am using the following settings:
Verticle: 2, Horizontal: 2, Opacity: 50, Blur: 6, color black. (you use what ever you want)
Remember to save as you go.
(*Resize everything before you start copy and pasting)
Paper 2 (resize 88%)
Element 1 (resize 34%)
Element 2 (resize 28%)
Element 3 (resize 30%)
Element 5 (resize 75%)
Element 6 (Do Not Resize)
Element 9 (resize 52%)
Element 12 (resize 20%)
Element 14 (resize 80%)
Element 15 (resize 58%)
Element 17 (resize 38%)
Element 22 (resize 66%)
Element 24 (resize 40%)
Element 25 (resize 58%)
Element 31 (resize 78%)
Element 35 (resize 78%)
Element 36 (Do Not Resize)
Element 38 (Do Not Resize)
Frame 3 (Do Not Resize)
Tube (if using the same Resize 65%)
Tube (if using the same tube Do Not Resize)
You can always refer to the sample for placement of anything!
Copy and paste paper 2. copy and paste frame 3. The next steps all go below the frame layer.
copy and paste Ele 5, drop opacity to 89%, adjust to the top right. Copy and paste Ele 14.
Add dropshadows as you go. position above the moon to the right with the branches hanging
outside the frame as in the sample. Duplicate and mirror, moving to the left side. copy and
paste Ele 35. Move so the skulls are above the tree. Copy and paste Ele 31. Move a bit to
the left just off center. Copy and paste Ele 12. place on the right arm of the scarecrow.
Copy and paste Ele 6. Move to the bottom of the frame. With the magic wand, click inside the
frame, selections, modify, expand by 6, invert. Start at the bottom with the paper, and hit
delete. Select the moon, hit delete, select the frame layer, hit delete. With the eraser,
select the right tree layer, erase the root, do the same to the left side too.
Selections, select none. The rest of the elements are on top of the frame unless directed to
place differently.
Copy and paste Ele 15, using the pick tool, rotate a bit to the left
Don't forget your dropshadows. Copy and paste Ele 9, adjust to the right tree and "hang" it
from the tree. copy and paste Ele 36. Place to the bottom right of frame. Copy and paste
the tube, position her between the rocks of ele 36. Copy and paste Ele 22. MOve
to the left side of the frame, place where the top of post is just above the fence level.
Copy and paste Ele 1,2,& 3. Arange the pumpkins as in the sample. Copy and paste Ele 24. Move
so the cat sits in between the pumpkins. Copy and paste Ele. 38, mirror and place so it
looks like the tube is sitting in a leaf pile. Erase the last leaf on the left. Now you can
add any other embelishments to your tag that you want. I added Ele 17 and duplicated. Placing
one behind the frame and paper layers to the left by the pumpkins and then to the right
behind the tombstone. I also added Ele 25. Duplicated 2 times and placed them on the bottom
layers, see sample for placement.
crop and resize. I resized mine to 500 Width.
Now add your name. I used an orange color from the kit and then added a gradient glow.
If you want to add the same follow the steps below.
settings:
Effects, plugins, Eye candy 4000, gradient glow
Glow width 3
Soft corners 25
overall opacity 100
Color black, and slide another tab to the middle.
Add your dropshadow. Add your copyrights and license for the tube.
Merge visible and save! you're done! Simple and easy.
I would love to see what you made!
Thank you for following my tutorial! If you have any questions please email me at
kissnjoe@yahoo.com!
Thursday, October 27, 2011
New PTU Tut Be Creative

Just right click and save the word art to your computer, it's saved in PNG format.

Scrap kit: PTU kit Sew Creative by Creative Scraps by Crys HERE
Tube: tube of choice, I am using the Adorable art work of PinUp Toons HERE
You must have a license number to use this tube.
Font Used: For the initial: LD Stitched and for the name: Some Weatz slanted
Eye Candy 4000 Gradient Glow (Optional)
♥ Let's Get started! ♥
Open new raster layer at 700x700
For the drop shadow on evertying I am using the following settings:
Verticle: 2, Horizontal: 2, Opacity: 50, Blur: 6, color black. (you use what ever you want)
Remember to save as you go.
(*Resize everything before you start copy and pasting)
Paper 1 (resize 75%)
Paper 3 (resize 75%)
Paper 6 (resize 75%)
Element 1 (resize 68%)
Element 3 (resize 18%)
Element 4 (resize 18%)
Element 6 (resize 18%)
Element 13 (resize 62%)
Element 15 (resize 46%)
Element 23 (resize 18%)
Element 29 (resize 74%)
Element 40 (resize 75%)
Element 41 (resize 48%)
Element 47 (resize 62%)
Frame 1 (resize 80%)
Frame 4 (resize 80%)
Tube (if using the same tube Do Not Resize)
You can always refer to the sample for placement of anything!
Copy and paste paper 6 and apply your mask of choice. Merge Group
copy and paste frame 4. With the magic wand, click inside the frame, selections, modify,
expand by 6, invert. Copy and paste paper 1, hit delete, and drag behind the frame layer. Add
your dropshadow.
Copy and paste Element 1 adjust to bottom of the frame, add dropshadow, copy and paste your
tube, adjust to sitting on the pincusion as in sample. (remember to add dropshadow as you go)
Copy and paste Ele 15, using the pick tool, rotate to the right. Drag behind the frame and paper
layers to the upper left hand side. Copy and paste Ele 47, position to the left side under
frame and paper layer, above quilt. Copy and paste Ele 40, using the pick tool rotate to
the right, move to the bottom right under the frame and paper layer. Duplicate, mirror and
rotate to the left a bit, position to the left side, see sample for placement. Copy and
paste Ele 29. Using the pick tool, rotate to the right just a bit, drag to just under ele 40 on
the right.
copy and paste Frame 1, with the magic wand click in each of the three frames, selections,
modify, expand by 6, invert copy and paste paper 3. Hit delete and drag below the frame.
Duplicate your tube, resize to make her face fit in the frame. hit delete. Selections select
none. Erase any part of her that is in the other 2 frames (keeping her face in the top frame)
Duplicate her face and mirror. Drag to the bottom frame, as in the sample. Add your dropshadow
to the frame. copy and paste Ele 18 and drag to the top chain of frame 1. Now its just copy
and pasting the rest of the elements and placing them where you like, you can use the sample
for placement. copy and paste the provided word art, or create your own.
crop and resize. I resized mine to 500 Width.
Now add your name. I used a green from the kit and then added a gradient glow. If you want
to add the same follow the steps below.
settings:
Effects, plugins, Eye candy 4000, gradient glow
Glow width 3
Soft corners 25
overall opacity 100
Color black, and slide another tab to the middle.
Add your dropshadow. I also added an initial in the empty center frame.
Add your copyrights and license for the tube.
Merge visible and save! you're done! Simple and easy.
I would love to see what you made!
Thank you for following my tutorial! If you have any questions please email me at
kissnjoe@yahoo.com!
Tuesday, October 18, 2011
PTU Tut Hope

Scrap kit: PTU kit Hope, Faith, Believe by PSPGirl HERE
Tube: tube of choice, I am using the beautiful art work of Myka Jelina HERE
You must have a license number to use this tube. (I purchased mine at CILM)
Template: Misunderstood by Me HERE
Font Used: Respective Slanted
Eye Candy 4000 Gradient Glow (Optional)
Your choice of mask
♥ Let's Get started! ♥
Open template, canvas size 750x750. Resize 600x600 Delete word art, heart skulls and
copyright info.
For the drop shadow on evertying I am using the following settings:
Verticle: 2, Horizontal: 2, Opacity: 71, Blur: 6, color black. (you use what ever you want)
Remember to save as you go.
(*Resize everything before you start copy and pasting)
Paper 6 (resize 61%)
Paper 7 (resize 61%)
Paper 8 (resize 61%)
Paper 9 (resize 61%)
Element 4 (resize 35%)
Element 5 (resize 30%)
Element 8 (resize 30%)
Element 14 (resize 50%)
Element 25 (resize 40%)
Element 37 (resize 55%)
Element 39 (resize 55%)
Element 48 (resize 55%)
Element 55 (resize 40%)
Tube (if using the same tube Do Not Resize)
Close up Tube
You can always refer to the sample for placement of anything!
On the bottom layer of template, select the 3 rectangles on the left, selections, float,
defloat, invert, copy and paste paper 6. Hit delete, selections, select none and delete
the grey template layer.
Do the same for the long black rectangle with paper 9, the 3 grey squares with paper 7 and
the circle with paper 8. Before you select none on the circle, copy and paste the close up
tube, hit delete. Selections, select none. Make sure to delete the template layers.
On the white rectangle under the 3 squares, change the color from white to black.
I added a gradient glow to the 3 rectangles on the left and to the circle with the following
settings:
Effects, plugins, Eye candy 4000, gradient glow
Glow width 3
Soft corners 25
overall opacity 100
Color black, and slide another tab to the middle.
Copy and paste Ele. 37 and using your pick tool, rotate to the left. Place to the top left
under the circle. Duplicate, and rotate as in the sample and place under the long rectangle
to the right. Copy and paste Ele. 14, place above circle layer and move slightly to the right
under the black rectangle. Change color to white, and duplicate to make brighter.
copy and paste Ele. 55, using the pick tool rotate to the left some, adjust to the top layer
and above the 3 squares. See sample for placement, duplicate, mirror and place to the low
right of the circle. Copy and paste Ele. 8. place to the lower left of circle, above ele 55
copy and paste Ele. 5. Duplicate and move to the top of Ele 55 on the left.
Copy and paste Ele. 4, using the pick tool, rotate to the left some, and place above Ele. 55
on the right. Copy and paste Ele 39, using the Pick tool rotate and drag below Ele 4.
Copy and paste Ele. 48. place to the right under Ele 4. Duplicate and mirror. Using the
Pick tool, rotate to the right and place below Ele. 8. Copy and paste the tube, move below
Ele. 4. Remember to add your dropshadow to everything. Crop and add a new raster layer, drag
to the bottom layer and flood fill with a color from the kit. Add your mask to it, and merge
Now resize. I reszied mine to 500 pixels. Now add your name. I added an inner bevel to
the name on these settings:
Width 10
Smoothness 30
Depth 16
Ambience -27
Shininess 46
Angle 135
Intensity 30
Elevation 88
color white.
Now to get the outlining of the name, selections, float, defloat, modify, expand by 2, add a
new raster layer and flood fill with a dark purple from the kit. Drag below the name.
Add your dropshadow. Add your copyrights and license for the tube.
Merge visible and save! you're done! Simple and easy.
I would love to see what you made!
Thank you for following my tutorial! If you have any questions please email me at
kissnjoe@yahoo.com!
Monday, September 26, 2011
PTU Tutorial Emo Angel
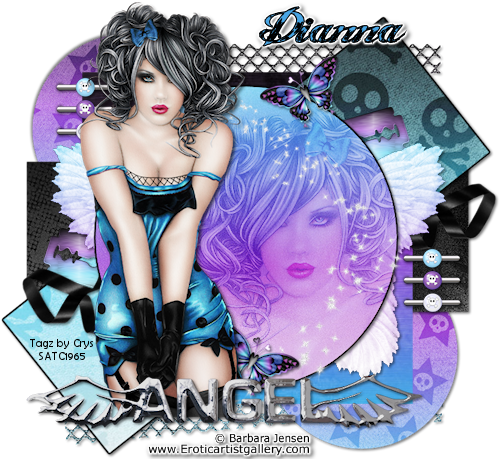
For this tutorial you will need the following:
Scrap kit: PTU kit Emo Angel by Digicats (and dogs) HERE
Tube: tube of choice, I am using the beautiful art work of Barbara Jensen HERE
You must have a license number to use this tube.
Template: Emo Angel by Me HERE
Font Used: Angel Tears
Eye Candy 4000 Gradient Glow (Optional)
♥ Let's Get started! ♥
Open template, canvas size 800x800. Delete word art and copyright info.
For the drop shadow on evertying I am using the following settings:
Verticle: 2, Horizontal: 2, Opacity: 71, Blur: 6, color black. (you use what ever you want)
Remember to save as you go.
(*Resize everything before you start copy and pasting)
Paper 6 (resize 60%)
Paper 7 (resize 90%)
Paper 17 (resize 85%)
Paper 19 (resize 75%)
Paper 20 (resize 75%)
Angel Wings (Do Not resize)
butterfly 1 (resize 35%)
Glitter Trail (do not resize)
Mesh (Do Not Resize)
Razor Blade (resize 60%)
Ribbon 4 (resize 68%)
Staples (resize 54%)
Word art angel (Do Not Resize)
Tube (if using the same tube Do Not Resize)
Close up Tube (if using the same tube Do Not Resize)
You can always refer to the sample for placement of anything!
Copy and paste mesh, drag to bottom layer. Add dropshadow.
Select smaller circle to the bottom. Selections, float, defloat, invert.
Copy and paste paper 6 Hit delete. selctions, select none. Delete grey circle,
Don't forget to add your dropshadow as you go. Duplicate and position above top smaller
circle to the left, delete grey circle.
Select long horizontal rectangle, just above smaller cirlce layers, selections, select all,
float, defloat, invert. copy and paste paper 17. Hit delete, selections, select none, and
delete grey rectangle.
Select dark grey square. Follow the above directions and paste paper 20. Continue with the
above directions. select the diagonal rectangle, again following the directions above and
paste paper 7. continue with the same directions.
Select the larger top circle layer. Once again follow the above directions and paste
paper 19. Hit delete, copy and paste the close up tube, hit delete. Selections, select none
Delete grey circle layer. On the tube, I changed the blend mode to soft light. I added a
gradient glow to the large circle and diagonal rectangle. Follow the next steps if you want
to add the same gradient glow.
Effects, plugins, Eye candy 4000, gradient glow
Glow width 3
Soft corners 25
overall opacity 100
Color white, and slide another tab to the middle.
Copy and paste staples, add dropshadow, adjust to the top left side, duplicate and move to
lower right side, see sample for placement. Copy and paste the angel wings, adjust the wings
so they are centered behind the circle. Copy and paste the razor blade, position behind the
wings. Duplicate and mirror, adjust as in the sample. Copy and paste ribbon 4, using the
pick tool. rotate to the right so the ribbon is more horizontal. position to the left side,
Duplicate and mirror. Copy and paste the glitter trail. Move to the right side above the
large circle.
Copy and paste the tube. Remember to add dropshadow as you go.
Copy and paste the butterfly 1 using the pick tool, rotate to the left slightly, adjust behind
the tube a bit, duplicate and mirror, adjust to the top right of circle.
Copy and paste the word art moving above the tube to the bottom!
Crop and resize to your liking, I resized to 500. Make sure DPI is 72.
Add your name. I added a gradient glow to mine on these settings:
Effects, plugins, Eye candy 4000, gradient glow
Glow width 3
Soft corners 25
overall opacity 100
Color white, and slide another tab to the middle.
Add your dropshadow. Add your copyrights and license for the tube.
Merge visible and save! you're done! Simple and easy.
I would love to see what you made!
Thank you for following my tutorial! If you have any questions please email me at
kissnjoe@yahoo.com!
Friday, September 23, 2011
New PTU Tut Girls Night

For this tutorial you will need the following:
Scrap kit: PTU kit Breakfast at Tiffany's by Sweet Creations Scraps HERE
Tube: tube of choice, I am using the gorgeous art work of PinUpToons HERE
You must have a license number to use his work. (mine was purchased at CILM)
Font Used: 2Peas Wedding Day
Eye Candy 4000 Gradient Glow (Optional)
Mask of choice
♥ Let's Get started! ♥
For the drop shadow on evertying I am using the following settings:
Verticle: 2, Horizontal: 2, Opacity: 71, Blur: 6, color black. (you use what ever you want)
Remember to save as you go.
(*Resize everything before you start copy and pasting)
Paper 5 (resize 73%)
Paper 7 (resize 73%)
Paper 12 (resize 94%)
Chair (resize 42%)
Champagne (resize 50%)
Champagne Glass (resize 40%)
City Scape (Resize 50%)
Film Strip (resize 70%)
Flower 2 (resize 26%)
Flower 6 (resize 26%)
Frame 3 (resize 74%)
Moon (resize 73%)
Paper Butterfly (resize 26%)
Retro Dress 1 (resize 62%)
Ribbon 1 (resize 42%)
Scattered Pettles (resize 48%)
Umbrella (resize 62%)
Tubes (if using the same tube Do not resize)
You can always refer to the sample for placement of anything!
Copy and paste paper 12, Apply your mask.
Copy and paste the frame, copy and paste paper 7, with your magic wand, select frame layerclick inside the frame, selections, invert, back on paper layer, hit delete. Selections,
select none. Add your dropshadow to the frame. Copy and paste the moon, adjust over the moon
on the paper. Copy and paste cityscape. Adjust so the longest building on the right is
almost touching the top inner part of frame. See sample. Remember to add your dropshadow as
you go. Copy and paste the chair, so the back of it is mid way up the frame. Mirror and place
on the left as in sample. Copy and paste the umbrella and place on the left side above the
mask layer. copy and paste the retro dress, using the pick tool, rotate to the right
Above the frame layer, copy and paste the champange glass and champange, using your pick
tool, rotate the bottle to the left some.
Copy and paste the film strip, with the pick tool, rotate to the left, see sample. Adjust to
the bottom of the frame. With the magic wand, click in the film strip, hold the shift key and
click in each of the boxes. Selections, invert, copy and paste paper 5. Hit delete, copy
and paste the tube of choice.and hit delete again on each tube. see sample. On the tube layer,
change the blend mode to luminance legacy. Do this for both tubes.
copy and paste ribbon 1, using the pick tool, rotate to the left so the right side is even with
top film strip frame. copy and paste flower 2, move to top left side of film strip, duplicate
the flower and position to the lower right side of film strip. Copy and paste the flower 6
and move below the film strip to the top left, duplicate and position to the lower right
corner of the film strip. copy and paste paper butterfly, using the pick tool, rotate a bit
to the left, position to the left below the champagne bottle. Duplicate and mirror
position to the right top of film strip. Copy and paste the main tube, mirror. Add your
dropshadow.
Crop and resize to your liking, I resized to 500. Make sure DPI is 72.
I added some word art. You are welcome to use the same wording:
Girls Night. And then I added a gradient glow to it on these settings:
Effects, plugins, Eye candy 4000, gradient glow
Glow width 3
Soft corners 25
overall opacity 100
Color white, and slide another tab to the middle.
Add the dropshadow to it. Now add your name. I used the same gradient glow as above on the
name. Add your dropshadow. Add your copyrights for the tube. On the mask layer, using the pick
tool, drag in the corner to make it just a bit smaller.
Merge visible and save! you're done! Simple and easy.
I would love to see what you made!
Thank you for following my tutorial! If you have any questions please email me at
kissnjoe@yahoo.com!
Here is another version I did using the stunning art work of Keith Garvey!

Wednesday, September 21, 2011
PTU Tut In The Wild
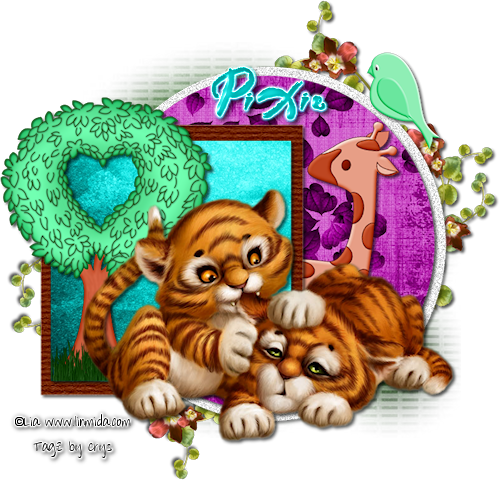
For this tutorial you will need the following:
Scrap kit: PTU kit Woodland Ball by Kissed by Pix HERE
Tube: tube of choice, I am using the gorgeous art work of Lia
Template: Spoiled by Me HERE
Font Used: Rainforest
Eye Candy 4000 Gradient Glow (Optional)
Filters Unlimited (Optional)
Filters Unlimited (Optional)
Mask of choice
♥ Let's Get started! ♥
Open template, canvas size 750x750. Delete word art, copyright and the wavy lines.
For the drop shadow on evertying I am using the following settings:
Verticle: 2, Horizontal: 2, Opacity: 71, Blur: 6, color black. (you use what ever you want)
Remember to save as you go.
(*Resize everything before you start copy and pasting)
Paper 1 (resize 70%)
Paper 5 (resize 70%)
Leaf paper 6 (resize 70%)
Bird 3 (resize 30%)
Giraffe (do not resize)
Grass (do not resize)
Heart Tree (Do Not Resize)
Vine (resize 88%)
Tube (if using the same tube resize 90%)
You can always refer to the sample for placement of anything!
Copy and paste paper 1, Apply your mask.
On large circle change color to white, adjust, add noise, at 74%, uniform and monochrome
checked. Resize circle 90%.
Select smaller circle. Selections, float, defloat, invert. Copy and paste leaf paper
6. Hit delete. selctions, select none. Delete grey circle, Don't forget to add your dropshadow as you go.
On the large square, change color to one from your tube, I used a brown/red color. Now you can
leave it as it is and add dropshadow to it, or you can use the filters unlimited plugin to
give it a wood like effect. If you want same effect, follow the next step:
Effect, plugins, filters unlimited, Paper textures, structure paper one, leave settings and
click apply. Add dropshadow.
select the smaller square, selections, float, defloat, invert. copy and paste paper 5, hit
delete, copy and paste grass and adjust in the smaller square, hit delete to remove excess
grass, Selections, select none, delete small grey square.
Copy and paste heart tree, adjust below the grass, using your eraser, and erase the roots.
copy and paste the giraffe, use your pick tool and slightly rotate to the right. Drag it below
the larger circle layer.
Copy and paste the vine, mirror and flip, adjust to the right top corner, under the large
circle. Duplicate, mirror and flip, move to bottom left corner.
Copy and paste the tube. Don't forget your dropshadow.
Crop and resize to your liking, I resized to 500. Make sure DPI is 72.
Add your name. I added a gradient glow to mine on these settings:
Effects, plugins, Eye candy 4000, gradient glow
Glow width 3
Soft corners 25
overall opacity 100
Color white, and slide another tab to the middle.
Add your dropshadow. Add your copyrights for the tube.
Merge visible and save! you're done! Simple and easy.
I would love to see what you made!
Thank you for following my tutorial! If you have any questions please email me at
kissnjoe@yahoo.com!
On large circle change color to white, adjust, add noise, at 74%, uniform and monochrome
checked. Resize circle 90%.
Select smaller circle. Selections, float, defloat, invert. Copy and paste leaf paper
6. Hit delete. selctions, select none. Delete grey circle, Don't forget to add your dropshadow as you go.
On the large square, change color to one from your tube, I used a brown/red color. Now you can
leave it as it is and add dropshadow to it, or you can use the filters unlimited plugin to
give it a wood like effect. If you want same effect, follow the next step:
Effect, plugins, filters unlimited, Paper textures, structure paper one, leave settings and
click apply. Add dropshadow.
select the smaller square, selections, float, defloat, invert. copy and paste paper 5, hit
delete, copy and paste grass and adjust in the smaller square, hit delete to remove excess
grass, Selections, select none, delete small grey square.
Copy and paste heart tree, adjust below the grass, using your eraser, and erase the roots.
copy and paste the giraffe, use your pick tool and slightly rotate to the right. Drag it below
the larger circle layer.
Copy and paste the vine, mirror and flip, adjust to the right top corner, under the large
circle. Duplicate, mirror and flip, move to bottom left corner.
Copy and paste the tube. Don't forget your dropshadow.
Crop and resize to your liking, I resized to 500. Make sure DPI is 72.
Add your name. I added a gradient glow to mine on these settings:
Effects, plugins, Eye candy 4000, gradient glow
Glow width 3
Soft corners 25
overall opacity 100
Color white, and slide another tab to the middle.
Add your dropshadow. Add your copyrights for the tube.
Merge visible and save! you're done! Simple and easy.
I would love to see what you made!
Thank you for following my tutorial! If you have any questions please email me at
kissnjoe@yahoo.com!
Sunday, September 18, 2011
PTU Tut Love Me
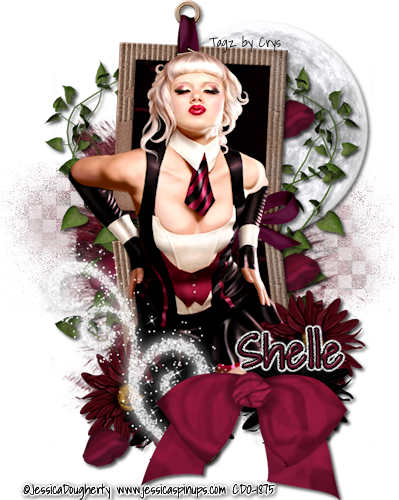
For this tutorial you will need the following:
Scrap kit: PTU kit Love Hurts by Shellez Creations HERE
Tube: tube of choice, I am using the gorgeous art work of Jessica Dougherty HERE
You must have a license to use her work
You must have a license to use her work
Font Used: Shadows into light
Eye Candy 4000 Gradient Glow (Optional)
Mask of choice
♥ Let's Get started! ♥
Open new image, 700x700
For the drop shadow on evertying I am using the following settings:
Verticle: 2, Horizontal: 2, Opacity: 71, Blur: 6, color black. (you use what ever you want)
Remember to save as you go.
(*Resize everything before you start copy and pasting)
Paper 2 (resize 75%)
Paper 6 (resize 65%)
Element 1 (resize 14%) flower petal
Element 3 (resize 46%) bow
Element 24 (resize 75%) sparkles
Element 25 (resize 68%) moon
Element 26 (Do Not Resize) vine
Element 29 (resize 30%) red flower
Element 30 (resize 30%) black flower
Element 34 (resize 50%) Frame
Tube (if using the same tube resize 88%)
Open new image, 700x700
For the drop shadow on evertying I am using the following settings:
Verticle: 2, Horizontal: 2, Opacity: 71, Blur: 6, color black. (you use what ever you want)
Remember to save as you go.
(*Resize everything before you start copy and pasting)
Paper 2 (resize 75%)
Paper 6 (resize 65%)
Element 1 (resize 14%) flower petal
Element 3 (resize 46%) bow
Element 24 (resize 75%) sparkles
Element 25 (resize 68%) moon
Element 26 (Do Not Resize) vine
Element 29 (resize 30%) red flower
Element 30 (resize 30%) black flower
Element 34 (resize 50%) Frame
Tube (if using the same tube resize 88%)
You can always refer to the sample for placement of anything!
Copy and paste paper 2, Apply your mask.
copy and paste element 34, with magic wand, click inside both frame openings, selections, invert
copy and paste paper 6 hit delete. copy and paste element 25, adjust to above the mask
layer and to the upper right corner of the frame.
copy and paste element 26. See sample for placement, duplicate and mirror. Don't forget to
add your dropshadow as you go.
Copy and paste the tube, mirror and drag below the frame. Duplicate and drag above the frame.
Erase part of the legs on top tube layer to make her appear below the frame at the bottom.
Add your dropshadow to the bottom tube layer. copy and paste element 29. Adjust to lower
left corner of the frame. Duplicate and move to the right side. copy and paste element 30.
adjust above red flower on the left. Duplicate and move to the right above the red flower.
Copy and paste element 24. Using the pick tool, rotate some to the right. Copy and paste
element 3. Move to lower right corner of frame above the flowers.
Back on the sparkles layer, erase the bottom part showing under the bow. Duplicate 2 times.
on the bottom layer, add the dropshadow. Copy and paste element 1. Duplicate and arrange,
see sample for placement.
Crop and resize to your liking, I resized to 500. Make sure DPI is 72.
Add your name. I added a gradient glow to mine on these settings:
Effects, plugins, Eye candy 4000, gradient glow
Glow width 3
Soft corners 25
overall opacity 100
Color black, and slide another tab to the middle.
Add your dropshadow. Add your copyrights for the tube.
Merge visible and save! you're done! Simple and easy.
I would love to see what you made!
Thank you for following my tutorial! If you have any questions please email me at
kissnjoe@yahoo.com!
copy and paste element 34, with magic wand, click inside both frame openings, selections, invert
copy and paste paper 6 hit delete. copy and paste element 25, adjust to above the mask
layer and to the upper right corner of the frame.
copy and paste element 26. See sample for placement, duplicate and mirror. Don't forget to
add your dropshadow as you go.
Copy and paste the tube, mirror and drag below the frame. Duplicate and drag above the frame.
Erase part of the legs on top tube layer to make her appear below the frame at the bottom.
Add your dropshadow to the bottom tube layer. copy and paste element 29. Adjust to lower
left corner of the frame. Duplicate and move to the right side. copy and paste element 30.
adjust above red flower on the left. Duplicate and move to the right above the red flower.
Copy and paste element 24. Using the pick tool, rotate some to the right. Copy and paste
element 3. Move to lower right corner of frame above the flowers.
Back on the sparkles layer, erase the bottom part showing under the bow. Duplicate 2 times.
on the bottom layer, add the dropshadow. Copy and paste element 1. Duplicate and arrange,
see sample for placement.
Crop and resize to your liking, I resized to 500. Make sure DPI is 72.
Add your name. I added a gradient glow to mine on these settings:
Effects, plugins, Eye candy 4000, gradient glow
Glow width 3
Soft corners 25
overall opacity 100
Color black, and slide another tab to the middle.
Add your dropshadow. Add your copyrights for the tube.
Merge visible and save! you're done! Simple and easy.
I would love to see what you made!
Thank you for following my tutorial! If you have any questions please email me at
kissnjoe@yahoo.com!
PTU Tut Masquerade
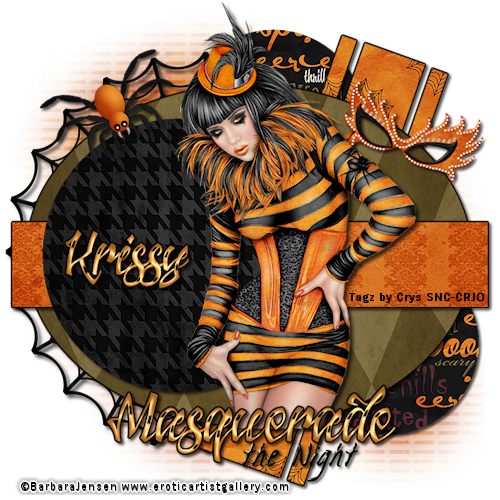
For this tutorial you will need the following:
Scrap kit: PTU kit Halloweeny by Krissy's Scraps HERE
Template: Make a Choice by Me HERE
Tube: tube of choice, I am using the gorgeous art work of Barbara Jensen HERE
You must have a license to use her work this tube was purchased at Scraps N Crap
Font Used: Jacked Eleven Highlight
Eye Candy 4000 Gradient Glow (Optional)
Mask of choice
♥ Let's Get started! ♥
Open template, image, canvas size 750x750
For the drop shadow on evertying I am using the following settings:
Verticle: 2, Horizontal: 2, Opacity: 71, Blur: 6, color black. (you use what ever you want)
Remember to save as you go.
(*Resize everything before you start copy and pasting)
Paper 6 (resize 75%)
Paper 7 (resize 93%)
Paper 8 (resize 89%)
Paper 10 (resize 66%)
Paper 12 (resize 89%)
Cobweb 1 (Do Not resize)
Masquerade mask 2 (Do Not Resize)
Spider 2 (resize 54%)
Tube (if using the same tube Do Not resize)
Open template, image, canvas size 750x750
For the drop shadow on evertying I am using the following settings:
Verticle: 2, Horizontal: 2, Opacity: 71, Blur: 6, color black. (you use what ever you want)
Remember to save as you go.
(*Resize everything before you start copy and pasting)
Paper 6 (resize 75%)
Paper 7 (resize 93%)
Paper 8 (resize 89%)
Paper 10 (resize 66%)
Paper 12 (resize 89%)
Cobweb 1 (Do Not resize)
Masquerade mask 2 (Do Not Resize)
Spider 2 (resize 54%)
Tube (if using the same tube Do Not resize)
You can always refer to the sample for placement of anything!
Delete the copyright and word art
Copy and paste paper 7, duplicate and hide the top paper, drag the other paper to bottom
layer and apply your mask.
Unhide other paper, drag to above long rectangle, selections, float, defloat, invert and select
paper, hit delete. Delete the rectangle template.
On bottom upper small circle, selections, float, defloat, invert and copy and paste paper 10
hit delete. Add dropshadow and duplicate, adjust to bottom right above the other small circle
now delete both grey circles. Dodn't forget to add your dropshadow as you go.
select the diagonal 3 rectangels, selections, float, defloat, invert, copy and paste paper 12
hit delete. I added a gradient glow to them, it is optional and looks fine with out it, but
if you would like to do it to then follow the next steps, if not then skip.
Effects, plugins, Eye candy 4000, gradient glow
Glow width 3
Soft corners 25
overall opacity 100
Color black, and slide another tab to the middle.
Select the oval, selections, float, defloat, invert, copy and paste paper 8, and hit delete.
I also added the same gradient glow to the oval as above.
Select the small circle on top, selections, float defloat, invert, copy and paste paper 6
Now copy and paste the cobweb, drag it to the bottom layer and adjust to the left side, see
sample for placement.
copy and paste the mask, using the pick tool, turn in to the right just a bit. Adjust above
the long rectangle to the top right.
copy and paste the spider and using the pick tool, adjust to the right, and place to the top
left corner. copy and paste the tube and position to the right of the black circle.
Add your dropshadow.
Now I added word art, you are welcome make the same one. I added the inner bevel effect to it
if you would like to do the same, follow the next step.
Effects, 3D Effects, inner bevel on these settings:
Width 1, Smoothness 64, Depth 16, Ambience -27, Shininess 46, Angle 135, Intensity 30
Elevation 88, using white. Then I added the same gradient glow above.
Crop and resize to your liking, I resized to 500. Make sure DPI is 72.
Add your name. I added the same inner bevel and gradient glow to the name as above.
Add your dropshadow. Add your copyrights for the tube.
Merge visible and save! you're done! Simple and easy.
I would love to see what you made!
Thank you for following my tutorial! If you have any questions please email me at
kissnjoe@yahoo.com!
Copy and paste paper 7, duplicate and hide the top paper, drag the other paper to bottom
layer and apply your mask.
Unhide other paper, drag to above long rectangle, selections, float, defloat, invert and select
paper, hit delete. Delete the rectangle template.
On bottom upper small circle, selections, float, defloat, invert and copy and paste paper 10
hit delete. Add dropshadow and duplicate, adjust to bottom right above the other small circle
now delete both grey circles. Dodn't forget to add your dropshadow as you go.
select the diagonal 3 rectangels, selections, float, defloat, invert, copy and paste paper 12
hit delete. I added a gradient glow to them, it is optional and looks fine with out it, but
if you would like to do it to then follow the next steps, if not then skip.
Effects, plugins, Eye candy 4000, gradient glow
Glow width 3
Soft corners 25
overall opacity 100
Color black, and slide another tab to the middle.
Select the oval, selections, float, defloat, invert, copy and paste paper 8, and hit delete.
I also added the same gradient glow to the oval as above.
Select the small circle on top, selections, float defloat, invert, copy and paste paper 6
Now copy and paste the cobweb, drag it to the bottom layer and adjust to the left side, see
sample for placement.
copy and paste the mask, using the pick tool, turn in to the right just a bit. Adjust above
the long rectangle to the top right.
copy and paste the spider and using the pick tool, adjust to the right, and place to the top
left corner. copy and paste the tube and position to the right of the black circle.
Add your dropshadow.
Now I added word art, you are welcome make the same one. I added the inner bevel effect to it
if you would like to do the same, follow the next step.
Effects, 3D Effects, inner bevel on these settings:
Width 1, Smoothness 64, Depth 16, Ambience -27, Shininess 46, Angle 135, Intensity 30
Elevation 88, using white. Then I added the same gradient glow above.
Crop and resize to your liking, I resized to 500. Make sure DPI is 72.
Add your name. I added the same inner bevel and gradient glow to the name as above.
Add your dropshadow. Add your copyrights for the tube.
Merge visible and save! you're done! Simple and easy.
I would love to see what you made!
Thank you for following my tutorial! If you have any questions please email me at
kissnjoe@yahoo.com!
Thursday, August 25, 2011
Time and Space PTU Tutorial
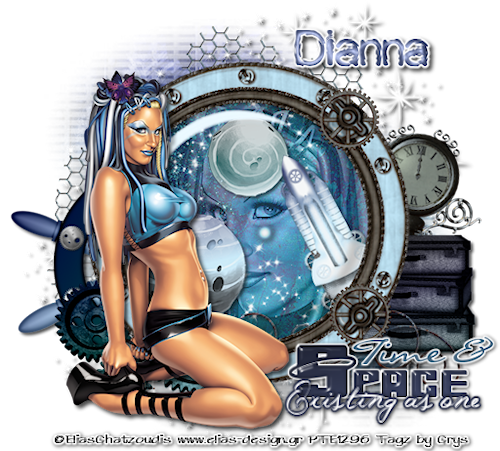
If you want to use the same Word art as I am, please right click and save the word art below...

Scrap kit: PTU kit From the Earth to the Moon by Digicats (and Dogs) HERE
Tube: I am using the awesome art work of Elias Chatzoudis HERE
(Must have a license number to use his art!)
Mask of choice
Font Used: Wasser
♥ Let's Get started! ♥
Open New raster 700x700 at 72 DPI
For the drop shadow on evertying I am using the following settings:
Verticle: 2, Horizontal: 2, Opacity: 70, Blur: 6, color black. (you use what ever you want)
Remember to save as you go.
(*Resize everything before you start copy and pasting)
Paper 13 (resize 72%)
Paper 4 (resize 88%)
Captains Wheel (do Not resize)
Chicken Wire (resize 74% mirror, and flip)
Clock (resize 70%)
Divider (resize 72%)
Gears2 (resize 48%)
Luggage (resize 48%)
Planet 1&2 (resize 36%)
Porthole (resize 78%)
Rocket 1 (resize 36%)
Shooting star (Do Not resize)
Sparkles (do Not resize)
Sparkling stars (reszie 51%)
Tube (if using the same resize 70%)
Tube close up (same as above tube)
You can always refer to the sample for placement of anything!
copy and paste paper 4, add your mask, copy and paste sparkles, copy and paste porthole.
Copy and paste the chicken wire, adjusting to the left top side as in sample.
copy and paste paper 13 drag below the porthole and erase everything on the outside edge.
your paper should only be seen from the center of the Porthole. Copy and paste close up
tube, erasing everything on the outside of the porthole. I chaged the blend mode to
Luminance (Legacy) and dropped opacity to 59. Copy and paste sparkling stars and adjust to
the top of the porthole just above the close up tube layer. Erase anything that hangs out of
the porthole. Duplicate, image, flip, and drag to bottom like in the sample. Copy and paste
the rocket, using your pick tool, rotate to the left, don't forget to add your dropshadow as
you go. copy and paste planet 1 and 2 adjusting inside the porthole. copy and paste shooting
star, erase anything sticking out of the porthole.
Copy and paste the clock, using the pick tool, rotate to the right slightly. Move to the
right side under paper 13 layer. copy and paste the luggage, place above the clock, using
the eraser tool, erase any of the clock that sticks out the bottom of the luggage.
copy and paste the divider moving to the bottom of the luggage layer. Still adding the
dropshadow as you go. Add your tube and add dropshadow. Position to lower left side.
copy and paste the captains wheel, adjusting to the lower left side, under the paper 13
layer. copy and paste the gears 2 above the wheel and adjust to lower bottom left corner.
Crop and resize. I resized mine to 500 pixels. Make sure the DPI
is at 72. If you choose, you can add the word art as seen in the sample, or make your own.
You do not have to add the word art if you do not choose to.
Add your name. I used inner bevel to give the name a cool effect on these settings:
Bevel 2 (semi circle), width 31 smoothness 35, depth 16, ambience -27, shininess 46
Angle 135, intensity 30, elevation 88.light color white.
I added a gradient glow to the name on the following settings:
Basic Tab: Glow width 3, Soft corners 25%, Overall opacity 100%
color Tab: using white, drag a second tab to 1/2 accross so there are 2 black tabs.
Add your copyrights for the tube. Don't forget to add your license number
if using a PTU tube.
Merge visible and save! you're done! Simple and easy.
I would love to see what you made!
Thank you for following my tutorial! If you have any questions please email me at
kissnjoe@yahoo.com!
Monday, August 22, 2011
New PTU tut: Shiver Me Timbers
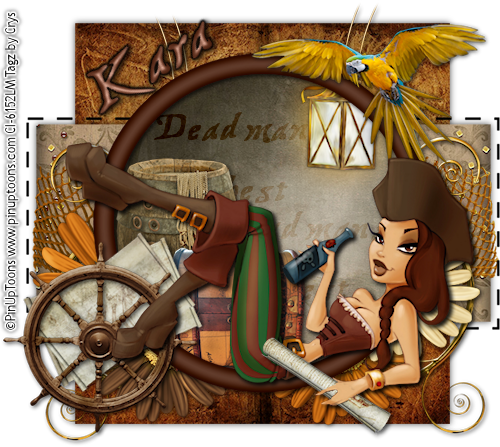
Scrap kit: PTU kit Shiver Me Timbers By Sweet Cravings Scraps HERE
Template: Shiver Me Timbers by Me HERE
Tube: I am using the awesome art work of PinUp Toons HERE
(I bought mine from CILM so I am using that license number)
Font Used: Treasure Map Deadhand
♥ Let's Get started! ♥
Open template, image, resize size 600x600. Image, Canvas size 700x700
For the drop shadow on evertying I am using the following settings:
Verticle: 2, Horizontal: 2, Opacity: 70, Blur: 6, color black. (you use what ever you want)
Remember to save as you go.
(*Resize everything before you start copy and pasting)
Paper 5 (resize 60%)
Paper 6 (resize 90%)
Paper 10 (resize 80%)
Barrel (resize 34%)
Fishing Net 2 (resize 78%)
Flare (Do Not resize)
Flower 7,8,&9 (resize 40%)
Lantern (resize 32%)
Parrot (resize 58% mirror)
Scroll 1 (resize 32%)
Scroll 2 (resize 40%)
Ship Wheel (resize 48%)
Treasure Chest (resize 34%)
Tube (if using the same Do not resize, mirror)
You can always refer to the sample for placement of anything!
Delete the copyright and the word art layer.
Select the the Circle layer, selections, float, defloat, invert.
Copy and paste paper 5, hit delete on the keyboard. Selections, select none.
Delete the circle layer.
Make sure you add your dropshadow to everthing as you go.
Select the rectangle layer, selections, float, defloat, invert, copy and paste paper 6
Hit delete. Selections, select none and delete the grey rectangle layer.
Select the large square, selections, float, defloat, invert copy and paste paper 10
hit delete. Selections, select none and delete the grey square layer.
Copy and paste the flare, see sample for placement, with the eraser tool, erase the tip of
the flare so it barely sticks up over the square. Duplicate mirror.
Copy and paste the fishing net, adjust above the rectangle layer just below the flares.
Copy and paste flower 7,8, and 9. Drag just below the frame and circle layers, see sample
for placement. Duplicate flower 8 and move to oposite side like example.
Remember to add dropshadows as you go.
below the frame layer copy and paste the barrel and treasure chest. position to bottom
left side. copy and paste the lantern, duplicate and change color to a warm yellow/orange
color, adjust, blur, gaussian blur at 20. Copy and paste the parrot and adjust to top right
side of circle frame. copy and paste scroll 2, using the pick tool, rotate the scroll as in
example. Copy and paste the ships wheel. Copy and paste the tube, add dropshadow. Copy and
paste scroll 1 move over the tube hand as the example and lower the opacity of the scroll
until you can see the hand below it, erase only the scroll that is above the hand, so it looks
like the tube is holding the scroll.
Crop and resize. I resized mine to 500 pixels. Make sure the DPI
is at 72. Add your name. I added a gradient glow to the name on the following settings:
Basic Tab: Glow width 3, Soft corners 25%, Overall opacity 100%
color Tab: using black, drag a second tab to 3/4 accross so there are 2 black tabs.
Add your copyrights for the tube. Don't forget to add your license number
if using a PTU tube.
Merge visible and save! you're done! Simple and easy.
I would love to see what you made!
Thank you for following my tutorial! If you have any questions please email me at
kissnjoe@yahoo.com!
PTU Tut Emo Shun
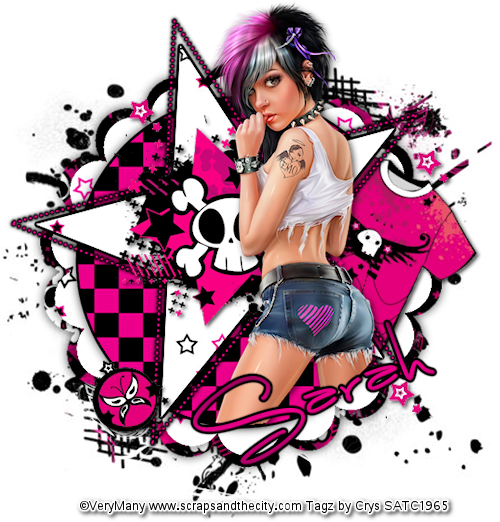
For this tutorial you will need the following:
Scrap kit: PTU kit Emo Shun by Scraps by CWD HERE
Template: Missy template #26 HERE
Tube: I am using the awesome art work of VeryMany HERE
(If you use the same tube from SATC you must have a license number)
Font Used: Luna Bar
Mask of choice
♥ Let's Get started! ♥
Open template, image, canvas size 600x600
For the drop shadow on evertying I am using the following settings:
Verticle: 2, Horizontal: 2, Opacity: 70, Blur: 6, color black. (you use what ever you want)
Remember to save as you go.
(*Resize everything before you start copy and pasting)
Paper 4 (resize 82%)
Paper 7 (resize 75%)
Paper 16 (resize 75%)
Emo Accent2 (Do Not resize)
Emo Accent3 (Do Not Resize)
Scalloped Template2 (resize 86%)
Scalloped Template3 (resize 82%)
Skull Star Grunge Decal (resize 54%)
T-shirt Pink Skull (Do Not Resize - Mirror)
Tube (if using the same resize 54%)
Open template, image, canvas size 600x600
For the drop shadow on evertying I am using the following settings:
Verticle: 2, Horizontal: 2, Opacity: 70, Blur: 6, color black. (you use what ever you want)
Remember to save as you go.
(*Resize everything before you start copy and pasting)
Paper 4 (resize 82%)
Paper 7 (resize 75%)
Paper 16 (resize 75%)
Emo Accent2 (Do Not resize)
Emo Accent3 (Do Not Resize)
Scalloped Template2 (resize 86%)
Scalloped Template3 (resize 82%)
Skull Star Grunge Decal (resize 54%)
T-shirt Pink Skull (Do Not Resize - Mirror)
Tube (if using the same resize 54%)
You can always refer to the sample for placement of anything!
Delete the copyright and the background layer.
Select the the Circle layer, selections, float, defloat, invert.
Copy and paste paper 16, hit delete on the keyboard. Selections, select none.
Delete the circle layer.
Make sure you add your dropshadow to everthing as you go.
Select the star layer, selections, float, defloat, invert, copy and paste paper 7
Hit delete. Selections, select none and delete the star layer.
I added a gradient glow to both the circle and the star on the following settings:
Basic Tab: Glow width 3, Soft corners 25%, Overall opacity 100%
color Tab: using black, drag a second tab to 3/4 accross so there are 2 black tabs.
Copy and paste scalloped template 2. adjust under the circle layer. Copy and paste
scalloped template3 above scalloped temp2 center.
Copy and paste paper 4. Add your mask to it, in the layers palette, right click in mask
Merge group.
Copy and paste the tube, on the circle layer, selections, select all, float, defloat, invert
now select the tube and erase the legs that hang over the circle edge. Add dropshadow to
the tube.
Copy and paste the remaining elements and adjust to your liking, you can follow the sample
for placements.
On the dotted star, I picked a pink from the kit and changed the color to the pink, then added
a gradient glow with the above settings.
Add your dropshadow. Crop and resize. I resized mine to 500 pixels. Make sure the DPI
is at 72. Add your name. I added the same gradient glow to mine.
Add your copyrights for the tube. Don't forget to add your license number
if using a PTU tube.
Merge visible and save! you're done! Simple and easy.
I would love to see what you made!
Thank you for following my tutorial! If you have any questions please email me at
kissnjoe@yahoo.com!
Select the the Circle layer, selections, float, defloat, invert.
Copy and paste paper 16, hit delete on the keyboard. Selections, select none.
Delete the circle layer.
Make sure you add your dropshadow to everthing as you go.
Select the star layer, selections, float, defloat, invert, copy and paste paper 7
Hit delete. Selections, select none and delete the star layer.
I added a gradient glow to both the circle and the star on the following settings:
Basic Tab: Glow width 3, Soft corners 25%, Overall opacity 100%
color Tab: using black, drag a second tab to 3/4 accross so there are 2 black tabs.
Copy and paste scalloped template 2. adjust under the circle layer. Copy and paste
scalloped template3 above scalloped temp2 center.
Copy and paste paper 4. Add your mask to it, in the layers palette, right click in mask
Merge group.
Copy and paste the tube, on the circle layer, selections, select all, float, defloat, invert
now select the tube and erase the legs that hang over the circle edge. Add dropshadow to
the tube.
Copy and paste the remaining elements and adjust to your liking, you can follow the sample
for placements.
On the dotted star, I picked a pink from the kit and changed the color to the pink, then added
a gradient glow with the above settings.
Add your dropshadow. Crop and resize. I resized mine to 500 pixels. Make sure the DPI
is at 72. Add your name. I added the same gradient glow to mine.
Add your copyrights for the tube. Don't forget to add your license number
if using a PTU tube.
Merge visible and save! you're done! Simple and easy.
I would love to see what you made!
Thank you for following my tutorial! If you have any questions please email me at
kissnjoe@yahoo.com!
Friday, August 12, 2011
Kitties in my Garden PTU tut
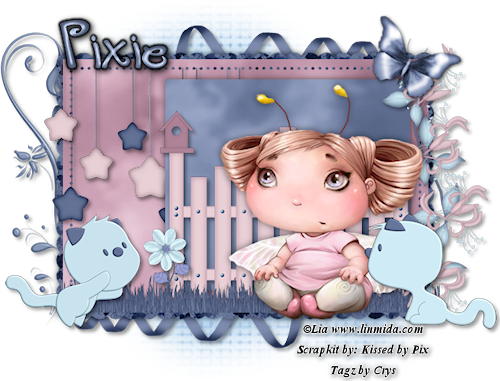
To make this adorable siggy, please follow the directions below!
For this tutorial you will need the following:
Scrap kit: PTU kit Kitties in my Garden by kissed by Pix HERE
Template: Missy template #29 HERE
Tube: tube of choice, I am using the adorable art work of Lia
Font Used: Tingle Institute
Mask of choice
♥ Let's Get started! ♥
Open template, image, canvas size 600x600
For the drop shadow on evertying I am using the following settings:
Verticle: 2, Horizontal: 2, Opacity: 54, Blur: 6, color black. (you use what ever you want)
Remember to save as you go.
(*Resize everything before you start copy and pasting)
Paper 1 (resize 54%)
Sky Paper 1 (resize 66%)
Sky Paper 2 (resize 66%)
Floral Paper 3 (resize 66%)
Blue Grass (resize 68%)
Doodle 2 (resize 67%)
Fence (resize 56%)
Flutter 4 (resize 18%)
Kitty 3 (resize 28%)
Kitty 8 (resize 28%)
Ribbon 6 (resize 68%)
Star Mobile (do not resize)
Summer flower 3 (resize 16%)
Vine (resize 60%)
Tube (if using the same tube resize 68%)
Open template, image, canvas size 600x600
For the drop shadow on evertying I am using the following settings:
Verticle: 2, Horizontal: 2, Opacity: 54, Blur: 6, color black. (you use what ever you want)
Remember to save as you go.
(*Resize everything before you start copy and pasting)
Paper 1 (resize 54%)
Sky Paper 1 (resize 66%)
Sky Paper 2 (resize 66%)
Floral Paper 3 (resize 66%)
Blue Grass (resize 68%)
Doodle 2 (resize 67%)
Fence (resize 56%)
Flutter 4 (resize 18%)
Kitty 3 (resize 28%)
Kitty 8 (resize 28%)
Ribbon 6 (resize 68%)
Star Mobile (do not resize)
Summer flower 3 (resize 16%)
Vine (resize 60%)
Tube (if using the same tube resize 68%)
You can always refer to the sample for placement of anything!
Delete the copyright, brush by Ivy, and the background.
Select the the scalloped edge layer, selections, float, defloat, invert.
Copy and paste floral paper 3, hit delete on the keyboard. Selections, select none.
Delete the black scalloped edge layer.
Make sure you add your dropshadow to everthing as you went.
Select large rectangle layer, selections, float, defloat, invert, copy and paste sky paper 2
Hit delete. Selections, select none and delete the grey rectangle.
Select the smaller rectangle, selections, float, defloat, invert, copy and paste sky paper 1,
hit delete. Selections, select none and delete the smaller grey rectangle.
Copy and paste paper 1, layers, load/save mask, add your mask, right click on the mask layer
and merge group. Now you can resize or move around if needed.
copy and paste ribbon 6 drag to bottom layer just above the mask in the bottom left corner.
Duplicate, mirror and adjust to the top right side. See example.
copy and paste the doodle 2. Mirror and using your pick tool, straiten it out some.
copy and paste the star mobile. using your selection tool set on rectangle, select the top
part of the mobile (Large star) and delete it, leaveing the strings and the stars. See sample
for placement. Remember to add dropshadow as you go. Copy and paste the vine, using the pick
tool straighten it out and move to the right side of the template on top layer.
Copy and paste the fence, adjusting inside the smaller rectangle. Copy and paste flutter 4
using the pick tool again, turn it to the right a bit. Position to top right above the vine.
copy and paste blue grass, aranging on top of the fence to strech the entire length of larger
rectangle. Copy and paste summer flower setting just on top of left fence post.
Copy and paste kitty 8, mirror and place at the bottom left corner. Copy and paste kitty 3,
mirror and move to the bottom right corner.
Copy and paste the tube and drag just below kitty 3 layer. Add your dropshadows.
Crop and resize to your liking, I resized to 500. Make sure DPI is 72.
Add your name. I added an effect to the name. If you want to use the same effect, then follow the
next steps...
Effects, 3D Effects, inner bevel on these settings:
Width 24, Smoothness 40, Depth 16, Ambience -27, Shininess 46, Angle 135, Intensity 30
Elevation 88, using white. Click ok, then I added a gradient glow with the color black.
Add your dropshadow. Add your copyrights for the tube.
Merge visible and save! you're done! Simple and easy.
I would love to see what you made!
Thank you for following my tutorial! If you have any questions please email me at
kissnjoe@yahoo.com!
Select the the scalloped edge layer, selections, float, defloat, invert.
Copy and paste floral paper 3, hit delete on the keyboard. Selections, select none.
Delete the black scalloped edge layer.
Make sure you add your dropshadow to everthing as you went.
Select large rectangle layer, selections, float, defloat, invert, copy and paste sky paper 2
Hit delete. Selections, select none and delete the grey rectangle.
Select the smaller rectangle, selections, float, defloat, invert, copy and paste sky paper 1,
hit delete. Selections, select none and delete the smaller grey rectangle.
Copy and paste paper 1, layers, load/save mask, add your mask, right click on the mask layer
and merge group. Now you can resize or move around if needed.
copy and paste ribbon 6 drag to bottom layer just above the mask in the bottom left corner.
Duplicate, mirror and adjust to the top right side. See example.
copy and paste the doodle 2. Mirror and using your pick tool, straiten it out some.
copy and paste the star mobile. using your selection tool set on rectangle, select the top
part of the mobile (Large star) and delete it, leaveing the strings and the stars. See sample
for placement. Remember to add dropshadow as you go. Copy and paste the vine, using the pick
tool straighten it out and move to the right side of the template on top layer.
Copy and paste the fence, adjusting inside the smaller rectangle. Copy and paste flutter 4
using the pick tool again, turn it to the right a bit. Position to top right above the vine.
copy and paste blue grass, aranging on top of the fence to strech the entire length of larger
rectangle. Copy and paste summer flower setting just on top of left fence post.
Copy and paste kitty 8, mirror and place at the bottom left corner. Copy and paste kitty 3,
mirror and move to the bottom right corner.
Copy and paste the tube and drag just below kitty 3 layer. Add your dropshadows.
Crop and resize to your liking, I resized to 500. Make sure DPI is 72.
Add your name. I added an effect to the name. If you want to use the same effect, then follow the
next steps...
Effects, 3D Effects, inner bevel on these settings:
Width 24, Smoothness 40, Depth 16, Ambience -27, Shininess 46, Angle 135, Intensity 30
Elevation 88, using white. Click ok, then I added a gradient glow with the color black.
Add your dropshadow. Add your copyrights for the tube.
Merge visible and save! you're done! Simple and easy.
I would love to see what you made!
Thank you for following my tutorial! If you have any questions please email me at
kissnjoe@yahoo.com!
Subscribe to:
Posts (Atom)
About Me
- Crys
- I am a SAHM of 2 very active kids and a Wife to a wonderful man. I also take care of my grandma who lives with us...so yep I am a busy girl...lol, I started out as a tagger almost 4 yrs ago and then I started making templates and writing tutorials, one day I decided I wanted to try my hand at making scrap kits...and almost 2 years later, I am still making them. I have met a lot of amazing people along the way that have helped and given me support through-out all of this. Big hugs and thanks! Well that is about it, if you want to know more...just shoot me an email!
My Scrap Blog

Snag My Blinkie
